

To build raised beds, start with a plan that maximizes sun, airflow, and easy access for wheelbarrows. Choose durable framing材 like timber, composite, or concrete blocks, and assemble square corners with level checks for stability. Line edges with a barrier, then install a simple irrigation system. Fill with a layered soil mix—about 1 part compost, 2 parts topsoil, 1 part organic matter—and label layers for consistency. Modular designs adapt to space and crops, and you’ll learn more as you proceed.
Key Takeaways
- Plan beds with sun exposure, paths, and wheelbarrow routes to optimize accessibility and workflow.
- Choose durable edging (timber, stone, or composite) and frame beds square, level, and secure.
- Build layered soil: top-dressing, drainage layer, and stable base; mix 1:2:1 compost/topsoil/organic matter.
- Install irrigation (drip lines/soaker hoses) and barrier fabrics to control moisture and prevent intrusion.
- Prepare for maintenance with labeling, crop rotation, mulch, and regular monitoring for pests and health.
Why Raised Beds Improve Drainage and Yields
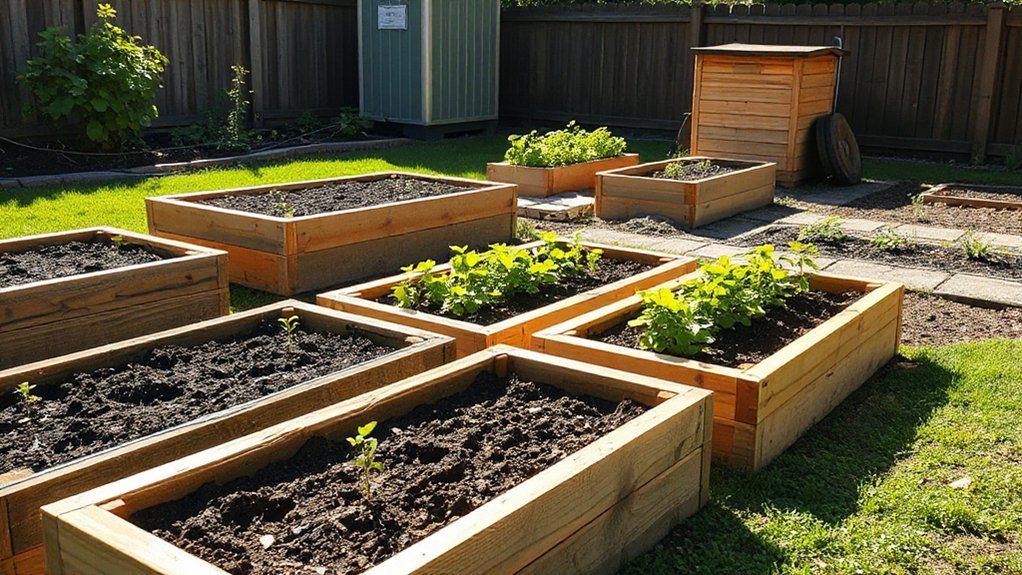
Raised beds improve drainage and yields by elevating soil above the compacted ground, so excess water drains away quickly while roots access air-filled gaps. You control soil structure by choosing appropriate components and applying targeted soil amendments. In raised beds, improved drainage reduces root rot risk and encourages deeper rooting, which boosts nutrient uptake and fruiting. You’ll monitor moisture and avoid waterlogging, using timely irrigation and fabric mulch where appropriate. Use soil amendments to tailor texture, pH, and nutrient availability, ensuring a stable growing environment. For pest control, keep beds clean, rotate crops, and install barriers when needed to minimize infestations without harsh chemicals. This approach creates predictable, consistent yields by maintaining aeration, consistent moisture, and a balanced nutrient profile throughout the season.
Quick-Start: What You’ll Need to Begin
Ready to get started, you’ll need a clear plan and the right gear to set up your raised beds efficiently. First, decide bed dimensions, materials, and a simple layout that fits your space. Gather sturdy lumber or segments, a drill, screws, a level, and a measuring tape. Protective gloves, a soil thermometer, and basic hand tools help you work faster. For soil, choose a high-quality mix and consider composting techniques to enrich organic matter. Stockpile a wheelbarrow and a watering can or hose with a nozzle for even irrigation. Include a pest-control plan; basic garden pest control measures minimize damage early. Finally, keep seed catalogs or starter plants handy, plus a notebook to track amendments and results. Ready to proceed, you’ll be prepared for efficient setup and rapid progress.
Plan Your Raised-Bed Layout: Space, Access, and Sun
Consider how much space your beds need, and mark clear paths for tidy, accessible work zones. Plan an easy-access layout so you can reach every bed from both sides without stepping on soil. Check your site for ideal sun exposure and arrange beds to maximize light while keeping rotation and maintenance practical.
Space Planning Tips
Careful space planning makes your raised-bed layout efficient and easy to manage: you’ll want clear access paths, ideal sun exposure, and logical bed spacing that matches how you’ll plant, weed, and harvest.
1) Map beds to sun and shade: place taller crops on the north side to prevent shading shorter friends, and cluster companion planting pairs to maximize pest control.
2) Design practical access: keep 2–3 ft paths for comfortable weeding and harvesting, and align wheelbarrow routes with disposal zones to avoid crossing beds.
3) Schedule rotations and spacing: stagger crops by season, respect mature width, and leave room for mulch, irrigation, and future expansion without crowding.
This approach enhances Companion planting, Pest control, and overall yield.
Easy Access Layout
A well-planned raised-bed layout starts with clear, easy access from every angle. You should position beds to allow 2–3 feet of working space on all sides, preventing stepping on soil and reducing compaction. Prioritize contiguous paths that minimize trampling while keeping paths wide enough for wheelbarrows or carts. Consider access from multiple doors or sightlines to reduce unnecessary travel. For compost strategies, place a nearby, clearly labeled compost area to simplify weekly additions and turnover without crossing beds. Implement pest management zones: buffer edges with mulch and plant companions that deter pests, while leaving room for quick inspections. Use a modular design that can adapt to sun patterns and shifts in crop rotation, maintaining stable workflow and ease of maintenance.
Optimal Sun Position
Ideal sun position directly shapes your raised-bed layout. You’ll optimize growth by mapping sun hours across seasons and aligning beds accordingly. Consider how light shifts; slight rotation preserves production without crowding. Use these steps:
- Assess patterns: track morning versus afternoon sun to determine front and back bed faces.
- Plan paths and access: place long sides where you won’t shade adjacent rows, preserving airflow.
- Integrate planting strategies: pair sun-loving crops with partial shade indicators, and use companion planting to enhance pest control.
Choose Raised-Bed Styles and Dimensions

When choosing raised-bed styles and dimensions, start by considering your space, climate, and the crops you plan to grow, then select a design that maximizes accessibility and soil performance. You’ll balance overall footprint with bed width, length, and interior height to suit reaching comfort and air flow. Favor modular or tiered layouts for scalability, but avoid excessive complexity that hinders maintenance. Materials selection should prioritize durability, rot resistance, and cost, such as rot‑proof timber, composite, or concrete blocks, ensuring corners stay square. Aim for at least 18–24 inches of soil depth for most vegetables; deeper beds support-root crops. Consider aesthetic design to align with site appearance while preserving sun exposure and drainage. Prioritize stability, ease of irrigation, and weed suppression as you finalize styles and dimensions.
Frame Your Beds: Tools, Assembly, and Pitfalls
To frame your beds effectively, assemble a sturdy framework first, then verify square corners and level footing before adding soil. You’ll avoid wobble by choosing quality hardware and clean joints, which boosts both garden aesthetics and material durability.
- Gather tools: saw, drill, level, screws, brackets.
- Assemble components squarely, then fasten firmly and check again for level.
- Inspect for gaps and gaps again—seal with weatherproof paint or sealant if needed.
Pitfalls to sidestep: mismatched boards, improper fasteners, and over-tightening that splits edges. Maintain uniform mounting, keep corners true, and periodically re-torque fasteners after weather cycles. A precise frame supports stable soil, reduces warping, and elevates overall bed performance.
Fill Your Beds: Soil Mixes and Ratios Explained
You’ll start with layered soil formulas that balance nutrients, drainage, and structure. Use clear ratios for compost, topsoil, and amendments to create a fertile, well-draining bed. We’ll discuss how these layers interact to produce consistently rich beds.
Layered Soil Formulas
Layered soil formulas let you tailor drainage, fertility, and aeration for raised beds. You’ll mix layers to support root growth, moisture retention, and easy cultivation. Use deliberate sequences so each layer serves a purpose and stays distinct.
1) Top-dressing for growth: a light, nutrient-rich mix that feeds plants without compacting the surface.
2) Drainage layer: coarse material to prevent waterlogging while keeping roots oxygenated.
3) Functional base: a stable, inert core that anchors the bed and moderates temperature swings.
Keep it practical: label each layer, adjust ratios by crop needs, and monitor moisture daily. Companion planting supports pest control, reducing sprays. Maintain consistency, avoid bland substitutions, and document outcomes to refine future beds. You’ll gain reliable yields by following measured, repeatable layered formulas.
Ratios For Rich Beds
Mixing the right ratios is essential for rich, productive beds. You aim for a well-balanced base that supports roots, moisture, and drainage. Start with a sturdy foundation of topsoil, add compost for microbial activity, and reserve a portion for organic amendments. A practical ratio is about 1 part compost, 2 parts topsoil, and 1 part rich organic matter or leaf mold, adjusted for your climate and drainage. Incorporate compost ratios gradually, testing texture and scent as you go. If you notice compaction, loosen with coarse sand or perlite, then re-measure. Avoid over-watering, which can wash nutrients away. Keep the bed fertile by reapplying compost every season and rotating crops. Track results to refine future mixes and maintain soil life.
Edges, Barriers, and Irrigation for Raised Beds
Edges, barriers, and irrigation are the essentials that keep raised beds neat, stable, and productive. You’ll choose durable edge finishing that resists rot and blends with your landscape. Plan barrier materials to prevent soil intrusion and root spread beyond the bed. Then organize irrigation to deliver consistent moisture with minimal waste.
- Edge finishing: select treated wood, stone, or composite that lasts and looks intentional.
- Barrier materials: use landscape fabric underlay or physical barriers to stop grass and roots from encroaching.
- Irrigation: install drip lines or soaker hoses with a simple controller for even saturation and reduced evaporation.
Apply these elements with precision: measure, level, and secure every component to maintain long-term bed integrity.
Planting, Maintenance, and Troubleshooting Your Beds

Planting, maintenance, and troubleshooting your beds start with a clear plan: choose crops suited to your climate and season, prepare soil with compost or well-rotted manure, and space plants to guarantee airflow and access. You’ll monitor growth, water consistently, and mulch to conserve moisture and suppress weeds. Companion planting boosts resilience by pairing compatible species to deter pests and improve yields. Rotate crops annually to reduce disease pressure and nutrient depletion. For pest control, inspect leaves weekly, remove damaged foliage, and employ targeted interventions like barriers or organic sprays when needed. Maintain tidy beds, prune overcrowded areas, and label varieties for ongoing care. Record successes and problems to refine your plan next season, ensuring steady production, minimal inputs, and a durable, productive system.
Frequently Asked Questions
How Deep Should Roots Typically Reach in Raised Beds?
Root depth in raised beds typically reaches 12 to 18 inches, though larger plants may push deeper. Guarantee rich soil nutrition and moist, well-drained conditions to support steady growth and robust root exploration throughout the bed.
Can I Harvest Produce While the Bed Is Still in Use?
You can harvest while the bed is in use, but stagger picks to avoid over-stressing roots. Start with a 30% compost enrichment boost, then do soil testing to guide timing and volumes for continuous production.
Are There Climate Considerations for Winterizing Raised Beds?
Yes—climate adaptation matters; you should winterize raised beds with proper winter protection. You’ll mulch deeply, insulate with row covers or cardboard, and consider geothermal or heavy-duty fabric to guard soil life and prevent freezing damage.
What Pests Are Most Common in Raised Beds Indoors or Outdoors?
Pests you’ll encounter include aphids, gnats, slugs, and mites outdoors, plus fungus gnats and mites indoors. Use Pest prevention and Pest identification strategies, monitor regularly, and act quickly with traps, barriers, beneficials, and careful sanitation. Time is now.
How Do I Recycle Old Materials Into Beds Safely?
Yes—you can recycle old materials into beds safely by selecting non-toxic options, avoiding treated wood, painting low-VOC if needed, and lining with ground fabric. Prioritize safety concerns, inspect for rot, screws, and sharp edges before assembly.
Conclusion
You’ll wrap this project up with trusted practicality, keeping expectations modest and attainable. Raised beds don’t solve every garden whim, but they gently steer drainage, soil depth, and accessibility toward steady progress. If harvests lag, tweak water and compost in quiet increments. Resist grand promises; celebrate small wins: healthier roots, neater edges, fewer weeds. In time, your beds mature into dependable workhorses, quietly expanding your garden’s potential without shouting for attention.
About the Author


