The hidden power of the oscillating multi-tool lies in its variable speed, blade versatility, and precise control. You’ll switch from delicate trimming to aggressive demolition with clean, repeatable results, using the right blade for each material. Set up for minimal vibration, secure the workpiece, and choose a stable stance to reduce fatigue. Maintain blades, verify torque, and calibrate speed for each task. If you keep exploring, you’ll uncover even more practical edge-to-edge performance.
Key Takeaways
- The oscillating tool’s hidden power lies in rapid, precise micro-movements that minimize damage to surrounding materials.
- Quick-change blades unlock versatility for cutting, sanding, grinding, and scraping across materials.
- Variable speed control enables delicate edges and rapid material removal with consistent results.
- Proper setup—blade alignment, secure workpiece, and ergonomic stance—reduces vibration and improves accuracy.
- Regular maintenance and calibration prevent power loss, chatter, and tool wear for long-lasting performance.
How to Use an Oscillating Multi-Tool for Real Tasks

An oscillating multi-tool shines when you match the blade to the task and ride the cut with steady, controlled motions. To start, choose a blade suited to the material and cut direction, then steady your hand and let the tool do the work. Maintain consistent contact without forcing the blade, and let the blade’s oscillation do the heavy lifting. For wood, use a fine-tooth blade for clean edges; for metal or drywall, switch to a carbide or reinforced blade to reduce wear. Monitor blade durability by inspecting teeth after rough cuts and replacing worn blades promptly. Cordless convenience matters: guarantee a charged battery, keep the tool balanced, and work from a stable position. This approach minimizes heat, preserves blade durability, and delivers precise results.
Why Variable Speed Matters for Precision and Control
Variable speed changes everything when you’re aiming for clean, accurate cuts. You’ll feel the control sharpen as you tailor the tool’s cadence to the material and task. Speed modulation matters because it balances aggressiveness with finesse, reducing chatter and improving edge quality. Use it to punch through tough spots, then ease off for finishing passes.
- Fine-tune kickback resistance by lowering speed on delicate edges.
- Increase speed for rapid material removal without overheating the blade.
- Switch speeds during a single cut to maintain consistency and minimize vibration.
Vibration control comes from maintaining steady technique and appropriate speed settings. Mastery equals fewer passes, cleaner lines, and predictable results, making precision work practical and repeatable.
The Most Common Blades and Their Tasks
Choosing the right blade is half the battle when you’re using an oscillating multi-tool, because each task benefits from a specific edge geometry and tooth count. The most common blades cover wood, metal, drywall, and plastic, each tailored to cut cleanly without chatter. For wood, straight and arched blades excel in plunge cuts and curves; for metal, bi-metal and carbide blades resist wear while maintaining bite. Drywall blades rapidly skim through gypsum with minimal dust, while plastic blades minimize surface gouges. You’ll notice blade durability matters when you push through nail hits or dense fibers, and you’ll manage finish quality by matching bite to material density. Oscillation frequency influences cut aggressiveness; higher frequencies demand steadier control for precise results.
Pick the Right Blade for Each Material
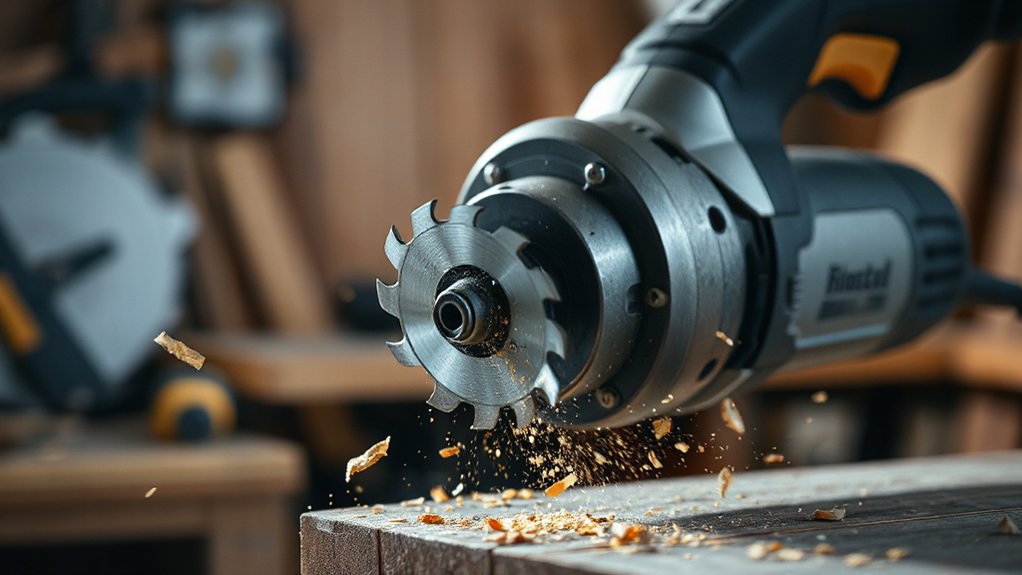
Choosing the right blade starts with matching blade material to the workpiece for clean cuts and long life. Consider material-specific blade types, like carbide for metal or steel for wood, and use quick-change tips to switch without hassle. Keep blade compatibility in mind and follow practical, precise steps to maximize performance.
Blade Material Compatibility
Blade material compatibility is essential for clean cuts and tool longevity: using the wrong blade for a given material leads to dulling, scorching, or dangerous kickback. You choose blades by material hardness, edge geometry, and backing substrate to minimize heat and wear. Pay attention to these points:
1) Blade durability hinges on matched material and coating to resist corrosion, friction, and heat buildup.
2) Material compatibility directly affects motor temperature, so use the right blade to keep temps within safe ranges.
3) Consistent performance comes from selecting blades designed for your material, work rate, and debris load.
This precision approach protects your tool and your work, delivering reliable cuts and longer blade life.
Material-Specific Blade Types
Picking the right blade type for each material starts with recognizing how hardness, toughness, and heat interact with blade geometry and backing. You’ll select blades by material, tooth count, and backing to maximize performance and minimize wear. For wood, use blades with aggressive teeth and flexible backing to reduce chatter; you’ll cut cleanly without bogging down. For metal, choose rigid blades with small, sturdy teeth and reinforced backing to resist heat buildup and maintain edge integrity; expect longer blade life with proper feed pressure. For plastics, opt for finer-tooth blades and a low-friction backing to prevent melting. In all cases, prioritize blade durability and material compatibility to sustain efficiency, reduce downtime, and preserve tool balance. Avoid forcing cuts; match blade to workpiece and let the tool do the work.
Quick-Change Blade Tips
When you’re swapping blades, pick the right one for the job, and do it quickly and correctly. Quick-change tips keep you efficient and safe, maximizing both blade durability and motor efficiency. Choose blades by material, then confirm compatibility with your tool’s arbor and speed setting. Use these practices to optimize performance:
- Align properly: insert fully, lock securely, and verify seating before use.
- Inspect blades: look for cracks, dull edges, or warping; replace immediately.
- Maintain speed: use the lowest effective setting to extend blade life and reduce stress on the motor.
Memory note: clean blades after use to prevent debris buildup, and store them in a dry, organized case for longevity.
Set Up for Clean Cuts and Minimal Vibration
Align for clean precision by tightening your setup and guiding the blade with steady control. Reduce vibration by using the tool’s gear features correctly and ensuring the housing and vibration dampeners are properly engaged. Secure the tool for cuts, confirming a stable stance and a firm grip so your edge stays true and you avoid wandering.
Align For Clean Precision
Set up the tool precisely to curb drift and vibration from the get-go: secure the workpiece square, align the base plate and blade with deliberate, deliberate measurements, and verify that the shoe sits flat against the work surface. You’ll maximize control by pairing the tool’s ergonomic design with deliberate contact points and a stable stance. Focused alignment minimizes deflection and yields cleaner edges, while aesthetic enhancements boost visual confidence in your setup.
- Verify squareness to the line or edge.
- Align the base plate parallel to the cut path.
- Check shoe contact and balance before startup.
This approach delivers consistent performance, reduced corrective passes, and a crisp finish you can trust, with practical, authoritative guidance that respects precision above all.
Reduce Vibration With Gear
To reduce vibration, optimize the gear assembly for smooth transfer of energy and consistent blade motion. You’ll focus on alignment, minimizing play, and selecting matched gear ratios that favor steady torque delivery. Check that gear teeth engage cleanly, with uniform backlash, to prevent binding or chatter at startup. Use high-quality bearing surfaces and proper lubrication to sustain quiet, responsive operation through the cut. Guarantee gear mechanisms transfer motion without sudden accelerations, preserving a predictable blade arc and reducing kick. Reassemble with torque control that avoids over-tightening, which can introduce binding. Test with light loads, then progressively increase force while listening for irregularities. Fine-tune by confirming minimal vibration at mid-stroke, achieving smooth performance, clean cuts, and enhanced tool control.
Secure Tool For Cuts
Secure the tool before you start any cut. You set up for clean cuts by prioritizing grip, balance, and control, which minimizes vibration and preserves precision. A sturdy tool improves blade performance, reduces walk, and protects your workpiece.
- Confirm the clamp and accessory fit, then test fit without load to ensure smooth operation.
- Adjust the shoe for a flat, stable stance, aligning your body with the cut line.
- Check the blade for proper seating and unobstructed movement, replacing worn blades to sustain blade durability.
Key considerations: Tool ergonomics keep your wrist neutral and your posture steady, while blade durability ensures consistent penetration and reduced deflection. Maintain tension on the grip, cut with deliberate speed, and rely on secure setup to deliver reliable, accurate results.
Practical Tricks: Sanding, Scraping, and Grout Removal
Sanding, scraping, and grout removal are where the oscillating multi-tool proves its value: move steadily, choose the right attachment, and let the tool do the work. You’ll maximize surface prep by selecting precision grits and rigid blades for tight spots, then progress through clean passes rather than heavy bursts. With sanding, keep the pad flat to avoid gouges and swap to finer grits as you approach a smooth finish. For scraping, use a sharp, stiff blade and apply steady pressure near the edges where debris hides. Grout removal benefits from carbide blades and a shallow angle to prevent tile damage. Tool customization and accessory compatibility let you tailor kits to tasks, ensuring efficient material removal. Keep blades aligned, secure, and maintained for reliable performance.
Power, Speed, and Ergonomics for Long-Term Performance

Power delivery shapes both speed and control, so you’ll want a tool that maintains stable torque across tasks. Set the right speed for each material and task, and pair that with a comfortable grip to reduce fatigue over long sessions. Focus on ergonomic efficiency by aligning posture, minimizing wrist strain, and using brief, deliberate motions to sustain performance.
Power Delivery Dynamics
The oscillating multi-tool delivers power, speed, and ergonomics that matter for long-term performance, and understanding their interplay helps you choose settings and techniques that last. You optimize delivery by matching load to voltage stability, avoiding sharp spikes or drops that cause heat buildup and wear. Power fluctuations can shorten accessory life, so monitor amp draw and keep feeds steady. Maintain solid connections and use the correct accessory for the material to stabilize performance.
1) Choose a tool with a proven regulator to maintain steady speed under load
2) Use the right accessory and mounting to reduce chatter and supply ripple
3) Inspect plugs, cords, and batteries regularly to prevent intermittent power loss
Ergonomic Efficiency Tips
Efficient use hinges on aligning your stance, grip, and motion with the tool’s oscillation to minimize fatigue and maximize control. You’ll optimize power without sacrificing precision by adopting a neutral spine, relaxed shoulders, and a forearm-supported stance. Choose a comfortable handle grip and maintain a steady, low-effort wrist. Prioritize an ergonomic grip that keeps your hand out of extension and reduces grip fatigue during extended sessions. Adjust speed to match material resistance; slower speeds favor control, faster speeds boost material removal but demand steadier hands. Focus on balance optimization: distribute weight evenly, keep the tool close to the body, and avoid overreaching. Maintain brief, planned pauses to prevent strain and preserve consistent performance over time.
Safety and Maintenance to Extend Tool Life
Safety and maintenance go hand in hand: regular checks and proper care guarantee your oscillating multi-tool stays reliable and performs at peak efficiency. You protect tool longevity by instituting disciplined routines and following safety protocols that minimize wear and risk. Establish clear, repeatable practices rather than improvised fixes.
- Inspect blades and accessories before each use; replace damaged parts immediately.
- Clean vents and housing after work; remove dust to prevent overheating.
- Lubricate moving joints as recommended by the manufacturer and store in a dry, protected area.
Consistency matters: schedule quarterly checks, document findings, and address issues without delay. Adhering to these steps preserves performance, reduces downtime, and extends service life while keeping you safer on the job.
Real-World Demos: From Delicate Trim to Demolition
From delicate trim to demolition, real-world demos prove the oscillating multi-tool handles a wide range of tasks with precision and control. You’ll see clean progressions when trimming niche moldings, and you’ll notice minimal tear-out thanks to a narrow blade and controlled oscillation. When cutting through metal or nails, you maintain steady speed and use correct blade profiles to maximize efficiency. In plunge-and-trace tasks, the tool’s compact head lets you follow tight lines without chatter. Demolition scenarios benefit from rapid material removal with appropriate blades, while dust collection helps keep work sites safer and clearer. For Tool maintenance, inspect blades for wear and torque settings regularly. Battery compatibility matters; match cells to your tool’s platform for consistent power delivery and reliability.
Troubleshooting the Top Three Oscillation Problems
When your oscillating tool stumbles, start by recognizing the top three problems: insufficient blade contact, irregular oscillation speed, and excessive vibration. You fix these with targeted checks and calibrated adjustments.
- Inspect blade contact and hardware torque; reseat blades and secure mounting with correct fasteners.
- Test speed consistency; use tool calibration to set a stable cadence and confirm on/off cycling is smooth.
- Reduce vibration by verifying correct accessory compatibility, balancing components, and using dampening accessories as intended.
In practice, adopt precise maintenance routines and verify compatibility before work. Keep blades, wands, and adapters matched to the tool’s model. Regular calibration ensures predictable performance, while correct accessories prevent power loss and chatter.
Quick-Start Checklist to Unlock the Tool’s Hidden Power
To activate the tool’s hidden power, start with a brisk, purpose-driven checklist that covers setup, compatibility, and calibration. Begin with mounting the correct blade and ensuring the guard is secure, then verify tool is powered off before connecting a compatible battery. Check battery compatibility first: confirm voltage, amp-hour rating, and manufacturer compatibility notes to avoid performance dropoffs or premature wear. Next, confirm accessory fit; blades should seat fully and lock with a positive click. Calibrate by testing on scrap material: observe smooth oscillation, minimal vibration, and clean edge transfer. If performance lags, reassess blade sharpening and recheck fastener torque. Maintain consistency by logging tool and accessory serials, date, and results. This disciplined approach reveals the tool’s hidden power with repeatable, predictable outcomes. Blade sharpening, Battery compatibility.
Frequently Asked Questions
Can Oscillating Tools Cut Metal Safely Without Overheating?
You can cut metal safely with an oscillating tool, but monitor heat and follow overheating prevention steps. Use proper metal-cutting blades, slow steady strokes, and allow breaks; avoid binding, and choose correct RPM settings for safer metal cutting.
What Accessories Reduce Vibration the Most Effectively?
Start with vibration-damping accessories, because they reduce fatigue fastest. You’ll want ergonomic grips and vibration damping tech on the tool itself; these cut transmission. You feel steadier, control improves, and long sessions stay comfortable—no-tool-jitter, period.
How Does Blade Pitch Affect Cut Quality?
Blade angle affects cut quality by aligning the blade with the material’s grain and load, directly influencing cutting precision, cleaner edges, and reduced deflection; set a moderate pitch and test, adjusting for material density and blade geometry.
Are There Built-In Memory Settings for Common Tasks?
Yes, it has memory presets for common tasks, letting you save preferred speeds and settings. You’re in control, easily recalling task customization with a quick switch, keeping precision steady and workflow smooth when switching between cuts and materials.
Can You Use Standard Blades for Nonstandard Materials?
Yes, you can, but use blade compatibility guidance. For nonstandard materials, choose material specific blades; standard blades may underperform or fail. Always verify manufacturer recommendations and use proper mounting, speed settings, and cut techniques for safe results.
Conclusion
You’ve got the know-how to wield an oscillating multi-tool with confidence: choose the right blade, set the speed, and steady your hands for clean, precise cuts. When you fine-tune vibration and fit, the tool behaves like an extension of your will. Do the prep, follow the safety steps, and you’ll cut waste to a minimum and finish fast. It’s a simple truth—practice makes sharp, not luck. Once you lock in control, you’ll ride the wave.
About the Author