

Begin by identifying your Victorian villa’s core style and era, then confirm foundations and main load paths to guarantee stability. Detect and address moisture early with baseline humidity, barriers, and targeted inspections. Prioritize repairs for safety and longevity—sealing exterior gaps, updating wiring, and reinforcing framing as needed. Plan modern living without sacrificing character, while preserving decorative details and authentic finishes. Navigate permits confidently, budget rigorously, and schedule the restoration in phases. If you keep going, you’ll uncover practical steps to apply this approach.
Key Takeaways
- Assess the Victorian villa’s style, era, and original features to guide authentic restoration decisions.
- Inspect foundations, load paths, and moisture indicators to ensure structural stability before cosmetic work.
- Track humidity and moisture sources; implement barriers, ventilation improvements, and dehumidification as needed.
- Prioritize safety-first repairs (structural, electrical, fire-safety) and address drainage to protect the foundation.
- Preserve and reproduce decorative details with period-appropriate, reversible finishes and documentation.
Identify the Victorian Villa’s Core Style and Era

To identify the Victorian villa’s core style and era, start by cataloging its defining architectural features and the period they most closely align with. You’ll assess massing, ornament, window patterns, roofline, and detailing for consistent stylistic cues. Compare parlor plans, entry vestibules, and columnwork against recognized categories— Gothic Revival, Italianate, Queen Anne, or Second Empire—then map features to their typical construction dates and regional adaptations. You’ll use historical context to frame why a given house reflects a particular sensibility: asymmetry, decorative brackets, or turret accents signal late‑nineteenth‑century experimentation. Document provenance, builder notes, and alteration history to refine attribution. This disciplined approach delivers a precise core style identification, enabling authentic restoration decisions aligned with Victorian architecture principles and historical context.
Confirm Foundations and Main Load Paths
You’ll verify the foundations for stability with precise measurements and visible cues, confirming every substrate and edge detail before proceeding. Trace the main load paths from bearing walls to footings, ensuring continuous, unobstructed routes and documenting any deviations. This initial check establishes a reliable baseline for subsequent reinforcement or restoration work.
Foundations Checkpoints
Foundations are the backbone of a Victorian villa, and you should verify both the foundations themselves and the main load paths they support before any further work. You systematically record existing conditions, identify material types, and note pest or moisture indicators that could compromise stability. Confirm continuous bearing through footings, walls, and radially loaded elements, and map critical transfer points to the superstructure. Assess crack patterns, settlement history, and signs of movement, distinguishing reversible minor shifts from structural concerns. Document load path redundancy and any alterations that affect distribution, ensuring loads align with original designers’ intent. Landscaping considerations and interior design trends influence site drainage and foundation exposure, so plan drainage, grading, and garden interfaces without compromising structural integrity. Maintain precise notes for future inspections and align with conservation guidelines.
Load Path Confirmation
Load path confirmation requires a precise tracing of how loads travel from the roof and upper elevations down through walls, beams, and foundations. You map each element’s role, verifying continuous transfer to the foundation with no abrupt changes in direction or magnitude. Begin at the roof ridge, consider snow and wind effects, then follow joists, rafters, and ceiling loads into bearing walls. Assess lintels, openings, and beam splices for uninterrupted load paths, noting any alterations from Victorian architecture that could shift distribution. Validate connections at floor and wall plates, verifying anchorages, bolt schedules, and timber joints. Document potential voids, rot, or insect damage that compromise load distribution. End with a clear diagram set and calculation summary to ensure stable, code-compliant performance under anticipated service conditions.
Detect and Address Moisture Early
You should establish baseline humidity and monitor it regularly to catch early moisture signals. Track humidity levels across living spaces and damp-prone zones, noting any unexpected spikes that hint at hidden leaks or condensation. When readings rise, implement prompt mitigation steps—seal leaks, improve ventilation, and dry affected areas before mold can establish itself.
Early Moisture Detection
Early moisture detection hinges on proactive, systematic checks that catch issues before they compromise structure or finishes. You establish a routine of visual inspections for staining, efflorescence, and peeling paints, focusing on joints, corners, and historically vulnerable framing. Detail-oriented surveys pair with simple, verified methods: moisture barriers are installed behind masonry where feasible, protecting wood and plaster from capillary rise and condensation. You verify seal integrity around penetrations, windows, and doorframes, noting any breach that could channel dampness inward. Humidity sensors are positioned in key zones to flag rising readings, especially near kitchens, bathrooms, and laundry alcoves. Document all observations, map any recurring hotspots, and schedule follow-ups to confirm the effectiveness of interventions without delaying essential restoration work. Maintain records for future maintenance cycles and a drier, longer-lasting villa.
Tracking Humidity Levels
Tracking humidity levels starts with a clear plan to monitor and respond to changes before they trigger damage. You establish fixed reference ranges for indoor RH, align them with material tolerances, and set proactive alerts. Humidity monitoring hinges on consistent data—place calibrated sensors in representative locales: near masonry, under eaves, and in high-traffic rooms. Record daily readings and weekly trends, not just instantaneous values, to detect slow shifts. When numbers drift beyond thresholds, investigate causes: ventilation gaps, irrigation leaks, or damp clothing habits. Implement moisture control measures promptly: seal leaks, improve air exchange, and adjust dehumidification. Document interventions and outcomes, then refine targets. This disciplined approach minimizes decay risk, preserves fabric integrity, and supports long‑term restoration goals with measurable, repeatable results.
Prompt Mitigation Steps
When moisture is detected, act immediately to prevent progression from a warning to actual damage. You’ll begin with a precise assessment: identify source, isolate affected zones, and document findings for historic records. Prioritize ventilation and targeted drying, using dehumidifiers and Fans to maintain steady, controlled moisture reduction. Remove compromised materials promptly and seal vulnerable joints to prevent recurring intrusion. Schedule moisture rechecks at short intervals and adjust strategies based on readings. If structure shows drooping boards, warped plaster, or efflorescence, involve specialists and reference Historical significance to guarantee interventions respect preservation ethics. In interior design terms, preserve original finishes where feasible; when replacement is necessary, choose historically appropriate materials. Maintain a clear log to support future restorations and protect the villa’s enduring value.
Prioritize Repairs for Safety and Longevity
Prioritizing repairs for safety and longevity means you start with non‑negotiables: structural integrity, moisture control, and electrical and fire-safety systems. You assess framing, foundations, and loads, documenting any cracks or deflections, then stabilize or replace compromised members to prevent progressive failure. Moisture control follows: seal exterior ramps, patch gutters, and install vapor barriers to deter rot, mold, and deterioration. Electrical and fire‑safety systems get a full audit—update panels, wiring, and grounding, install modern detectors, and ensure proper clearances and fire barriers. With core risks mitigated, you can plan future enhancements without compromising safety. Integrate landscape design considerations to manage drainage around the villa, and align interior décor choices with robust, low‑risk materials. Your method remains precise, evidence‑driven, and focused on long‑term stability.
Plan Modern Living Without Sacrificing Character
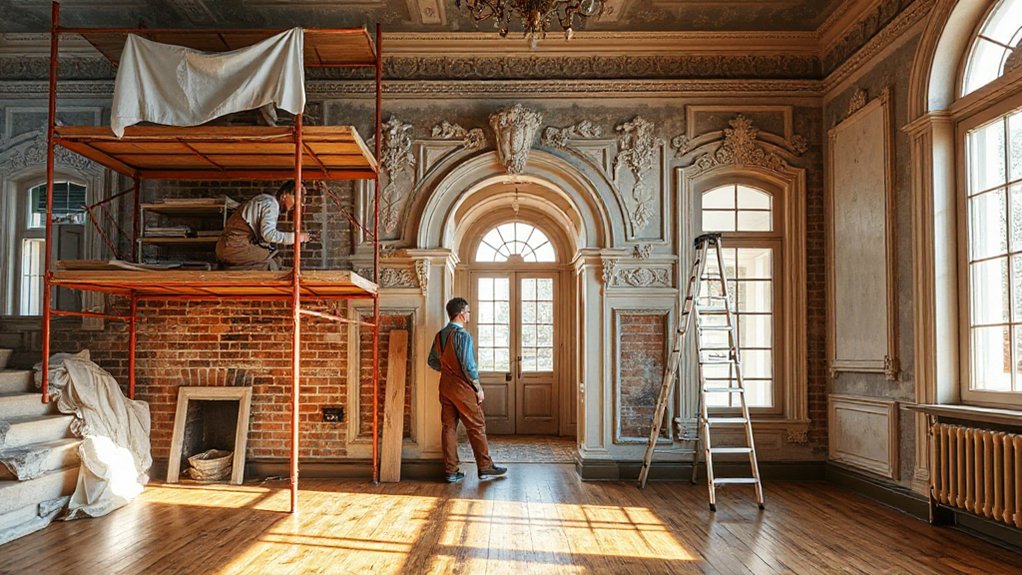
To balance contemporary comfort with Victorian authenticity, start with a coherent design framework that preserves defining elements while embracing scaled modernization.
- Align room proportions with original silhouettes, choosing furniture that echoes era lines but uses modern comfort standards.
- Integrate landscape integration by connecting indoors to outdoor spaces through sightlines, French doors, and terraces that respect the villa’s proportions.
- Calibrate interior lighting to highlight details—wall sconces, cove lighting, and task lighting that enhance period features without overpowering them.
- Select materials and finishes that nod to the past in texture and patina, while applying contemporary durability and performance where needed.
Source Period-Appropriate Materials and Finishes
You’ll identify period-appropriate materials and finishes that honor the villa’s character while meeting modern performance needs. Prioritize authentic sourcing, verify provenance, and assess compatibility with structural and decorative elements. This groundwork guarantees a coherent, durable restoration that respects craftsmanship and enhances long-term value.
Sourcing Period Materials
How can you guarantee authenticity begins at the sourcing stage? You’ll build a factual foundation by identifying exact period equivalents, verifying provenance, and recording every material nuance. Precision sourcing minimizes later regret and preserves character.
- Map period-accurate timber, brick, and plaster sources, prioritizing original mills and regional traditions.
- Vet suppliers for archival techniques, finishes, and aging that mirror Victorian practices without over-claiming.
- Cross‑check catalog notes with historical references to avoid anachronisms in Modern landscaping and interior modernization contexts.
- Demand clear documentation, test patches, and reversible, compatible alternatives where exact matches aren’t feasible.
This disciplined approach sustains integrity, supports accurate restoration modules, and guides your decisions through careful, verifiable choices.
Finishes Authentic Restoration
Embrace period-appropriate finishes by selecting coatings, lacquers, and patinas that mirror Victorian chemistry and aesthetics, then test them under real-world conditions to confirm compatibility with existing substrates and later aging. You’ll document resin bases, oil varnishes, and pigment suspensions, tuned for compatibility with plaster, timber, and masonry. Select finishes that enhance grain and patina without masking joinery integrity, ensuring reversibility where possible. For interior decoration, balance sheen with historical accuracy, opting for low-odor, breathable systems on lime plaster and wood. In garden landscaping zones adjacent to interiors, apply resistant, UV-stable coats on exterior joinery, while preserving decorative plaster accents. Record application data, cure times, and environmental limits to guide future maintenance, matching restoration cadence to life-cycle expectations and preserving authentic Victorian ambiance throughout the villa.
Conserve Decorative Details: Mouldings, Tiles, and Stained Glass
To conserve decorative details like mouldings, tiles, and stained glass, start with a precise assessment of what’s intact and what needs restoration.
- Inspect decorative motifs and identify any cracks, chips, or losses, documenting color, glaze, and pattern for faithful reproduction.
- Evaluate mouldings and plasterwork for hidden damage, checking joins, corners, and archivally stable backing before any repair.
- Test tiles and stained glass for fit and alignment, noting glaze wear, glaze creep, and lead came integrity to guide meticulous restoration.
- Prepare preservation plan prioritizing minimal intervention, appropriate cleaning methods, and compatible materials to maintain historic character and structural soundness.
Windows and Doors: Restore or Replace With Historic Integrity
Windows and doors demand the same careful judgment as decorative details: preserve historic fabric where feasible, and replace only when essential to safety, function, or long-term stability. You evaluate sash construction, glazing, and timber readiness, prioritizing original profiles and joinery. When restoration isn’t viable, you choose scale-matched replacements that honor proportion, muntin pattern, and sightlines, ensuring grain, texture, and finish read as authentic. Incorporate modern weather strategies through discreet measures—insulated glazing where appropriate, but harmonized with historic muntins and detailed cames. For doors, preserve panels and architraves; repair hinges and thresholds to maintain operability and security. Where you must modernize, select contemporary door design that respects era cues. Balance performance with provenance, documenting every alteration for future stewardship and historic integrity.
Roofing, Gutters, and Flashing: Top-Down Protection

Roofing, gutters, and flashing form the rooflines that shield the house from weather; start with a precise assessment of current material, condition, and drainage, then plan a cohesive strategy that preserves historic character while delivering modern reliability. You’ll map wear on shakes or tiles, inspect flashing joints, and verify gutter slopes to prevent backups and staining. Prioritize durable, sympathetic materials and seamless integration with exterior paint while accommodating solar panels where appropriate.
1) Assess substrate, choose period-appropriate profile, and guarantee proper nailing or fasteners.
2) Repair flashing with corrosion-resistant joints, sealing fast corners and valleys.
3) Restore gutters with correct pitch and leaf protection to maintain drainage.
4) Coordinate finishes and solar panel mounting, preserving aesthetics and accessibility for maintenance.
Electrical, Plumbing, and Heating: Upgrade With Minimal Invasiveness
Electrical, plumbing, and heating upgrades should be pursued with minimal invasiveness by mapping existing systems, identifying non-disruptive routes, and prioritizing modern, compact components that fit within original wall cavities or crawl spaces. You’ll select slimline wiring, modular controls, and compact heat sources to preserve fabric. Plan wireless automation to control lighting, climate, and valves without trenching or substantial replumbing. Integrate smart lighting via low-profile switches and occupancy sensors that mirror Victorian rhythms while maintaining aesthetics. Use conduit runs that reuse existing voids, and install heat sources behind baseboards or in discreet niches, minimizing visible alterations. Document every junction, seal penetrations, and test for leaks, ensuring reliability. Prioritize serviceability and future upgrades to sustain authentic interiors with contemporary efficiency.
Fire Safety Upgrades: Meet Codes Without Damaging Heritage
To protect a Victorian villa without marring its character, you must weave modern fire safety standards into the fabric of heritage preservation. You’ll balance code compliance with preserved detail, prioritizing passive systems and discreet interventions that respect Victorian architecture and Heritage conservation.
- Install discreet, code-compliant smoke detection linked to a central panel, hidden within cornices or atop ceiling roses where possible.
- Choose fire-resistant finishes and fabrics that maintain period aesthetics while reducing ignition risk.
- Upgrade electrical and mechanical routes with fire-stopping measures that minimize disruption to historic fabric.
- Implement compartmentalization strategies, using fire-rated doors and minimal guidance devices, to contain any incident without altering the space’s character.
Permits and Heritage Approvals: Navigating the System

Securing permits and heritage approvals is a disciplined, essential step that shapes every phase of restoration. You’ll map the permitting processes early, aligning design details with statutory expectations before work begins. Begin with a clear project brief and annotated drawings that demonstrate compliance with heritage regulations, including any constraints on materials, elevations, and setbacks. Engage promptly with local planning authorities and the state heritage agency to identify required submissions, timelines, and potential conditional approvals. Maintain meticulous records of approvals, amendments, and advisory notes, so your team can adapt without delays. Expect iterative reviews and targeted consultations with conservation officers. Document rationales for design choices that preserve character while meeting safety and function. Clear, proactive communication minimizes ambiguity and keeps your restoration on track.
Budgeting and Phasing the Restoration Timeline
Careful budgeting and a phased timeline are the backbone of a successful Victorian villa restoration. You’ll allocate funds by priority, anticipate contingencies, and map milestones to avoid overruns. A clear schedule prevents scope creep and keeps trades coordinated, reducing rework and delays. Use realistic lead times for materials and approvals, and document changes to preserve value and provenance.
- Establish a baseline budget, identify critical path tasks, and set stage gates with financial triggers.
- Time the demolition, structural repairs, and finishes to minimize disruption and align with trades’ availability.
- Reserve funds for Landscaping ideas and interior lighting upgrades that elevate period charm without overinvesting early.
- Create a rolling timeline with quarterly reviews, adjusting for weather, permit updates, and supplier lead times.
Maintenance Plan to Preserve the Villa After Restoration
A proactive maintenance plan guarantees the villa’s period details, structural integrity, and mechanical systems remain stable long after restoration. You’ll implement a scheduled regime that protects timber framing, plasterwork, and decorative finishes, with quarterly inspections and annual specialist assessments. Document every adjustment, replacement, and cleaning method to preserve provenance and avoid drift from original specifications. Garden landscaping should be maintained to prevent damp transfer and root intrusion, aligning with grading, drainage, and seasonal pruning cycles. Interior lighting requires careful calibration of fixtures, wiring, and controls to sustain ambiance and energy efficiency without altering historic circuits. Establish a responsive repair protocol; stock common consumables and authentic fasteners. Mentor occupants on care standards, ensuring consistent, proactive stewardship that extends the villa’s character, value, and operability.
Frequently Asked Questions
How Long Does a Victorian Villa Restoration Typically Take?
A Victorian villa restoration typically takes several months to a couple of years, depending on scope. You’ll manage architectural details and material sourcing meticulously, coordinating trades, permits, and investigations to preserve authenticity and minimize disruption during the process.
What Costs Are Usually Hidden in Restoration Projects?
Hidden expenses shadow your budget, and permitting challenges bite when you least expect it. You’ll uncover contingencies, escalate timelines, and quantify risk, because seasoned professionals anticipate costs, secure approvals, and allocate buffers to manage unforeseen regulatory hurdles.
Can I Live in the Villa During Restoration Work?
Yes, you can live there, but plan carefully. Living arrangements require temporary housing during noisy, dusty phases; guarantee safe access, dust containment, and utilities. Coordinate permits, schedule, and contractor footprints to minimize disruption and maintain essential comforts.
Which Trades Are Essential for a Historic Restoration?
Essential trades are carpentry, masonry, plastering, wood finishing, plumbing, electrical, roofing, and conservation glazing. You prioritize historical accuracy and preservation techniques, coordinating specialists early to safeguard structure, authenticity, and long-term stability during a rigorous, standards-driven restoration project.
How Do I Verify Contractor Experience With Heritage Projects?
Start by verifying contractor experience with heritage projects: 78% of specialists hold accredited heritage qualifications. You should request project records, speak with past clients, and review portfolio details on Historical craftsmanship and Preservation techniques to confirm proven competence.
Conclusion
You stand at the threshold, tools ready, history humming in the walls. You’ve mapped the core style, verified foundations, and tamed moisture threats, all while preserving the villa’s character. As permits wind through the system and fire-safety measures whisper into place, you sense the timeline narrowing yet inching forward. With every precise repair and thoughtful upgrade, you edge closer to a living, breathing heritage home. Tomorrow, the first full reveal of a restored legacy awaits your careful, deliberate touch.
About the Author



