

Transforming a former industrial unit into livable space starts with a rigorous structural and compliance check. You’ll assess foundations, framing, and load paths, then map permitting, zoning, and safety requirements. Define a clear living-unit vision inside the shell, prioritizing flexible layouts, disciplined budgeting, and durable systems. Plan fire safety, egress, and IAQ from the outset, plus long-term maintenance. With a phased schedule and clear trades coordination, you’ll stay on track and reveal how to optimize every detail as you proceed.
Key Takeaways
- Conduct a thorough structural assessment to ensure load paths, stability, and compliance with seismic/wind standards before occupancy.
- Develop a permitting, zoning, and compliance plan that covers demolition, new builds, electrical, plumbing, and safety certifications.
- Create flexible interior layouts with modular strategies, maximizing open space while preserving essential services and future adaptability.
- Plan HVAC, IAQ, electrical, plumbing, and smart-home systems with efficient zoning, controls, and energy performance in mind.
- Prioritize durable, compliant materials (prefer reclaimed options where feasible) and establish a clear maintenance and safety protocol for long-term viability.
Can This Warehouse Become a Home? Structural Feasibility and Foundations

This warehouse can become a home, but only if its structure and foundations meet tight, code-driven standards. You perform a careful structural assessment to verify framing, load paths, and seismic or wind requirements, then confirm that all connections align with design documents. You identify any corrosion, fatigue, or misalignments that threaten safety, and you quantify remediation steps with clear cost and timeline estimates. Foundation stability is nonnegotiable: you test bearing capacity, assess settlement potential, and check for hidden voids or water intrusion that could undermine support. You document retrofit options, from underpinning to pile remediation, prioritizing systems that support utilities and occupancy loads. You establish a pass/fail criterion, then proceed only if the structure demonstrates reliable performance under anticipated living conditions.
Assess Structural Viability for Habitable Quarters
Assess structural viability for habitable quarters by focusing on load-bearing integrity, connection details, and overall stability under expected living conditions. You evaluate framing, joists, beams, and supports for continuous performance, noting any deterioration, corrosion, or settlement that could compromise safety. Check wall-to-floor connections, roof transfers, and anchor points to ensure redundancy and resilience against daily loads, vibrations, and environmental forces. Prioritize practical, actionable assessments: determine whether existing structures meet modern occupancy expectations, with clear thresholds for repair or reinforcement. Consider Historical preservation implications, guaranteeing critical elements remain intact where feasible while meeting safety standards. Plan for aesthetic integration alongside structural upgrades, so retrofit work respects form and historical character without compromising load paths or long-term durability. Use documented findings to guide budgets and schedules.
Permitting, Zoning, and Compliance Strategy
You’ve completed the structural viability review, so you’re now mapping a practical permitting, zoning, and compliance path that aligns with those findings. You’ll identify the authoritative permit types, build a logic sequence, and pin down realistic timelines. Begin with zoning checks to confirm allowed land use, density, and occupancy limits under current Zoning restrictions, then map required amendments if needed. Next, chart permitting processes for demolition, new construction, electrical, plumbing, and mechanical work, coordinating inspections and documentation to avoid delays. Compile a single, auditable package: site plan, floor plans, energy calculations, and safety certifications. Establish a compliance calendar that aligns with utility turn-ons, occupancy readiness, and landlord-tenant responsibilities. Build buffers for reviews, and maintain clear records to support decision-making and future changes.
Define Your Living-Unit Vision Inside the Warehouse Shell

To shape a livable unit inside the warehouse shell, start with a clear footprint and core priorities: define the number of bedrooms, essential lived-in zones, and a robust circulation core that minimizes wasted space. You’ll translate open-plan potential into concrete zones: sleeping, cooking, hygiene, work, and relaxing areas that align with your daily rhythm. Specify ceilings, natural light strategies, and service corridors that stay unobtrusive yet functional. Align interior acoustics with activity zones to reduce noise bleed between private and public areas. Clarify design aesthetics early—material palettes, fixtures, and finishes that tolerate industrial realities while delivering warmth and coherence. Document decisions for future adaptation, ensuring the vision remains feasible as structure, systems, and future occupants dictate adjustments.
Budgeting for a Safe, Comfortable Transformation
Effective budgeting for a safe, comfortable transformation starts with a clear cost baseline, realistic contingency, and a disciplined spend plan that aligns with your design priorities and timeline. You’ll map hard costs (structure, utilities, safety upgrades) and soft costs (permits, design fees, inspections) to prevent overruns. Build a realistic contingency, typically 10–20%, and tie it to milestones. Track every line item in a centralized budget to avoid drift and miscommunication with contractors. Prioritize essential safety and long-term reliability over cosmetic fixes, but reserve funds for strategic upgrades that improve livability without breaking the bank. Allocate a portion for artistic expression to keep spaces distinctive, and plan for community engagement to validate choices and strengthen local support. Stay disciplined, document changes, and revisit projections quarterly to stay aligned with progress.
Prioritize Insulation and Thermal Comfort
Prioritizing insulation and thermal comfort starts with a practical, no-nonsense plan: seal gaps, choose high-performance materials, and design for steady, livable temperatures year-round.
- Assess building envelope tightness and seal air leaks promptly to reduce heat transfer
- Select Thermal insulation with high R-values and low thermal bridging for consistent climate control
- Install vapor barriers and continuous insulation to prevent condensation and drafts
- Orient and zone space to optimize heat retention, storage of warmth, and ease of climate control
Implement efficient windows and doors, and verify thermal performance with simple testing. Keep loads predictable, target comfort ranges, and document improvements. You’ll achieve lower energy use, fewer drafts, and steadier indoor conditions while preparing for future upgrades and occupant well-being.
Sound, Light, and Privacy Planning

With the envelope already tightened, focus on how sound, light, and privacy shape daily comfort in the renovated space. You’ll plan acoustics first, selecting soundproofing techniques that reduce interference from adjacent units and street noise without sacrificing openness. Consider decoupled walls, resilient channels, and high-density insulation in partitions where privacy matters most. For light, balance daylight with controls: dimmable fixtures, layered shading, and glare-free windows to avoid fatigue and heat gain. Address privacy by configuring sightlines and enclosure options that minimize pass-through from shared corridors or exterior activity. Material choices should be non-reflective on busy surfaces to curb visual noise and light spill. Finally, document intended use, occupancy patterns, and maintenance routines to sustain comfort and uphold privacy standards, avoiding future retrofit headaches.
Reclaimed and Compliant Materials: What to Use
You’ll assess reclaimed material sources for reliability, traceability, and suitability to living spaces. Guarantee compliance with current standards and project specs, prioritizing materials that meet safety, moisture, and fire performance requirements. Start by mapping supplier criteria, testing practices, and documentation to confirm both sourcing integrity and regulatory alignment.
Reclaimed Material Sourcing
Reclaimed material sourcing hinges on selecting materials that are both authentic to the project and compliant with current codes. You’ll prioritize integrity, provenance, and performance, balancing history with modern requirements. Reclaimed sourcing guides you toward durable, safe choices that reduce waste and support sustainability.
- Verify sourcing docs and material provenance for every item
- Choose structurally sound, repairable pieces with documented history
- Favor sources that minimize processing energy and waste
- Match material specs to exact performance needs and local standards
This approach keeps you focused on practical, verifiable gains rather than hype. By selecting sustainable materials thoughtfully, you’ll achieve a cohesive look without sacrificing safety or compliance while maximizing reuse benefits. Reclaimed sourcing becomes a discipline, not a impulse, guiding your project toward authentic character and long-term resilience.
Compliance and Standards Use
When you choose reclaimed and compliant materials, you must align them with current codes and performance standards from the start. You’ll verify material provenance, testing, and installation requirements to avoid failures later. Prioritize formaldehyde limits, VOCs, fire ratings, and structural certifications, so everything meets local authority needs. Assess compatibility with existing systems, ensuring moisture resistance, thermal performance, and durability suit daily living. Historical preservation informs your selections, guiding authentic textures and detailing without compromising safety or function. Document material origin, age, and condition for audits and future maintenance. Plan aesthetic integration by blending reclaimed features with modern controls, avoiding visual clutter. Maintain a clear record of compliance steps, warranties, and inspection milestones to protect investment and tenant comfort.
Flexible, Adaptable Floor Plans for Industrial Shells
Flexible, adaptable floor plans are essential when converting an industrial shell into livable space. You’ll design zones that can shift without major reconstruction, preserving structure while enabling future changes. Prioritize open concept layouts to maximize light, flow, and flexibility, then layer in defined pockets for privacy as needed. Keep circulation clear and mechanicals accessible for upgrades.
- Use modular partitions that glide or stack, not permanently fixed walls
- Locate core utilities centrally to simplify reconfiguration
- Plan adaptable room sizes with removable elements for future needs
- Integrate industrial aesthetics through materials while maintaining residential comfort
With this approach, you gain resilience, cost control, and room for growth. You’ll deliver a space that feels intentional, stylish, and responsive to evolving lifestyles.
Efficient Heating, Ventilation, and Cooling Systems
To maximize comfort and efficiency, you’ll prioritize a heating design that matchups load with insulation and solar gains. You should integrate balanced ventilation and sensible cooling approaches to maintain consistent indoor conditions with minimal energy use. Start with a clear plan for controls and filtration that support reliable performance year-round.
Efficient Heating Design
Efficient heating starts with a precise load assessment and targeted design choices that minimize waste and maximize comfort. You’ll specify zones, select compact, efficient equipment, and tailor controls to real usage, not assumptions. Prioritize low-leak envelopes and rapid-response systems to curb heat loss and overheating. Smart thermostats become central, learning patterns and adjusting cycles to actual occupancy. Choose reliable insulation materials that resist moisture and seasonal swings, then pair with high-efficiency radiators or radiant floors for even warmth.
- Targeted zoning and seamless control for comfort and efficiency
- Smart thermostats to learn schedules and reduce waste
- Insulation materials that resist moisture and thermal bridges
- Efficient, compact equipment matched to loads and space
Ventilation and Comfort
Ventilation and comfort hinge on balanced airflow and responsive systems that maintain IAQ without wasting energy. You’ll design a practical, integrated approach that prioritizes reliability, controllability, and measurable performance. Start with a capable ventilation strategy that blends natural ventilation opportunities with mechanical support, avoiding drafts and temperature swings. Choose high-efficiency fans, filters rated for your pollutants, and zones that respond to occupancy and moisture. Prioritize airtight building assemblies to reduce heat loss while ensuring fresh air delivery to habitable spaces. Monitor indoor air quality using simple indicators or sensors and adjust ventilation rates accordingly, especially in enclosed or high-occupancy areas. Natural ventilation can reduce energy use, but you must verify IAQ remains comfortable and safe at all times.
Exposing Structure: Design Features Without Compromising Safety
Exposing structure can enrich the design, but it must be done without compromising safety. You’ll balance aesthetics with code-compliant treatment, preserving load paths while showcasing beams, joists, and columns. Use selective exposure: reveal key elements, coat or seal raw surfaces, and avoid sharp edges that invite contact hazards. Integrate design features that emphasize structure, not clutter.
- Highlight primary framing with discreet finishes that resist impact
- Install protective edge guards and handrails where exposed edges exist
- Choose breathable coatings that prevent condensation on timber or steel
- Align openings and lighting to emphasize structure without creating glare
Prioritize consistent detailing across materials, verify connections, and document every exposed element for future maintenance. Exposing structure becomes a feature that reinforces safety and architectural clarity through disciplined design features.
Waterproofing and Moisture Management Essentials
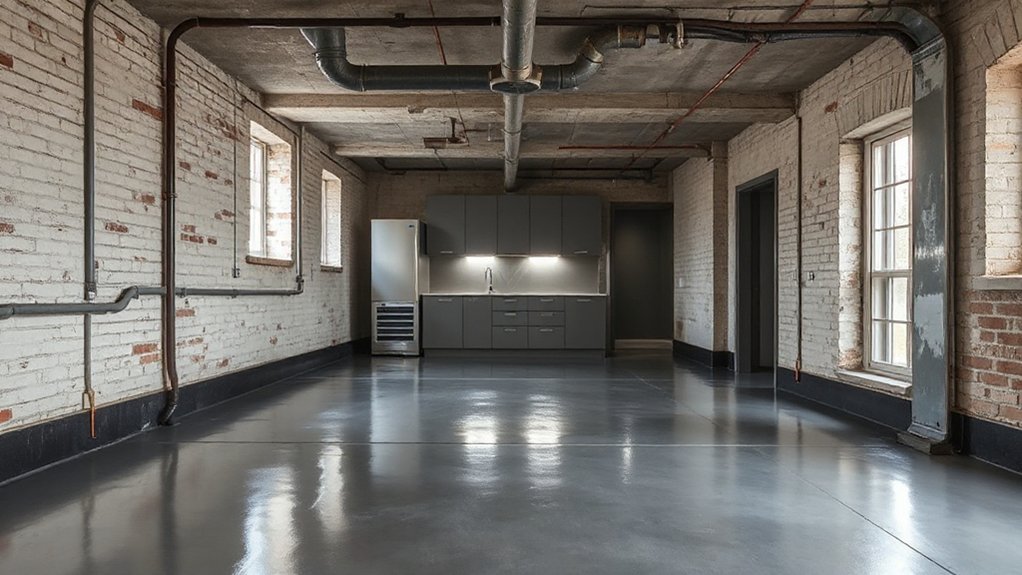
To protect your new living space, you’ll start with robust moisture control strategies and reliable waterproofing essentials. Prioritize continuous drainage, vapor barriers, and surface waterproofing to prevent hidden dampness and structural damage. Stay precise in inspection and maintenance routines so moisture never undermines comfort or safety.
Moisture Control Strategies
Moisture control is essential when converting an old industrial unit into living space, because unseen damp can undermine structure, insulation, and indoor air quality. You’ll prioritize active monitoring, airflow, and material selection to prevent condensation and mold growth. Use purpose-built details to keep moisture in check without sacrificing comfort or efficiency. Employ practical strategies that align with existing building physics, not guesswork.
- Implement Moisture barriers at lower walls and prone joints to deter capillary rise.
- Design Ventilation systems with controlled air exchange and humidity sensing.
- Seal penetrations around utilities, doors, and windows to reduce drafts and moisture inflow.
- Schedule regular inspections for signs of damp, rot, or mildew, and address promptly.
Waterproofing Essentials
Waterproofing isn’t optional when converting an old industrial unit into living space; it’s the foundation of durability, comfort, and energy efficiency. You’ll start with a thorough assessment of exterior envelopes, floor substrates, and joints to identify moisture pathways. Implement proven waterproofing techniques that suit your climate and building materials, prioritizing continuous protection without gaps. Use moisture barriers at key interfaces—basements, crawlspaces, and parapets—to slow and channel any intrusion toward safe exits. Prepare surfaces properly: clean, dry, and sound, with appropriate primers where required. Choose compatible products for each substrate, ensuring seamless progression between walls, floors, and ceilings. Regularly inspect and maintain seals, membranes, and drainage systems, correcting defects promptly to prevent costly damage. Document ongoing responsibilities to sustain long-term dryness and living comfort.
Integrating Kitchens and Bathrooms in an Industrial Shell

Renovating an industrial shell to integrate kitchens and bathrooms requires a disciplined layout and robust containment of services. You design zones that keep wet areas isolated, minimizing cross-contamination of dust and noise, while preserving open sightlines. Choose materials for durability and ease of cleaning, aligning with industrial aesthetics and future-proofing against wear. Establish standard heights, service routes, and resilient finishes from the outset to avoid costly rework later. Plan for concealed progressions between rough concrete and refined surfaces, so kitchens and baths feel cohesive within the shell.
- Define wet and dry zones with clear zoning markers and access points
- Specify durable, non-slip, chemical-resistant flooring for kitchens and baths
- Use sealed, washable wall finishes that tolerate steam and splashes
- Integrate integrated drip edges and drafting to manage moisture paths
Electrical, Plumbing, and Smart-Home Considerations
Electrical, plumbing, and smart-home systems must be planned with the same discipline you applied to containment and zoning. You’ll map circuits, water lines, and data runs to match room use, load, and future flexibility. Electrical wiring should follow a robust, code-compliant layout with accessible panels, dedicated circuits for heavy appliances, and separate ground-fault protection where needed. Plan plumbing fixtures for efficiency, reuse, and ease of maintenance, prioritizing point-of-use considerations, valve access, and frost protection if relevant. Install smart-home interfaces at central locations, ensuring reliable wireless or wired connectivity and future expandability. Document all revisions, label feeders, and preserve serviceability for trades. Prioritize safety, compliance, and compatibility across mechanical, electrical, and automation systems to avoid retrofits.
Lighting to Elevate Industrial Character
You balance industrial glow levels to define atmosphere without overpowering space. Consider vintage fixtures as anchors that reinforce character while keeping glare in check. This approach guides you toward crisp, purposeful lighting that complements exposed elements and modern living areas.
Industrial Glow Levels
Industrial glow levels should balance functionality with atmosphere, emphasizing purposeful illumination that enhances texture and form without glare. You design light so zones gain character without overwhelming raw materials; you control glow intensity to preserve depth, not wash it out. Precision matters: choose fixtures that deliver even, steady light and avoid flicker. You’ll layer ambient, task, and accent lighting to sustain industrial ambiance while improving comfort.
- Use dimmable LED fixtures to modulate glow intensity across spaces
- Opt for matte finishes and exposed channels that echo the era
- Prioritize anti-glare solutions for work areas without dulling mood
- Highlight brick, steel, and timber with targeted, directional lighting
Vintage Fixtures Focus
Vintage fixtures aren’t just adornments; they set the industrial rhythm. You view lighting as architecture, not decor, so pick fixtures that reinforce structure and scale. Prioritize durable materials—metal, enamel, tempered glass—over flimsy plastics, and choose finishes that resist wear. Aim for an aesthetic focus that highlights beams, brick, and open ductwork rather than hiding them. Mix direct and indirect lighting to sculpt texture: rely on pendant clusters above work surfaces and wall sconces to emphasize height. Guarantee wiring accommodates tall ceilings and spans without visual clutter. Calibrate color temperature to a cool, neutral range for clarity and cohesion. Document the aesthetic focus in plans, specifying glare control, accessibility, and maintenance cycles. This disciplined approach yields coherent vintage fixtures integrated with space.
Exterior Improvements: Facades, Entrances, and Outdoor Space
Exterior improvements set the tone for the renovated unit, balancing durability with curb appeal while ensuring accessibility and flow from street to living space. You’ll update facades with durable siding or brick, choose neutral tones, and preserve architectural details. Entrances should be wide, well lit, and weatherproof, with a visible path from sidewalk and clear signage. Exterior lighting enhances safety and atmosphere without glare, while Landscaping design frames the structure and reduces heat gain. Outdoor space should be functional for seating, dining, and small plants that require minimal maintenance. Plan for drainage, pests, and security cameras where appropriate. Address accessibility features early to avoid retrofits later, and coordinate materials to maintain a cohesive, lasting look.
- Assess facade materials and color
- Optimize entry width and door hardware
- ImplementExterior lighting strategically
- Design low-maintenance landscaping
Fire Safety, Egress, and Compliance Essentials
Fire safety, egress, and compliance are non-negotiable in converting an old industrial unit into livable space. You assess existing means of escape, verify door widths, and guarantee unobstructed paths to exits. Update fire-rated walls where needed, install adequate detection, and place extinguishers where access is obvious. You document compliance with local codes, maintain occupancy limits, and implement a clear, repeatable safety plan. Conduct regular fire drills so residents and staff know the procedures under stress. Post safety signage at every corridor junction, stair, and exit, with illuminated backups for power loss. Ensure electrical, plumbing, and HVAC work meet standards before occupancy, and keep records for inspections. You prioritize least-risk design, traceable approvals, and durable materials.
Timeline Management and Trade Coordination
You’ll map timeline milestones and align trade schedules from day one to avoid bottlenecks. Set clear milestones, synchronize deliveries, and confirm responsibilities with each contractor to keep the project on track. Monitor progress daily, adjust workflows as needed, and communicate changes promptly to prevent delays.
Timeline Milestones Coordination
To coordinate timeline milestones, establish a integrated master schedule that links design approvals, permitting, procurement, and trade activities, then track progress with weekly cross-trade check-ins and a fixed cadence for updating critical path tasks. You manage the sequence, confirm dependencies, and hold stakeholders accountable for on-time inputs, preventing lag from delaying milestones. Prioritize historical preservation and aesthetic integration in every milestone decision, ensuring design intent remains intact through procurement and trade work. Maintain a risk log for critical path risks and adjust baselines only with documented approvals. Communicate weekly status with concise dashboards, flagging variances early and proposing corrective actions. You align milestones with budget horizons and permit cycles to minimize rework and disruption.
- Establish baselined milestones and ownership
- Schedule cross-trade reviews and progress gates
- Track critical path, risks, and changes
- Document decisions for traceability
Trade Schedule Synchronization
Trade Schedule Synchronization requires tight alignment between design approval timelines, permitting windows, procurement lead times, and trade sequencing; you’ll synchronize activities so that each trade starts precisely when its inputs are ready and finishes within its assigned window. You manage the sequence by mapping critical path items, setting milestones, and coupling procurement with fabrication. Maintain a rolling update of any shifts in design or sourcing, and reallocate buffers only when necessary. Clear contractor communication is non-negotiable; you establish a single point of contact for each trade and require daily progress notes. When delays occur, you implement fast-track adjustments to protect the overall timeline, logging every change and its impact. This disciplined approach minimizes trade delays and preserves project velocity.
Case Studies: From Unit to Livable Living Space
Case studies illustrate how a formerly idle unit becomes functional living space, with real-world constraints shaping each outcome. You’ll see how designers balance structural viability, budget, and local regulations while preserving character. Outcomes vary, but the core lessons are consistent: plan early, verify acoustics and daylight, and prioritize flexible layouts that adapt to changing needs. Historical preservation informs aesthetic choices without sacrificing comfort, while community engagement ensures accepted adaptations and smoother permitting. Each case demonstrates how to reallocate existing shells, add essential services, and retrofit insulation for efficiency. You’ll learn to differentiate must-haves from nice-to-haves, and to document decisions for future adaptability.
- Precedent case: preservation-informed design and zoning alignment
- Site constraints and daylight optimization
- Flexible partitioning and service cores
- Stakeholder input and transparent permitting
Long-Term Maintenance and Adaptability for the Future
Long-term maintenance and adaptability demand deliberate planning from the outset. You’ll future-proof your project by detailing systems that age gracefully and can be upgraded without major disruption. Prioritize accessible mechanical rooms, modular services, and clearly labeled circuits to reduce downtime during repairs. Choose durable finishes and components with spare capacity to accommodate evolving needs, not just current codes. Establish a documented maintenance schedule—filter changes, seal inspections, structural checks—and assign ownership for each task. Build in flexibility for planned expansions or reconfigurations, so you aren’t forced into costly retrofits later. Consider energy performance, air sealing, and efficient HVAC as ongoing priorities to sustain long term sustainability. Design decisions should emphasize future adaptability, enabling you to respond to changes in occupancy, technology, and regulations.
Frequently Asked Questions
How Long Does the Conversion Timeline Typically Take?
Conversion typically takes 4–9 months, depending on scope and approvals. You should anticipate phased milestones, permit reviews, and weather delays. Prioritize Historical preservation, plan for Structural reinforcement, budget contingencies, and clear communication with contractors and authorities.
What Hidden Costs Commonly Arise in Conversions?
Hidden costs often pop up: unforeseen structural work, utility upgrades, and HVAC reruns. Do precise cost estimation early, and don’t overlook permit process fees and inspection delays, which can stretch timelines and budgets unexpectedly. Stay proactive, document everything, negotiate contingencies.
Can Tenants Access Utilities During Renovation?
Yes, you can usually access utilities during renovation, but only under proper terms. Confirm Utility access is arranged with the landlord and utility provider, and obtain Renovation permits before work begins to avoid penalties or stoppages.
What Are Minimal Daylighting Options for Dark Spaces?
Sure, yes: minimal daylighting options include strategic window placement and light wells. If you doubt it, you’ll appreciate natural lighting from carefully located clerestory or skylight openings, maximizing brightness without major remodels or costs.
How to Future-Proof for Resale Value After Finish?
Prioritize resale by preserving historic features and meeting zoning considerations, then future-proof with adaptable layouts, durable finishes, and modern systems. Maintain massing, daylighting, and energy efficiency to appeal to buyers while respecting historic preservation guidelines and zoning rules.
Conclusion
You can transform a former industrial unit into a livable home by validating structural viability, managing permits, and defining a clear vision inside the shell. Budget wisely, prioritize safety, and schedule trades with tight coordination. One striking stat: up to 60% of conversion costs come from repairs and systems upgrades, not the shell itself. Stay practical: plan phased milestones, document code compliance, and build in future adaptability so your space remains flexible as needs evolve.
About the Author



