

If you want to boost your home’s resale value, start with a timeless neutral palette that feels crisp and cohesive across rooms. Prioritize durable finishes, smart storage with built-ins, and clean lines to convey quality. Upgrade kitchens and baths with low-porosity surfaces, water-efficient fixtures, and cohesive hardware. Improve light and flow with layered lighting, mirrors, and correctly scaled furniture. Small, budget-friendly upgrades—like updated hardware and accent lighting—can have a big impact. Keep exploring for more practical ideas.
Key Takeaways
- Prioritize timeless neutral palettes and cohesive finishes to boost broad resale appeal and perceived quality.
- Invest in durable, low-porosity materials and premium fixtures for lasting value and easy maintenance.
- Maximize natural light and use layered lighting plus mirrors to enlarge spaces and create brightness.
- Enhance curb appeal with updated entry doors, welcoming lighting, and clean hardware for strong first impressions.
- Focus on high-ROI updates in kitchens and baths, including modern hardware, efficient fixtures, and cohesive, resale-ready finishes.
Choose a Timeless Neutral Palette for Resale

Choosing a timeless neutral palette sets a solid foundation for resale. You’ll create broad appeal by sticking with classic tones—grays, beiges, and warm whites—that harmonize with any decor.
Prioritize color consistency across rooms to avoid jarring shifts; select a cohesive base and coordinate accents for a unified look.
When choosing paints, opt for low-VOC formulas for durability and easier touch-ups, boosting paint longevity.
Prep surfaces thoroughly: fix cracks, sand glossy areas, and use primer on stained walls to prevent bleed-through.
Limit bold feature walls; if you add color, confine it to trim or accessories rather than large expanses.
Finally, document your color choices and finishes for future buyers, signaling thoughtful maintenance and a long-lasting, move-in ready aesthetic.
Light up a Space to Make It Feel Bigger and Brighter
Use mirrors to bounce light and visually expand tight spaces. Then prioritize maximizing natural light with unobstructed windows and bright window treatments.
Place reflective surfaces strategically to double the effect of your lighting, and align them with focal points to enhance brightness without clutter.
Keep the setup practical and purposeful, measuring each choice for how it improves perceived space and daily use.
Brighten With Mirrors
Mirrors reflect light and create the illusion of space, so placing them strategically can brighten a room and make it feel larger. To optimize impact, position mirrors opposite light sources or across from windows to multiply daylight without crowding walls.
Choose mirrors with clean lines and minimal frames to keep sightlines uninterrupted, enhancing a sense of openness. Use a mix of sizes to create a coordinated reflection scheme, avoiding overly busy compositions that can feel cluttered.
When applying mirror placement, consider functional zones: entryways gain welcome brightness, and narrow hallways feel extended. Integrate reflective decor with other design elements—glass tabletops, chrome hardware, and glossy surfaces—to reinforce brightness.
Avoid overuse; a few well-placed mirrors outperform volume.
Maximize Natural Light
Maximizing natural light starts with pruning shadows and inviting daylight to travel deeper. You optimize every available window, focusing on where glare hurts comfort and where diffusion boosts brightness without glare. Choose open, sheer or lightly textured window treatments to maintain view while softening harsh sun.
Position furniture to reflect light from walls and floors, avoiding blocks that create dull corners. Use light, neutral tones for walls and ceilings to amplify daylight without washing color. Indoor plants near windows add vitality without obstructing light flow.
Consider skylights or clerestory options if possible, but guarantee they don’t cause overheating. Maintain clean glass, trim exterior obstructions, and pair daylight with layered lighting for cloudy days.
Small upgrades yield substantial resale value and perceived spaciousness.
Reflective Surfaces Placement
Strategically placed reflective surfaces can instantly expand a space and boost brightness, especially when you mirror or bounce light from primary sources. To maximize impact, position mirrors opposite windows or light fixtures so daylight and lamp glow cross paths, widening the perceived area without crowding it.
Choose size and shape to suit scale: large, unobtrusive panels work in spacious rooms; elongated mirrors suit narrow hallways. Avoid covering full walls in mirrors in small, busy spaces, which can create visual clutter.
Maintain clean, polished finishes to reflect clearly; matte edges reduce glare. Prioritize strategic placement on areas where you want depth—entryways, behind seating, and above consoles.
Integrate reflective surfaces with complementary textures and lighting for a cohesive, brighter, more open ambience. Reflective surfaces enhance space efficiently through thoughtful strategic placement.
Smart Storage That Looks Built-In, Not Cluttered
Smart storage should look built-in, not like an afterthought, so you prioritize seamless integration over visible containers. You’ll gain a cleaner aesthetic by choosing furniture that hides its purpose behind flush fronts and concealed hardware. Think in terms of hidden compartments and modular shelving that adapts to your needs without shouting “storage.”
The goal is functionality that reads as architecture, not clutter.
- Install a wall of cabinetry with toe-kick drawers for slim accessories.
- Use modular shelving that reconfigures to hold books, baskets, or electronics.
- Integrate hidden compartments behind panels for remotes, chargers, and keys.
- Choose pull-out organizers inside cabinets to keep every item in its place.
Durable Finishes That Resist Wear and Feel Premium

Durable surfaces matter, so you’ll want finishes that stand up to daily wear without looking worn. Look for premium-feel materials with proven wear resistance that still read high-end in hand and light.
We’ll explore practical picks and application tips that keep rooms looking refined while aging gracefully.
Durable Surfaces, Premium Feel
Durable surfaces matter when you’re selling a home because they signal quality and reduce maintenance headaches for buyers. You’ll project value by selecting materials that endure daily use while feeling refined. Prioritize a balance of resilience and tactile luxury through these choices:
- Luxury countertops that resist scratches and stains without chalky finishes
- High end fixtures with solid metal hardware and precise fits
- Porcelain or engineered stone flooring that mimics natural beauty yet cleans easily
- Finishes with low porosity and easy wipeability to maintain a flawless look
These surfaces translate to fewer buyer concerns, faster showings, and a premium perception. Pair durable materials with clean lines and consistent graining to reinforce exclusivity, while avoiding busy patterns that distract from craftsmanship.
Wear-Resistant Finishes Guide
Wear-resistant finishes play a crucial role in selling a home because they minimize visible wear and ease maintenance for buyers. You’ll prioritize coatings that resist scratches, stains, and scuffs without sacrificing texture or color. Look for wear resistant finishes on high-traffic surfaces like floors, countertops, and cabinetry, where durability signals long-term value.
Opt for products offering clear surface protection that won’t yellow or peel with moisture or heat. In kitchens and baths, select sealed or hard-wax and polyurethane options that maintain sheen and resist water intrusion.
For living areas, consider matte or low-gloss finishes that hide minor imperfections while staying easy to wipe clean. Always verify manufacturers’ warranties and reapplication intervals to sustain surface protection and resale appeal.
Flooring and Baseboards That Boost Value

One smart way to boost resale value is choosing flooring and baseboards that balance style with durable performance. You’ll pair luxury flooring with stylish baseboards to signal quality through every room. Focus on cohesive tones and seamless connectivity to avoid visual clutter.
- Choose wide-plank hardwood or high-quality laminate for timeless appeal.
- Opt for moisture-resistant finishes in kitchens and baths to protect value.
- Select low-profile, matching baseboards to create clean lines.
- Coordinate color and texture between floors and trim for a unified look.
Entry Upgrades That Boost Curb Appeal
Upgrading your entry is a smart next step after choosing durable flooring and cohesive baseboards. You improve curb appeal by focusing on details you touch daily—doors, hardware, and lighting.
Start with entry lighting that welcomes guests and highlights architectural features without glare; layered fixtures create depth and safety after dark.
Update the door with a fresh coat of paint in a complementary hue, or swap to a stamped or solid-wood option for lasting impact.
Add a prominent, weatherproof doormat and simple planters to frame the threshold.
Replace worn hardware with brushed-nickel or matte-black knobs for a cohesive modern look.
Maintain clean lines, minimal clutter, and seasonal greenery to reinforce curb appeal and signal well-cared-for interiors.
Wall Treatments to Widen Rooms and Feel Expensive
Layering wall treatments can visually widen a room and make it feel more luxurious without major renovations. You can implement this today by pairing strategic finishes with light, neutral tones to maximize brightness and depth. Focus on texture and contrast to convey expense without overhauling square footage.
- Create an accent wall using a subtle textured paint finish to add depth without busy patterns.
- Add a glossy panel or wainscoting on the lower third for a refined, expansive look.
- Use high-contrast trim and molding to frame spaces and pull the eye outward.
- Choose a second accent for adjacent walls in a lighter shade to amplify perceived openness.
Accent walls and textured paint work together to elevate value through visual impact and sophistication. Avoid heavy, dark saturation in small rooms.
Kitchen and Bath Refreshes With High-Roi Tweaks
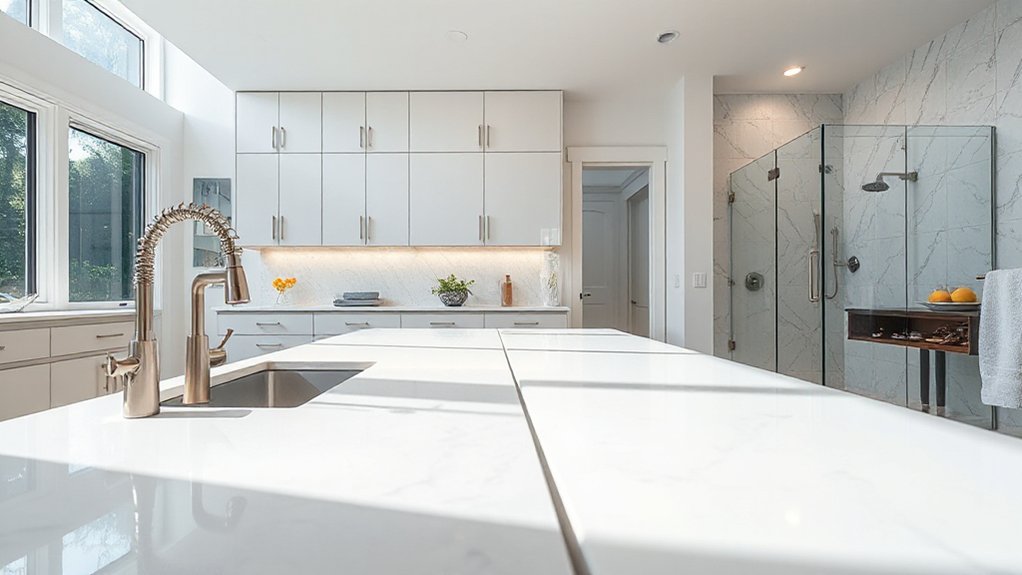
You’ll focus on high ROI kitchen wins, like upgrading hardware, revitalizing backsplashes, and improving lighting to make a big impact with minimal investment.
Timeless bath updates—think polished fixtures and neutral palettes—deliver lasting appeal without overpowering financial sense.
Smart storage tweaks tie the spaces together, boosting usability and resale value without major renovations.
High ROI Kitchen Wins
Many kitchen updates deliver big resale value with minimal disruption. You’ll win efficiency and appeal by focusing on high-ROI tweaks that feel fresh without a full remodel.
Here are practical moves you can implement now:
1) Update hardware with brushed metal or matte black finishes to modernize cabinets instantly.
2) Swap faucet and sink fixtures for water-saving, stylish options that read premium.
3) Add under-cabinet lighting and a bold, energy-efficient LED glow for ambiance and task clarity.
4) Introduce vintage accents and statement lighting to elevate character without overhauling layout.
These tweaks combine function and flair, delivering visible value fast while maintaining a cohesive, resale-ready kitchen.
Timeless Bath Updates
A timeless bath refresh centers on small, high-impact updates that deliver lasting appeal without a full renovation. You focus on surface-level changes that read expensive but aren’t risky, so you gain value without overhauling plumbing or tile.
Prioritize vintage fixtures to inject character while staying broad-market friendly; choose finishes and hardware that complement current cabinetry and countertops. Swap out dull faucet sets for modern, water-efficient options that resemble high-end models.
Introduce statement lighting—over a mirror or vanity—to frame the space, boost perceived size, and highlight key details. Keep color palettes restrained, leaning to neutrals with a single bold accent.
Add a frameless mirror and cohesive hardware kit for a polished, cohesive look. These tweaks deliver fresh appeal with minimal disruption and strong resale resonance.
Smart Storage Tweaks
Smart storage is the low-hanging fruit that compounds value in kitchen and bath refreshes. You’ll reclaim space without major renovations by smartly organizing what you already have. Focus on hidden compartments and modular shelving to maximize usability and resale appeal.
- Install pull-out organizers inside cabinets to reveal every inch and reduce clutter.
- Add modular shelving units that adapt to changing needs and leverage vertical space.
- Hide seldom-used items in discreet compartments behind panels or toe-kick drawers.
- Create a coordinated system with labeled bins and removable trays for quick cleanup.
These tweaks keep surfaces clean, make routines efficient, and suggest thoughtful design. The result: higher perceived value through practical, scalable storage that stays organized long after buyers tour.
Layout and Furniture Placement to Improve Flow
Optimizing layout and furniture placement starts with a clear flow: arrange spaces so movement feels natural and unobstructed. You’ll maximize value by prioritizing open concept cues while preserving defined zones for living, dining, and work.
Begin with scale-appropriate pieces; avoid oversized anchors that crowd pathways. Position seating to foster conversation and sightlines without forcing awkward turns. Create intentional focal points, then align rugs, lighting, and art to reinforce the route through each area.
Use furniture flow to guide traffic: place sofas and consoles to channel movement toward natural passages, not dead ends. Leave at least 30 inches for main walkways and 18 inches beside coffee tables.
Declutter surfaces, conceal cords, and emphasize cohesive finishes. This disciplined approach enhances perceived space and resale appeal.
Budget-Friendly DIY Upgrades That Maximize Resale Impact
When you’ve streamlined layout and eliminated clutter, small, affordable upgrades can deliver big resale payoffs without breaking the bank. You’ll maximize impact with DIY touches that feel premium yet stay budget-smart. Focus on visual polish, not complexity, and target rooms buyers notice first.
- Install artistic murals on a single accent wall to create depth without costly remodeling.
- Replace dated fixtures with affordable statement lighting to elevate ambience and perceived value.
- Refresh cabinetry with paint and new hardware for a high-end look at a fraction of the cost.
- Add inexpensive texture via removable wallpaper or fabric panels to boost room character without permanence.
These touches deliver bold cues of care, elevate photos, and help buyers imagine living there.
Frequently Asked Questions
How Soon Before Selling Should I Update Interior Design?
You should update interior design 4–8 weeks before selling. Prioritize quick wins like vintage furniture and bold wallpapers, which attract buyers without overhauling rooms. This timing minimizes risk and maximizes appeal in listings and showings.
Which Neutral Palette Has the Best Resale Track Record?
Like a well-tuned instrument, you’ll want a neutral palette with proven resale heft: gray-beige tones that coordinate color, sustain trend consistency, and keep spaces feeling cohesive and bright for buyers. Target timeless neutrals for maximum resale appeal.
Do High-End Finishes Always Boost Resale Value?
High-end finishes don’t always boost resale value, especially if inconsistent with the rest of your home. If you choose luxury countertops and upscale fixtures thoughtfully, you’ll likely see value, but avoid overinvesting beyond neighborhood expectations.
What Are Cost-Effective Lighting Upgrades for Resale?
You should invest in smart lighting and LED upgrades, which deliver brighter, more efficient rooms. You’ll save on energy and attract buyers, because smart lighting enhances ambiance and control, while LEDs reduce maintenance and improve overall perceived value.
Can DIY Projects Harm a Home’s Resale Value?
DIY projects can harm your resale value if you ignore permits, quality, and outcomes. You should avoid DIY pitfalls and renovation risks by planning carefully, hiring pros for complex tasks, and documenting work to preserve credibility and market appeal.
Conclusion
Think of your home as a ship ready for its next voyage. Your design choices are the sails and rigging: timeless neutrals catch favorable winds, bright lighting clears reefs, smart storage trims weight, durable finishes withstand storms, and cohesive flooring anchors the hull. By aligning layout, flow, and budget-friendly upgrades, you steer toward higher resale value. The voyage payoff isn’t just a price tag—it’s confident buyers stepping aboard and imagining a smooth sail ahead.
About the Author



