
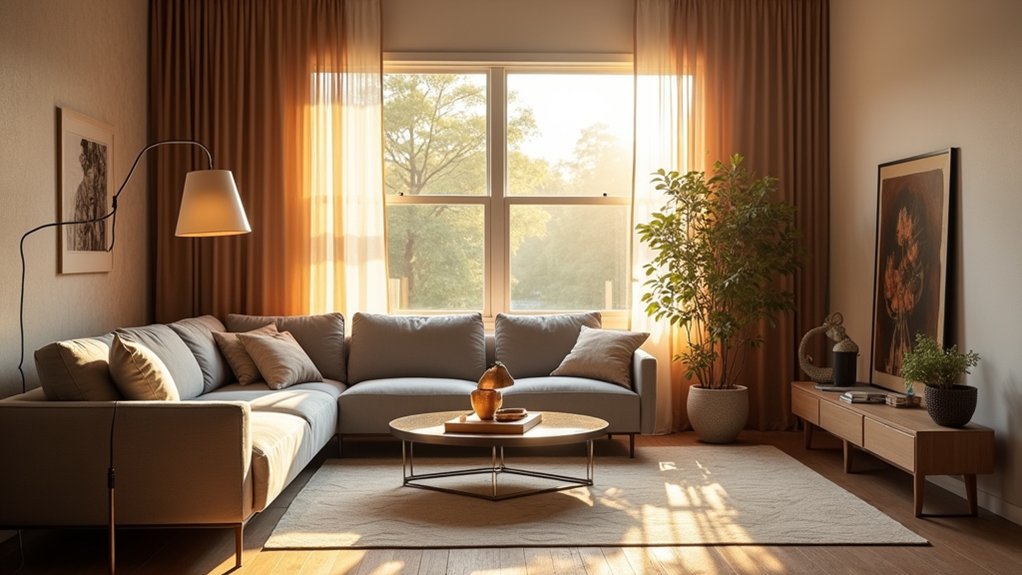
Layer your lighting with ambient, task, and accent layers to transform mood, flow, and usability. Balance color temperature across zones—cooler for focus, warmer for relaxation—and keep brightness matched to activity. Place fixtures for even coverage, using a grid aligned to room geometry, with dimming to modulate mood. Use under-cabinet and accent lighting to reveal textures and features. Map each space to its primary tasks, then upgrade in steps to fit your budget; more insights await.
Key Takeaways
- Use a layered lighting scheme (ambient, task, and accent) to create depth, balance, and focus in each room.
- Align color temperature with function: 2700–3000K for warmth, 3500–4500K for tasks, and adjust with dimmers for mood.
- Calibrate lighting to activities: bright task lighting in kitchens and workspaces; softer, diffuse lighting in living and bedrooms.
- Implement smart controls and scenes to transition moods, improve energy use, and align lighting with daily routines.
- Place fixtures thoughtfully to reduce glare and shadows, maintain even lux levels, and highlight architectural features and art.
Understanding Lighting Layering: Ambient, Task, and Accent

Ambient, task, and accent lighting form the three pillars of effective lighting layering. You design spaces by aligning light quality with function, not just brightness.
Ambient lighting provides general coverage, evenly reducing harsh contrasts and establishing baseline visibility.
Task lighting targets specific activities, delivering higher illuminance where you read, cook, or work, improving accuracy and reducing eye strain.
Accent lighting adds drama and dimension, drawing attention to architectural features, art, or textures without overpowering the scene.
Choose lighting fixtures that balance output, color temperature, and glare control to maintain rhythm across zones.
Consider color accents in fixture finishes and light output, ensuring tonal harmony with furnishings.
Precision layering requires calibrated luminance levels, consistent diffusion, and deliberate brightness hierarchy to support usability and aesthetic coherence.
Choosing Ambient, Task, and Accent Lighting for Each Room
To tailor lighting to each room, start by identifying the primary activities and the corresponding lighting roles: ambient for general visibility, task lighting for focused work, and accent lighting to emphasize features.
In living areas, choose diffuse ambient fixtures to evenly illuminate spaces. Add task lamps near seating for reading, and place accent lights to highlight art or architectural details.
In kitchens, install bright ambient layers with ceiling fixtures. Supplement counters with under-cabinet task lighting, and use accent lighting to spotlight textures or color schemes.
In bedrooms, balance soft ambient with bedside task lighting and a targeted accent to draw attention to a focal piece.
Guarantee consistency by selecting complementary lighting fixtures and harmonizing color schemes across rooms for cohesion.
Matching Bulbs to Mood: Color Temperature and Brightness
Color temperature and brightness set the mood and function of each space. You select color temperature to shape ambiance: cooler temps (roughly 4000–6500 K) heighten alertness for tasks, while warmer temps (2700–3000 K) foster relaxation.
Brightness levels must align with activity: higher outputs for task zones, lower outputs for lounges. In practice, you’ll balance simultaneity by layering lamps with adjustable dimming, ensuring progression feel natural.
Consider a baseline of 3000 K for living areas with dimming to 2000–2500 K for evening wind-down. In kitchens or work desks, deploy 3500–4500 K to preserve color accuracy and reduce eye strain.
Document your target ranges and verify with a light meter when precision matters. Consistency across fixtures avoids perceptual shifts that undermine chosen mood or function.
Mapping Lighting by Room Purpose and Activity

Start by mapping each space to its primary tasks so you can tailor lighting accordingly.
Prioritize task lighting by space, set activity-based brightness levels, and implement layered illumination to combine ambient, task, and accent layers.
This approach guarantees precise control and efficiency, aligning luminance with purpose and flow throughout the home.
Task Lighting By Space
Mapping lighting by space means identifying the primary tasks that define each room’s use and selecting focused task lighting accordingly. In this section, you map tasks to fixtures, aligning light quality with intended activities.
For kitchens, place under-cabinet LEDs to illuminate countertops, enabling precise food prep and reducing surface shadows. In offices or study alcoves, implement directional desk lamps with adjustable brightness to support reading, drafting, or screen work without glare.
Bathrooms benefit from vanity mirror lights that provide even illumination for grooming tasks, while laundry areas gain ceiling-mounted task luminaires for crease-free folding.
Living rooms should reserve task lighting for reading nooks or craft surfaces, avoiding excessive ambient bias. This approach supports space optimization by directing light where it’s needed, minimizing waste and enhancing efficiency.
Activity-Based Brightness Levels
Activity-based brightness levels tailor lighting to how you use each space, aligning luminance with task demands and mood goals. You map activities to illumination tiers, ensuring safety, efficiency, and comfort while preserving color fidelity.
By assigning roles to lighting fixtures and calibrating color schemes, you optimize contrast, reduce glare, and support specific workflows. In practice, you layer fixtures (ambient, task, accent) to achieve responsive brightness shifts that reflect activity changes without perceptual fatigue.
Precision control, dimming, and zoning enable you to maintain consistent vertical illuminance across surfaces, improving object visibility and mood modulation. This approach minimizes energy waste and guides user perception toward purposeful environments.
- Define zones by activity for each room
- Pair Lighting fixtures with task needs
- Calibrate Color schemes for wattage neutrality
- Implement seamless dimming shifts
- Audit luminance consistency over time
Layered Illumination Strategies
Layered illumination strategies combine ambient, task, and accent lighting to support each room’s purpose and activities. By mapping lighting layers to specific zones, you create functional zones that adapt to time of day and tasks.
Start with ambient sources that establish even coverage without glare, then layer task lighting at work surfaces for accuracy and comfort. Add accent lighting to emphasize architectural features or artwork, guiding attention and improving perceived depth.
Use dimming controls to shift mood from bright concentration to gentle relaxation, preserving Natural ambiance where desired. Consider color temperature to align with activity—cooler for focus, warmer for social interaction.
Ensure compatibility across fixtures, avoid overlapping beams, and maintain clean lines between layers. Artistic shadows add depth without sacrificing clarity.
Fixture Placement for Balanced Lighting
A balanced ceiling plan distributes light evenly to reduce glare and shadow, guiding you to place fixtures so the primary illumination covers work zones and seating areas without hotspots.
Implement a layered source strategy with ambient, task, and accent lighting, ensuring each layer supports the room’s activity while maintaining a cohesive color and intensity.
Start by mapping fixture placement that aligns with the room’s function, then fine-tune to preserve balance across the space.
Balanced Ceiling Plan
How should you place fixtures to achieve a balanced ceiling plan? You align luminaires to evenly distribute light across surfaces, respecting ceiling height and room function. Start with a grid that mirrors room geometry, then adjust for focal points and task areas. Use uniform spacing to avoid dark patches, and compensate for architectural features with dedicated fixtures.
Select lighting fixtures with consistent color rendering and output to minimize glare. Position downlights near walls to illuminate vertical planes, and suspend key fixtures where ceilings are higher to preserve proportionality. Implement dimming to modulate mood without altering balance.
Verify that all zones share similar lux levels, then test at peak usage times. Finally, document mounting heights and spacings for reproducibility.
- Symmetry considerations for grid layout
- Spacing guidelines relative to wall surfaces
- Fixture types aligned with ceiling height
- Dimming strategy across zones
- Verification steps for balanced lux levels
Layered Source Strategy
To establish a layered source strategy, you combine primary, secondary, and accent luminaires so each layer supports the others without creating glare or hotspots. Fixture placement should balance brightness, color rendering, and task needs across zones.
Position primary luminaires overhead or wall-wung to illuminate core surfaces evenly, avoiding direct sightlines into fixtures. Secondary sources fill shadows and refine depth, typically at eye level or adjacent to focal points, ensuring comfortable contrast.
Accent luminaires highlight architectural features, textures, and art without overpowering general illumination. Use dimming controls to maintain consistent luminance ratios as needs change.
Consider bulb longevity by selecting compatible lamps with stable output and efficient efficacy. Document spacing, mounting heights, and aiming angles to preserve Lighting aesthetics while preserving clarity and prevent fatigue.
Reassess quarterly to sustain balanced, glare-free environments.
Blending Natural and Artificial Light Effectively
Blending natural and artificial light requires a deliberate, task-focused approach: align daylight availability with indoor lighting to maintain consistent color and brightness throughout the day.
- Prioritize color temperature compatibility to avoid hue shifts between sources.
- Calibrate dimming levels to preserve natural balance and prevent glare.
- Use daylight-harvesting strategies with controllable artificial layers.
- Position task and ambient lights to complement window light rather than compete.
- Schedule seasonal adjustments to sustain mood enhancement and visual acuity.
Careful zoning ensures seamless progressions, preventing abrupt brightness changes.
You’ll achieve reproducible color reproduction across spaces, preserving material integrity and perceptual comfort.
Natural balance emerges when daylight cues guide artificial output, enabling reliable performance from early morning to late afternoon.
This disciplined approach supports mood enhancement by maintaining steadier luminance, reducing eye strain, and stabilizing perceived room size.
Practical Smart Lighting Basics for Daily Routines
Smart lighting routines let you automate common daily tasks, from morning wake-ups to evening wind-downs, with predictable, repeatable results. You’ll plan lighting moments around daily activities and establish scenes that align with your routines, rather than reacting to each moment.
Smart Lighting Routines
Smart lighting routines automate daily tasks by coordinating when and how lights turn on, dim, and switch color. You set schedules and triggers that align with your calendar and routines, ensuring consistent ambiance and safety. Use smart controls to centralize management, verify device compatibility, and reduce manual adjustments.
Energy efficiency rises as sensors and timers prevent idle usage, while gradual progressions protect eyes and preserve circadian balance. When you pair routines with occupancy and daylight sensors, you maximize savings without sacrificing comfort.
Test scenes for morning wake, work focus, dinner, and bedtime to fine‑tune performance. Leverage voice assistants for quick tweaks, and document changes for troubleshooting. Smart controls, energy efficiency, precision, and reliability underpin durable daily-scenes.
- Synchronize wake and sleep scenes with calendar cues
- Auto-adjust lighting based on room occupancy
- Dim gradually to emulate natural dawn and dusk
- Color temperature shifts for tasks and mood
- Audit energy use and refine automation rules
Daily Lighting Planning
Daily Lighting Planning translates your routines into actionable illumination strategies, prioritizing predictable brightness, color temperature, and control zoning to support focus, comfort, and energy efficiency.
You systematize daily tasks by mapping rooms to lighting scenes that align with stages of the day and activity intensity. Use layered layers: ambient base, task accents, and decorative highlights to reduce glare and guarantee consistency.
Choose tunable white fixtures to shift from cool mornings to warmer evenings, preserving Natural ambiance while minimizing eye strain. Implement smart controls with schedules and sensors to auto-adjust brightness and color temperature, maintaining visual harmony across zones.
Consider artistic shadows as a deliberate effect, guiding attention without overpowering function. Regularly audit luminance objectives and reoptimize zoning for ongoing efficiency.
Using Dimmers to Transform Spaces Quickly
Dimmers let you adjust lighting levels instantly, transforming mood and function in any room with minimal effort. You’ll optimize tasks and ambiance by selecting appropriate brightness, reducing glare, and conserving energy. A dimmer switch provides immediate control without reconfiguring fixtures, enabling seamless scene changes for work, dining, or relaxation.
Use calibrated steps to maintain color accuracy and avoid visible flicker in sensitive spaces. When deploying mood lighting, balance ambient and task needs to preserve depth and contrast. Verify compatibility with LED lamps and guarantee proper installation to prevent overheating.
Monitor load ratings to prevent circuit overload and maximize longevity. Regularly test transition points to confirm smooth dimming curves and consistent output across fixtures.
- Quick brightness calibration for multi-room setups
- Compatibility checks: dimmer switch with LEDs
- How to design mood lighting without overpowering tasks
- Energy savings through gradual dimming schedules
- Safe installation and load management practices
Directional Lighting to Highlight Architectural Features

Directional lighting plays an essential role in revealing and sculpting architectural features, drawing attention to moldings, columns, and textures without overpowering the space. You deploy focused luminance along wall planes to carve depth and emphasize material contrasts, ensuring even spill is minimized.
Position high-CRI spotlights at precise angles to create intentional accent shadows that define recesses, cornices, and architectural cues. Use adjustable beam angles to control falloff, preventing glare while preserving detail in plasterwork and brick.
Integrate wall-washing along textures to reveal tactility without flattening relief. Pair with dimmable controls to modulate mood lighting during different times of day, maintaining visual hierarchy.
The result is a disciplined, responsive scheme that reinforces form and historic character while sustaining clarity and balance.
Selecting Fixtures That Fit Your Style and Budget
Selecting fixtures that fit your style and budget starts with a clear plan: define functional needs, establish a ceiling for cost, and translate both into a cohesive design language. You’ll evaluate luminance, color temperature, and fixture form to ensure consistency with room intent and existing hardware.
Prioritize durability and energy efficiency, then compare warranty and maintenance implications. Vintage fixtures can contribute character without sacrificing performance, while budget options preserve scope.
- Define room role and lighting layers (ambient, task, accent) to guide fixture counts
- Assess ceiling height and electrical layout for practical placement
- Compare color temperatures (2700–3500K for warmth; 4000K+ for tasks)
- Vet compatibility with dimming and smart controls
- Balance aesthetic with budget without sacrificing safety and compliance
Common Lighting Mistakes in Small Rooms: And How to Avoid Them
Small rooms pose unique lighting challenges, and missteps here quickly degrade both visibility and mood. You should avoid overpowering glare from small fixtures and instead balance layers: ambient, task, and accent lighting tuned for scale.
Common mistakes include relying on a single central light, ignoring shadows, and neglecting dimming controls, which suppress depth and usability. Choose compact fixtures with adequate lumen output and precise beam control to minimize spill.
Prioritize energy efficiency by selecting high-efficiency LEDs and compatible drivers, optimizing color rendering for the room’s function. Leverage lighting technology such as layered layers and dimmable options to adapt brightness without clutter.
Measure spacing to prevent hot spots, and replace outdated sources promptly to sustain performance. This approach keeps small rooms visually expansive while delivering functional, consistent illumination.
How Color Temperature Changes Décor Perception

Color temperature shaping décor perception hinges on warmth, which you’ll notice influences mood and coziness as you set the scene.
Brighter, cooler light shifts emphasis to form and texture, altering how space feels and reads.
Together, warmth and brightness govern how your color choices appear and how occupants respond.
Warmth Affects Mood
Warmth, defined by color temperature, directly shapes how décor reads in a space and influences mood. You’ll learn that warmer temps (lower Kelvin) evoke comfort, while cooler temps can sharpen focus.
In practice, warmth modulates perceived texture and space, affecting how you experience light intensity and ambiance. This relationship supports targeted mood enhancement by aligning fixtures, surfaces, and finishes with your goals for relaxation or activity.
Precision in selecting lamps and coatings yields predictable responses, reducing guesswork and enhancing design integrity. Apply warmth deliberately to support desired experiences, not merely for aesthetics.
- Temperature choice channels mood through subtle texture and glow
- Low Kelvin yields intimate, cozy environments for unwinding
- Higher Kelvin supports alertness and task clarity
- Consistent chromaticity preserves perceived material quality
- Calibrated luminance reinforces mood enhancement without glare
Brightness Alters Perception
Brightness reshapes how color temperature is perceived within a space, altering apparent hue, saturation, and contrast as light levels rise or fall. You’ll notice a perception shift when you compare the same object under varying intensities: cooler temps emphasize crispness, warmer temps soften edges, and mid-range balances tonal accuracy.
In higher brightness, textures gain definition, reducing veiling and increasing perceived contrast, which elevates visual impact for tasks requiring detail. Lower illumination reduces chromatic saturation, shifting objects toward muted tones and affecting color fidelity.
When selecting lighting, consider target activities and material finishes; cool light supports accuracy in work zones, while warm light enhances ambiance in living areas. Documentation and calibration guarantee consistency across fixtures, avoiding unintended perceptual drift across rooms.
Planning Lighting for Reading, Working, and Entertaining

To plan effective lighting for reading, working, and entertaining, start by prioritizing task-specific layers: ambient, task, and accent. You’ll deploy a precise mix that supports focus, visibility, and mood while minimizing glare.
Consider lighting automation to adjust scenes by function—dim for reading, bright for editing, warm for social hours—without manual micromanagement. Align color temperature with activity: neutral to cool for productivity, warmer tones for relaxation, ensuring consistency across zones to reduce eye strain.
Use energy efficiency strategies like high-FFLEDs, proper luminaire placement, and zoned controls. Document a baseline plan, then test and iterate for comfort, performance, and cost balance.
- Layered approach for each activity
- Automated scene presets by zone
- Color temperature zoning
- Glare reduction techniques
- Energy-efficient fixture choices
Upgrading Lighting in Steps on a Budget
If you’re upgrading lighting on a budget, start with a clear, prioritized plan that targets the most impactful changes first. Begin with high-traffic zones and tasks that influence perception, such as living areas, kitchens, and workspaces.
Choose core luminaires that deliver durable, energy-efficient performance, then layer lighting to reduce reliance on single fixtures.
Implement Lighting installation best practices: verify lumen output, color temperature, and CRA/CRI to maintain true color rendering.
Phase replacements incrementally, selecting retrofit LEDs with compatible drivers to minimize retrofit costs and downtime.
Emphasize energy efficiency by targeting zones with the greatest usage hours and adopting dimmable controls, motion sensors, and occupancy-aware systems where feasible.
Document wattage reductions and maintenance intervals to measure progress and justify future upgrades.
Assessing Lighting Needs Before a Renovation
Determining lighting needs before a renovation requires a precise, data-driven approach. You map room function, natural light, and ceiling height to determine luminance targets, color balance, and fixture placement.
Analyze daylight availability, load-bearing constraints, and electrical capacity to avoid overspec’ing. Prioritize task lighting for work zones, ambient layers for mood, and accent fixtures for depth.
Calculate wattage, lumens, and color rendering to achieve consistent experiences across rooms. Consider energy efficiency by selecting high-CRI LEDs, smart controls, and dimming strategies that reduce usage without sacrificing quality.
Document revisions and parameters to guide procurement, installation, and future maintenance.
- Define room-by-room function and required luminance
- Assess daylight impact and window orientation
- Evaluate electrical capacity and switch layout
- Plan layered lighting: ambient, task, accent
- Prioritize energy efficiency and control strategies
Debunking Common Lighting Myths With Practical Fixes
Despite common beliefs, many lighting myths can misguide design decisions; debunking them reveals practical fixes that improve quality, efficiency, and user comfort. You’ll learn to test assumptions with measurements, not anecdotes, ensuring decisions align with space use.
Myth 1: brighter is always better. Fix: match lumen output to task zones, balancing ambient luminance with contrast.
Myth 2: cool white equals modern. Fix: adjust color temperature to support activity and mood, not just trends.
Myth 3: more fixtures equals better coverage. Fix: optimize spacing and layering to reduce glare and fatigue.
Myth 4: cheaper LEDs compromise performance. Fix: verify CRI, flicker, and dimming compatibility.
Outcome: Lighting efficiency improves through better planning and component selection, while energy conservation rises from appropriate controls and wattage.
Create a Cohesive, Maintainable Lighting Plan
A cohesive, maintainable lighting plan aligns tasks, zones, and controls into a single system you can tune over time. You’ll design around function, energy, and ambience, then implement standardization across spaces to guarantee predictability and upgrades without disruption.
Establish a hierarchy of layers: ambient, task, and accent, with consistent control protocols and labeling. Document fixture types, wattages, and dimming capabilities to prevent rework when you scale rooms.
Prioritize bulb compatibility and driver compatibility to maintain serviceability and performance. Maintain a living plan that logs changes, validates with audits, and updates schedules as needs evolve.
This approach minimizes outages, reduces complexity, and preserves aesthetic cohesion while supporting future technologies.
- Cohesive zoning and control scheme
- Standardized fixture families
- Documented bulb compatibility and drivers
- Upgrade roadmap with versioning
- Regular maintenance and audits
Frequently Asked Questions
How Do I Balance Natural and Artificial Light Effectively?
Balance natural and artificial light by layering sources and adjusting light placement. Use daylight when available, supplement with ambient, task, and accent lighting via Lighting fixtures, and align fixtures to window angles to optimize glare control and color integrity.
What’s the Best Color Temperature for Living Rooms?
For living rooms, aim for a color temperature around 2700–3000K for warmth and comfort; 3000K is ideal for everyday use. This color temperature supports mood enhancement without harsh contrasts, enabling precise ambient and task lighting balance.
How Many Lighting Layers Does a Room Need?
You need three lighting layers for a balanced scheme. Use layering techniques and fixture placement to guarantee ambient, task, and accent roles are satisfied, with proper spacing and dimming. This precise approach optimizes function, atmosphere, and flexibility.
Can I Retrofit Smart Lighting on a Budget?
Yes, you can retrofit smart lighting on a budget. Use smart bulbs for key zones and budget fixtures elsewhere; prioritize energy efficiency, compatible hubs, and scene control to maximize performance without overspending.
What Are the Signs of Poor Lighting in Small Spaces?
You notice poor lighting in small spaces through dim color contrast and uneven shadows. Improve with precise light placement, aiming for balanced brightness, reduced glare, and adequate color accuracy to avoid muddiness in surfaces and textures.
Conclusion
Ready to illuminate with intention? Build a balanced, budget-smart plan by blending ambient, task, and accent layers. Pinpoint bulbs by mood, color temperature, and brightness, then map fixtures to room purposes and activities. Place thoughtfully for even coverage, upgrade in steps, and assess renovation needs honestly. Debunk myths, maintain consistency, and document decisions. Design details, disciplined decisions, deliberate dynamics—your cohesive lighting plan transforms spaces, elevates function, and enhances atmosphere with every carefully calibrated lumen.
About the Author



