

To enhance interior design with lighting, you define goals around ambiance, function, and architectural highlights, then map fixtures to zones and control layers. Layer ambient, task, and accent lighting to balance mood and utility, starting with even base illumination and adding task and feature lighting. Choose color temperature to set mood, and select fixtures that match style, scale, and the room’s function. Consider CRI and reflections to shape perception, and use small-space tricks to expand feel; more tips await.
Key Takeaways
- Define lighting roles (ambience, function, highlights) and map fixtures to zones to guide design and upgrades.
- Layer ambient, task, and accent lighting with dimmers and presets for mood, efficiency, and flexibility.
- Choose color temperature and CRI to balance comfort, task visibility, and color accuracy.
- Use fixtures strategically to emphasize architecture, textures, and room proportions while avoiding overlighting.
- plan for small spaces with vertical lighting, reflective surfaces, and scalable controls to expand perceived space and control.
Define Your Lighting Goals: Ambiance, Function, and Architectural Highlights

To define your lighting goals, start by clarifying the three core roles lighting should play: ambiance, function, and architectural highlights. Ambiance sets mood and tone, guiding you to choose color temperature, dimming, and layering. Function ensures tasks are well-lit without glare, so you select task lighting, zoning, and appropriate illuminance. Architectural highlights reveal structure, scale, and texture, demanding purposeful contrast and accents. In each area, define measurable targets—brightness ranges, color accuracy, and control options. Consider Lighting technology and energy efficiency as your baseline filters: prefer interfaces that adapt to time of day and occupancy, while minimizing waste. Document your priorities, then map fixtures to zones, ensuring cohesive style, consistent output, and scalable upgrades as needs evolve.
Assess Natural Light and Room Constraints
Natural light shapes mood and perceived space, so start by mapping its available quantity, quality, and direction across the day. You assess window size, orientation, and typical occupancy to identify constraints on furniture placement and glare risk. Note how natural shadows shift with sun angle, influencing focal points and color perception. Consider seasonal variation and ceiling height, which affect reflection and diffusion. Evaluate room functions and circulation—do you need clear sightlines or dedicated blackout options for media areas? Window treatments should be prioritized for control without sacrificing daylighting. Plan for adjustable shading, radiance retention, and consistent color rendering. Record critical moments when daylight undermines visibility or creates hotspots. This audit informs where you add secondary lighting and how you balance ambient needs with architectural features.
Layer Ambient, Task, and Accent Lighting
Layer ambient, task, and accent lighting forms a balanced system that supports both function and mood. You blend layers to cover general illumination, focused work, and highlight details, avoiding glare and shadows. Ambient lighting establishes the room’s baseline, while task lighting ensures precision for reading, cooking, or grooming. Accent lighting draws attention to artwork, textures, and architectural features, adding depth without overpowering other layers. Prioritize controllability—dimmers and zoning let you adapt scenes quickly. Choose a mix of sources with compatible color rendering to preserve true hues. Consider energy efficiency by pairing LEDs with smart controls and occupancy sensors where appropriate. Keep proportions simple: air around fixtures reduces glare, and spacing avoids dark spots. Staying mindful of lighting trends helps you modernize without sacrificing practicality.
Choose Color Temperature to Set Mood and Function

Choosing color temperature shapes both mood and function. Balance warmth and brightness to keep spaces inviting yet practical, and match task lighting to the activity at hand. We’ll explore how warmer temps support comfort while cooler temps boost focus for work tasks.
Warmth and Brightness Balance
Which color temperature best fits the space and task at hand? You balance warmth and brightness to support both comfort and clarity. In living areas, blend soft, warm tones with sharper accents to invite conversation while preserving focus. For work zones, lean cooler whites to sharpen mood lighting and reduce fatigue, but keep some warmth nearby to prevent sterility. Use dimmers to adjust intensity by activity and time of day. Achieve color contrast by pairing warm wallpaper or textiles with cooler lighting to guide attention without glare. In kitchens and baths, favor brighter, neutral whites for practicality, adding warmth through decorative lighting accents. Maintain consistency across fixtures to avoid visual discord, ensuring mood lighting supports function without competing with room cues.
Task Lighting for Functionality
Why does color temperature matter for task lighting? You choose color temperature to align function with mood, ensuring visibility without fatigue. For hands-on work, aim for bright, cooler light (around 3500–4100K) to sharpen details and colors. In reading or drafting, maintain consistent color rendering to avoid shadows that distort perception. In kitchens or workspaces, cooler temps boost alertness and accuracy, while warmer temps suit relaxation zones nearby. Use layered lighting with adjustable fixtures to switch temps by task, avoiding a single, static feel. Leverage lighting automation to preset scenes by activity, reducing sudden changes and energy waste. Pair color choices with dimming controls to save energy efficiency without sacrificing clarity, ensuring you regularly calibrate output to maintain true color and contrast.
Select Fixtures by Style, Scale, and Room Function

When selecting fixtures, consider how style, scale, and room function work together to create a cohesive illumination plan. You’ll choose fixtures that align with the space’s aesthetic while delivering appropriate brightness for tasks and mood. Match scale to room dimensions: oversized fixtures can overwhelm small rooms; compact fixtures should balance larger spaces. For styles, prioritize consistency with existing finishes—metal, glass, or fabric—that reflect the room’s character. In kitchens and work areas, prioritize fixture placement that eliminates shadows and provides clear task light without glare. In living and dining zones, layer sources to achieve depth and warmth, balancing ambient, task, and accent roles. Light color matters: select temperatures that support the activity and evoke the desired atmosphere, then adjust as needed for harmony.
Illuminate Architectural Features With Purpose
Architectural features deserve intentional lighting that reveals form and texture without overpowering the space. You illuminate them with purpose, guiding attention to textures, profiles, and scale. Begin with deliberate light placement that emphasizes edges and shadows, adding depth rather than glare. Use targeted fixtures to sculpt architectural lines, avoiding flat, uniform illumination. Choose fixtures that complement the materiality—metal, wood, plaster—without competing with the feature. Guarantee fixture coordination across rooms so stair details, arches, and alcoves read cohesively. Avoid overlighting; select brightness that enhances contrast and legibility. Dim controls let you shift mood without losing definition. Test from multiple angles to confirm even grazing and accurate color rendering. Precision in placement, alignment, and scale elevates architecture and supports overall design harmony.
Lighting Plans for Kitchens, Living Rooms, Baths, and Workspaces
You’ll plan layered kitchen lighting to balance task, ambient, and accent needs, ensuring every zone performs clearly. In living spaces, aim for ambient illumination that supports function while letting layered accents highlight textures and architecture. Start by integrating layered kitchen lighting with ambient living room illumination to create cohesion across activities and moods.
Layered Kitchen Lighting
Layered kitchen lighting combines task, ambient, and accent layers to create a functional, inviting space. You’ll balance visibility with mood by layering sources that work together, not against each other. Use LED technology for efficiency and accurate color rendering, pairing under-cabinet strips with ceiling fixtures for even task light. Incorporate vintage fixtures for character without sacrificing modern performance.
- Establish a primary ambient layer with a dimmable ceiling light to control overall brightness.
- Add task lighting under cabinets to target countertops for precise prep work.
- Introduce accent lighting to highlight architectural features or artwork.
- Layer in decorative lighting, like pendant clusters, to reinforce style while remaining practical.
Ambient Living Room Illumination
Ambient living room illumination sets the tone for comfort and functionality, balancing brightness with mood to support conversations, relaxation, and entertainment. You should layer lighting to control zones, avoiding glare while preserving atmosphere. Begin with ambient outlets like recessed or ceiling fixtures for even base light, then add task lighting for reading and screens, and finish with Accent pieces to emphasize architecture or artwork. Choose Lighting fixtures that align with your color schemes and room scale, avoiding harsh contrasts. Dimmable options let you shift from lively gatherings to quiet nights without changing fixtures. Consider warm color temperatures for cozy vibes and cooler tones for focus zones. Confirm wiring supports future upgrades and that fixtures complement furniture, textiles, and wall treatments for a cohesive, functional space.
Dial in Controls: Dimmers, Presets, and Smart Lighting
Dialing in lighting controls sharpens mood, function, and energy use, so start with the basics: dimmers, presets, and smart lighting work together to tailor brightness, color, and timing to any space.
1) Understand how dimmers modulate intensity to fit tasks and atmosphere, reducing glare and energy waste.
2) Use presets to switch scenes quickly for daily routines or entertaining without fiddling with settings.
3) Leverage smart automation to synchronize lights with occupancy, daylight, and schedules for consistent performance.
4) Pair controls with a centralized system to monitor energy use, adjust remotely, and future-proof your design.
Lighting controls empower efficiency and ambiance; smart automation streamlines operation, elevating both function and feel.
Understand Color Rendering and How Light Alters Perception

Color Rendering Basics guide how light reveals color, texture, and mood in your spaces. You’ll see that light changes perception, making objects look warmer, cooler, or truer to life depending on the spectrum you choose. Start with practical tips to optimize color rendering and influence perception, then apply them to real rooms.
Color Rendering Basics
Color rendering is how a light source makes colors appear in a space, and understanding it helps you judge mood and accuracy. You’ll learn how light quality impacts perception, so you can select sources that meet color accuracy and color temperature goals.
- Define color rendering index (CRI) and note practical limits for interiors.
- Differentiate color temperature and its effect on mood and task visibility.
- Compare how warm versus cool tones shift perceived color saturation.
- Align lamp choices with spaces by balancing CRI, color temperature, and luminance for reliable color rendering.
Light Changes Perception
Light shapes how we perceive interior spaces by altering color and contrast as it hits surfaces. You’ll notice color rendering shifts how furniture reads, walls feel warmer or cooler, and textures gain or lose depth. Perception psychology explains why two rooms with identical colors look different under varied light; the brain interprets brightness and hue against context, influencing mood and spatial judgment. Be mindful of color temperature: cooler light can compress space, while warmer light expands it, especially in low-saturation palettes. You’ll also encounter visual illusions that mislead scale and form, driven by reflections, shadows, and glare. Acknowledge these effects when selecting lamps and fixtures, ensuring the lighting strategy supports the design intent without overstating contrasts. Precision in light quality yields intentional, cohesive environments.
Practical Lighting Tips
To apply what you know about how light shapes perception, start with practical checks on color rendering and its impact on space. You’ll test CRI, color temperature, and how objects read under varying brightness, noting any shifts that erode or enhance mood. Accurate rendering matters for outdoor ambiance and art accentuation, guiding placement and fixture choice.
- Check CRI and TLCI ratings for essential surfaces; adjust to preserve true hues.
- Compare multiple color temperatures at key zones to balance warmth with task needs.
- Use outreach lighting to highlight textures without washing color out.
- Assess glare and spill to maintain cohesion from entry to focal points.
Small-Space Tricks to Make Rooms Feel Bigger
Small spaces demand smart layout and lighting choices that visually expand the room. You’ll maximize perceived space by layering light sources: ambient, task, and accent, with careful placement to avoid clutter shadows. Use wall sconces or slender floor lamps along vertical lines to draw the eye upward, and mirror-positioned fixtures to reflect light without adding bulk. Choose reflective surfaces and light, neutral palettes to extend perception, then introduce pops of color with accents rather than large panels. Implement Creative color schemes that brighten without narrowing, balancing warm and cool tones for depth. Favor Sustainable lighting options—LEDs, dimmers, and efficient task lamps—to maintain brightness while reducing energy. Keep furniture arrangement open, and trim visual clutter to preserve airy flow.
Practical Budgeting and a Simple Fixture Plan
A practical budget can guide your fixture plan without sacrificing style. You’ll align cost, performance, and aesthetics from the start, ensuring each choice serves light goals and room scale. Focus on essential fixtures first, then add accents that elevate mood without inflating costs. Use a disciplined process for Budget planning and fixture selection to maximize impact.
- Define core needs: determine functions, rooms, and zones before purchasing.
- Set a price ceiling per fixture and total budget, then track every purchase.
- Prioritize energy efficiency and dimmable options for flexibility.
- Choose versatile styles that mix well with future decor changes.
Adopt this plan to avoid overbuying, simplify installation, and maintain a cohesive, budget-friendly lighting scheme.
Troubleshoot Common Lighting Pitfalls and Fixes
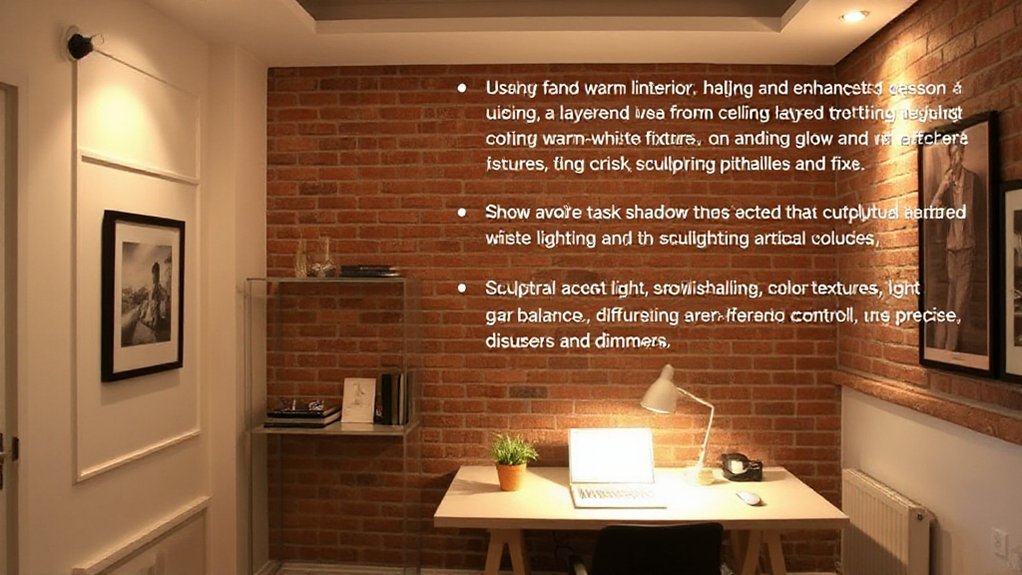
Common lighting pitfalls derail design and mood, but you can fix them quickly by diagnosing issues—then applying targeted improvements. First, test balance between ambient, task, and accent layers; mismatches create glare or flat spaces. If ceiling light glare dominates, swap to lower brightness or diffuse with dimmers and lampshades. Next, check color temperature alignment with space purpose; cooler temps for task zones and warmer hues for living areas feel cohesive. Address underlit corners with narrow-beam accents to add depth. Confirm fixtures are proportionate to ceilings and furniture to avoid cramped looks. Troubleshoot energy waste by replacing old bulbs with high-efficiency options and leveraging lighting technology, such as smart controls. Maintain consistency across rooms to sustain energy efficiency and a harmonious mood.
Frequently Asked Questions
How Do I Balance Mood and Visibility in Mixed-Use Rooms?
In mixed-use rooms, balance mood and visibility by layering light: use ambient contrast for atmosphere, add task layering near work zones, and dimmed connectors for shifts, ensuring glare-free surfaces and consistent color temperature across functions.
What’s the Best Lighting for Photos and Videos at Home?
Natural sunlight is best for photos; use it as your primary source, and supplement with an ambient glow to soften shadows. For videos, combine diffused daylight and steady, cool-balanced LEDs to maintain color accuracy and depth.
How Can I Minimize Glare on Screens and Mirrors?
To minimize glare, position screens away from direct light and use matte finishes; enable anti-glare tech and adjust brightness. For mirrors, diffuse ambient light and angle reflections. This glare reduction improves screen comfort across working and living spaces.
Which Energy-Efficient Options Don’T Sacrifice Color Accuracy?
Nearly 90% of households report satisfied color rendering with LED bulbs; you should too. You choose LED bulbs for accuracy, as good Color rendering keeps colors true, reducing glare while maintaining efficiency and vividness.
How Often Should I Update Lighting to Stay Current?
You should update lighting every 3–5 years to stay current, balancing trends with practical fixture maintenance. Keep an eye on Lighting trends and schedule checks to replace worn components, ensuring efficiency and color accuracy across spaces.
Conclusion
Incorporate lighting as a design tool, not an afterthought. By layering ambient, task, and accent light, you’ll shape mood, function, and space perception. Remember to tailor color temperature to activities and to the room’s highlights. An eye-opening stat: rooms lit with a balanced mix of 3–4 color temperatures feel 20% more inviting than those with a single temperature. Plan budget and fixtures deliberately, test lighting at different times, and adjust to avoid glare and shadows.
About the Author



