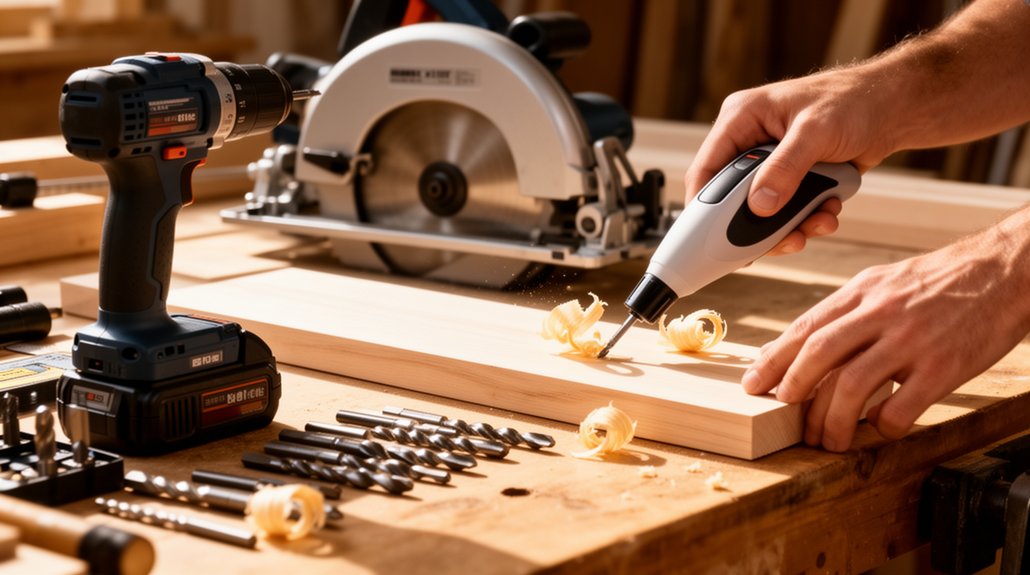
Start with a focused, budget-friendly toolkit: pick core tools (drill/driver, compact jigsaw, cordless flashlight) and add essentials that fit a few versatile tasks. Organize a sturdy workspace with labeled bins, quick-release hooks, and proper lighting. Prioritize safety with PPE, a clean setup, and routine tool maintenance. Choose bits and drivers that cover most jobs, select the right saw for the task, and map tasks to tools to minimize changes. If you keep going, you’ll uncover streamlined workflows and smarter upgrades.
Key Takeaways
- Start with a small, versatile tool kit (drill/driver, compact saw, flashlight) to handle most DIY tasks quickly.
- Prioritize ergonomic, reliable tools with compatible batteries to reduce downtime and fatigue.
- Organize a dedicated workspace with labeled storage, zones, and proper lighting for efficient work flow.
- Use a core set of high-quality bits and accessories, expanding only as needed to keep tasks streamlined.
- Follow a simple safety routine (PPE, clamps, guards) to prevent injuries and keep projects progressing smoothly.
Power Tools Beginners Really Need: A Starter Guide

If you’re just starting out, you don’t need every tool on the shelf—focus on a core set that covers most beginner tasks. You’ll build solid capability by choosing reliable power tool brands known for consistency and service. Start with a drill/driver, a compact jig saw, and a cordless flashlight to illuminate work areas. Add a multimeter and measuring tape for precise DIY project planning, plus a small portable workbench for stability. Prioritize ergonomics and safety features, like balanced weight and secure grips. Learn your tool’s basics first, then tackle simple tasks before expanding your collection. Rely on straightforward projects to validate your purchases, avoiding overreach. Keep a running note of what you use most to guide future upgrades in power tool brands and planning.
Building a Versatile Tool Kit on a Budget
Building a versatile tool kit on a budget starts with prioritizing multiuse tools and core performance over brand prestige or surplus accessories. You’ll maximize value by selecting versatile, reliable tools that cover multiple tasks and resist wear. Focus on foundational capabilities, then expand as needs arise. Budget shopping means comparing specs, warranties, and real-world reviews instead of chasing the latest tool brand buzz. Choose tools with common accessories and compatible batteries to avoid unnecessary duplication.
1) Prioritize multiuse tools with interchangeable bits and attachments
2) Favor reputable brands offering robust warranties and service
3) Plan purchases around essential tasks and future projects
A thoughtful combination of affordable, durable options keeps you productive without overspending, ensuring you stay prepared for varied tasks while maintaining quality control.
Essential PPE and Safe Handling: What You Need to Start Right
You start right by selecting essential PPE and practicing safe handling to protect yourself on every task. Wear the basics—eye protection, hearing protection, gloves, and a dust mask as needed—and follow manufacturer guidelines for use and maintenance. Keep start-right habits simple: inspect tools, secure work, and unplug or set power off before changing bits or accessories.
Personal Protective Equipment
Personal protective equipment (PPE) is essential from the moment you pick up a power tool; choosing the right gear and using it correctly prevents injuries and keeps projects moving. You should assess hazards, then select PPE that fits well and stays in place. Prioritize visibility, comfort, and durability so gear won’t be a distraction.
- Safety glasses or goggles to protect eyes from flying debris.
- Hearing protection to reduce long-term noise risk.
- Protective gloves and a properly fitted respirator when dust or chemicals are involved.
Always inspect PPE before use and replace worn or damaged items. Keep PPE clean and stored correctly to maintain effectiveness. Remember: personal protective equipment is only effective when you wear it consistently as you work. safety gear
Safe Handling Practices
Safe handling starts with the right PPE and smart habits that keep you in control from the moment you pick up a tool. You assess the task, select safety gear, and confirm your stance and grip before each cut or drill. Maintain clean work surfaces, organize cords, and secure your workpiece to prevent slips. Use handling techniques that match the tool’s design—steady pressure, controlled motions, and gradual speed changes. Inspect cords and guards, and unplug to adjust or switch bits. Keep hands clear of blades and rotating parts, and wear eye and hearing protection as a baseline. Plan your sequence, anticipate kickback risks, and pause when unsure. Consistency beats reaction; proper PPE and disciplined handling reduce hazards and boost reliable results.
Start-Right Essentials
When you’re tackling DIY tasks, you start right by selecting essential PPE and confirming safe handling practices before any cut or drill. Start-right essentials protect you from common hazards and keep your project on track, aligning with practical DIY project planning and debunking Power tool myths.
- Eye protection, hearing protection, and a sturdy glove set for grip and skin safety
- Dust mask or respirator, plus a tight-fitting face shield for fine particles
- Well-fit PPE, plus a clear, step-by-step safety checklist and tool-specific instructions
Stay concise: examine the work area, verify guards and bits, and reset power tools to off before adjustments. Prioritize PPE, enforce safe handling, and reduce risk while you execute precise cuts and clean finishes.
Set Up a Clean, Efficient Workspace for Tools

To set up a clean, efficient workspace for your power tools, start by designating a sturdy workbench with ample surface area and a clear space for each task. Next, organize a practical layout that minimizes reaching and backtracking, placing frequently used tools within easy reach. Implement dedicated zones for cutting, drilling, and assembly, with a clear path to a dust-collection or vacuum system. Establish tool storage that protects blades, bits, and accessories, using labeled bins or drawers to speed retrieval. Keep cords managed with clips or a retractable reel, and install adequate lighting to reduce mistakes. Maintain a clean surface by ending sessions with a quick wipe and tray sweep. Prioritize workspace organization and tool storage to sustain efficiency and safety.
Choose Tools by DIY Task
Focus your tool choices on the task at hand: pick task-specific tools and quick-change accessories that match your project needs. This keeps setups fast and avoids wasted time hunting for the right bit or blade. Start with a clear task plan, then select the core tool(s) and compatible fast-change parts to maximize efficiency.
Task-Specific Tool Picks
Task-Specific Tool Picks: choosing the right tool for each DIY task saves time and avoids errors. You’ll optimize outcomes by matching tools to tasks, not habits. Focus on efficiency, safety, and accuracy, integrating power tool ergonomics into every choice and aligning actions with DIY project planning. Prioritize balanced weight, grip comfort, and controlled power to reduce fatigue and mistakes.
1) Finishing tasks: compact palm sander, detail sander, trimming router for smooth edges.
2) Cutting tasks: circular saw, mini reciprocating saw, miter saw with accurate angles.
3) Drilling and driving: variable-speed drill/driver, impact driver, Bosch-style bit set with labeled bits.
Quick-Change Accessories Guide
Quick-change accessories save you time and keep projects moving. You’ll focus on selecting tools that swap bits, blades, or attachments with minimal effort, so you stay productive without downtime. Start by evaluating accessory compatibility with your base tool’s quick-change mechanisms—check spindle sizes, collar types, and locking methods before purchasing. Look for standardized shanks and universally compatible interfaces to avoid mismatches. When you set up, keep a consistent sequence: disengage, swap, lock, and test with light pressure. Favor robust detents, clear alignment marks, and tool-tensioning that resists creep under load. Prioritize kits that include a range of common accessories, plus adapters for niche tasks. With precise pairing of components, you’ll reduce fuss, extend tool life, and maintain steady workflow.
Organize Cords, Bits, and Accessories for Quick Access
To keep your workspace efficient, organize cords, bits, and accessories so you can grab what you need in seconds. You’ll reduce downtime and risk by assigning a dedicated spot for every item, labeled clearly, with quick-release hooks and magnetic strips for small fasteners. Keep cords coiled neatly with Velcro ties, and store tools on a wall rack to prevent on-shelf clutter. Apply consistent naming conventions in a single index so you can locate parts instantly. This is cord management and accessory organization done right.
- Use labeled bins for bits by size and type
- Mount a wall rack for drills and drivers with color-coded holders
- Implement a visible inventory checklist for quick reordering
Drills, Drivers, and Drill Bits: What You’ll Really Use Most
If you’re choosing tools for daily tasks, focus on the bits you’ll reach for most: standard twist bits for wood and metal, along with a few high-use driver bits. A quick-change driver keeps projects moving, and having a small set of versatile drill bits covers most jobs without clutter. Start with the essentials and add specialty bits only as needed to stay efficient.
Most Used Drill Bits
When you’re assembling a toolbox for DIY tasks, the drill bits, drivers, and drill bit sets you actually use matter more than their names or fancy features. In practice, you’ll rely on a small set of bits that cover common tasks, with predictable performance and clear compatibility.
1) Keep a high-carbon steel bit for general drilling in wood and soft plastics.
2) Use a sharp twist bit for metal, paired with appropriate lubricant to preserve edge life.
3) Reserve a carbide-tipped bit for harder materials and repetitive drilling, ensuring accessory compatibility with your chuck size.
This approach minimizes wastage and confusion, helping you choose drill bit types you’ll actually reach for, not just the latest release.
Versatile Quick-Change Drivers
Versatile quick-change drivers streamline your setup by letting you swap bits and heads in seconds, without hunting for wrenches or adapters. This system boosts efficiency by reducing downtime between tasks and keeping you focused on the job. Choose drivers with a reliable, one-handed chuck and a balanced weight for comfortable, precise control. When you swap bits, verify correct shank size and drive type to maintain accessory compatibility across applications. Keep cord management in mind: corded models should roll neatly at the base, while cordless setups benefit from compact chargers and organized holsters. Quick-change collars or magnetic holders minimize dropped bits and maximize throughput. For most DIY tasks, a versatile driver covers drilling, driving, and fastening needs, reducing tool clutter and expanding your project options.
Saws for Time-Saving Decisions: Which Type to Use When
Choosing the right saw saves hours on any project. When you decide, match the cut to the tool’s strengths and your material. You’ll save time and avoid rework by considering blade types and cutting depth at the outset. Use the right saw to minimize trips to the shop and maximize accuracy.
- Choose a circular saw for long, straight cuts with adjustable cutting depth to prevent blade overload.
- Pick a reciprocating saw for fast rough cuts and demolition, keeping blade types suitable for wood, metal, or plastic.
- Use a miter saw for precise crosscuts and angled cuts, focusing on consistent cutting depth and clean edges.
Remember: know the saw blade types you’ll rely on, and check cutting depth before each job to prevent surprises.
Sanders and Planers for Smooth Finishes: Quick Guide

You’ll start with proper sanding surface prep to guarantee a clean, even base for finish. Planer finish quality matters, so monitor blade sharpness and feed rate to avoid tear-out. Keep it safe by following tool safety tips and using appropriate clamps, PPE, and dust control.
Sanding Surface Prep
Sanding surface prep matters most when you’re aiming for a smooth, durable finish, and the right tools make the difference. You prep to remove imperfections, define a uniform surface, and promote coating adhesion from the start. Use sharp, appropriate grits and steady motion to avoid gouges or burnishing. Keep the workpiece dry, dust-free, and clamped for accuracy.
- Choose grit progression: start coarse to flatten, finish fine for a clean finish, ensuring consistent surface texture.
- Maintain tool control: light passes, even pressure, and slow movements yield uniform results and better adhesion.
- Clean between steps: wipe or vacuum thoroughly to prevent embedment and ensure reliable coating adhesion.
Surface preparation dictates result; neglect it, and coatings won’t bond reliably.
Planer Finish Quality
Planer finish quality hinges on how you set and use the tool. Begin with sharp blades and clean, flat stock to prevent tearing and uneven chips. Calibrate the depth stop precisely; small, consistent passes yield the cleanest surface. Move steadily with controlled pressure, letting the planer do the work rather than forcing it. If you notice fuzz or torn grain, back off the cut and re-run at a shallower depth to improve the final planing pass. Planer finish requires attention to feed direction and surface condition—avoid knots and highly resinous areas that can mar the edge. For quality control, check planed faces with a straightedge and feel for flatness, then remove any remaining nibs with light passes. Maintain cutters, bearings, and drift to guarantee consistent results.
Tool Safety Tips
Dust and noise aren’t the only hazards you face with sanders and planers; kickback, blade or belt surprises, and airborne grit can bite if you don’t respect the tool. You’ll reduce risk by practicing solid ergonomics and verifying safety certifications before use. Maintain a neutral stance, keep wrists straight, and let the tool do the work without forcing it. Inspect guards, blades, and belts for wear; replace damaged parts promptly. Use hearing and eye protection, and ensure dust collection is connected and effective. Remember tool ergonomics influence control and fatigue, so adjust handles and stance to fit your body. Certifications indicate built-in safety standards, not perfection.
- Check guards and blades before every session
- Use proper PPE and dust collection consistently
- Confirm tool is within regulatory safety certifications
Routers, Bits, and Jigs for Precise Joinery
Routers, bits, and jigs are the core tools for precise joinery, delivering clean dados, dovetails, and mortises with repeatable accuracy. You’ll rely on a quality router, sharp router bits, and purpose-built joinery jigs to control depth, alignment, and repeatability. Start with solid stock, square edges, and proper clamping to eliminate drift. Choose bits with carbide tips for longevity and clean cuts; select down-cut for clean top surfaces or up-cut for bit removal efficiency when needed. Jigs must be secure, calibrated, and matched to the cut. Practice safe, shallow passes, feeding steadily to minimize tear-out. Record settings for future tasks, and label bits and jigs for quick selection. Mastery comes from consistent setups, precise measurements, and disciplined work flow. Router bits, joinery jigs.
Measuring and Marking Tools for Accurate Results
With accurate measuring and marking, you set the foundation for every cut and join. You’ll prioritize reliability by choosing calibrated tools and proven methods, ensuring consistent results project to project. Precision isn’t luck; it’s disciplined use of proper instruments and marking techniques.
- Tape measures, calipers, and squares: verify calibration before every project to secure measurement accuracy.
- Marking tools: use sharp pencils, scribes, or marking knives for clean, transferable lines on wood or metal.
- Alignment aids: pegs, benches, and quick-release guides keep workpieces true during marking and setup.
Practice careful measurement accuracy and clean marking techniques, then double-check before cutting. Small errors multiply, but deliberate checks prevent waste and defects.
Routine Tool Maintenance: Cleaning, Lubrication, and Storage
Regular maintenance keeps power tools safe and reliable, so you should establish a routine for cleaning, lubrication, and storage. You perform quick after-use cleanup to remove dust and debris, then inspect for wear. Wipe blades, bits, and housings with an appropriate solvent, and dry completely before storage. Lubricate moving parts per manufacturer guidance, and avoid over-application that attracts grit. Check screws and guards for tightness, replacing damaged components promptly. Tool calibration should occur at defined intervals to ensure accuracy and repeatable results; document any drift and recalibrate as needed. Store tools in a dry, organized cabinet or case, with batteries removed if applicable. Battery maintenance is essential: keep contacts clean, charge with correct gear, and avoid deep discharges. Regular maintenance minimizes downtime and extends tool life.
Power Tool Safety Habits That Stick
Power tool safety habits stick when you build them into daily routine: start every project with a quick safety check, PPE on, and tools powered down before any adjustments. This mindset defeats power tool myths and keeps DIY safety at the forefront. You’ll perform a quick inspection, secure clamps, and verify guards are in place, every time. Stay focused, minimize distractions, and never bypass safety devices. Consistency prevents injuries and extends tool life.
- Establish a pre-work ritual that includes PPE, work area clearance, and tool power-off checks.
- Follow manufacturer instructions precisely; respect guards, switches, and bit/blade requirements.
- Address hazards immediately; if something feels off, pause, reassess, and adjust before continuing.
Simple Project Workflow: From Plan to Finished Task
You’ll start with a clear plan, then translate it into a concrete, stepwise workflow you can follow end-to-end. Begin with a precise objective, define measurable milestones, and estimate resources. In DIY project planning, map each task to a specific tool and time block, wiring safety checks into every step. Prioritize your workflow: prep, assemble, test, refine, and finish. Use a logical sequence that minimizes tool changes and movement, maximizing power tool ergonomics by aligning work posture, grips, and support surfaces. Document criteria for success and potential failure modes to preempt distractions. Schedule inspections after key stages, not just at the end. Maintain a clean workspace and labeled components to speed progression. This disciplined rhythm keeps complexity low and outcomes predictable.
Troubleshooting Common Tool Glitches Without Drama
When a tool stalls or misbehaves, you fix it fast by sticking to a simple, repeatable procedure. You’ll diagnose calmly, identify the fault, and reset expectations with a clear plan. Precision matters: verify power, inspect connections, and test with a known-good accessory. If issues persist, move to targeted checks without drama.
- Tool calibration: recheck settings, measure against the spec, adjust until repeatable results appear.
- Troubleshooting power cords: inspect for damage, test continuity, replace frayed segments or the cord entirely.
- Confirm operation: run a dry test on scrap material to confirm consistent performance before resuming tasks.
Upgrading Mindfully: When to Invest in Better Tools
After you’ve learned to troubleshoot calmly, the next smart move is knowing when to upgrade. Mindful upgrading means pausing to assess needs before spending. Start with purpose: which tasks recur, which tools show clear performance limits, and which safety concerns arise. If a tool underperforms in routine use, prioritize repair or upgrade rather than impulse buys. Set a threshold: if a tool’s efficiency drops below a defined level, or maintenance costs exceed a practical portion of replacement cost, consider tool investment. Compare specs, warranty, and compatibility with existing bits and accessories. Favor versatility over novelty, look for ergonomic design, balanced weight, and reliable motors. Plan purchases around a project calendar, not trends, and document costs to guarantee long-term value.
Frequently Asked Questions
How to Safely Store Power Tools After Use?
Store tools after use by unplugging, cleaning blades, and drying surfaces. Lubricate moving parts as needed, and return to a dry, organized cabinet. Follow Safety guidelines and Tool maintenance routines to prevent rust and accidents.
Which Power Tool Brands Offer Best Value?
Brand value hinges on reliability and warranty, so you’ll pick DeWalt, Makita, and Milwaukee for best value. Prioritize power tool maintenance and ergonomic design to minimize fatigue and maximize performance during steady, precise projects.
How to Identify Counterfeit Drill Bits?
You identify counterfeit drill bits by inspecting packaging, logos, and consistency; verify with counterfeit detection methods, compare to genuine branding, and test the bit’s fit and performance. Trust Genuine branding, follow manufacturer specs, and report suspicious items promptly.
What Are Signs a Tool Needs Calibration?
Calibration indicators include readings drifting, inaccurate cuts, and inconsistent depth. You should routinely check tool maintenance, align with manufacturer specs, and recalibrate when needed to guarantee precision and safety during projects.
How to Dispose of Battery Packs Responsibly?
You should dispose of battery packs at a certified collection site or retailer; avoid trash disposal. Use battery recycling programs, follow local guidelines, and treat damaged packs as hazardous waste to prevent leaks and environmental harm.
Conclusion
You’ve built a quiet library of power, where each tool is a steady librarian on a well-lit shelf. When you plan, you read the room; when you work, you measure twice and cut once; when you troubleshoot, you keep the story simple and calm. The workshop becomes a trusted map, guiding you home with fewer detours. Stay curious, upgrade thoughtfully, and let safety be your compass. In this life, your tools don’t merely work—they lead you forward.
About the Author