Yes—you can install a smart thermostat yourself, but start with safety and compatibility. Verify your system type, power needs, and whether a C-wire is available. Power down, remove the old unit, label wires, and mount the new base level. Connect wires to matching terminals, attach the C-wire if required, and secure screws without over‑torquing. Power up, connect to Wi‑Fi, and complete app setup. If problems pop up, you’ll find tips that guide you further.
Key Takeaways
- Verify compatibility, confirm system type, and ensure a C-wire or appropriate power solution before starting.
- Power down the HVAC, remove the old thermostat, label wires, and mount the new base level.
- Connect each wire to the correct terminal, secure screws, and ensure all terminals are occupied.
- Power up, connect to Wi‑Fi, and complete app setup, including cloud sync and basic configuration.
- Test by adjusting temperatures and modes; troubleshoot power, Wi‑Fi, or wiring issues and seek pro help if needed.
Can I Install a Smart Thermostat Myself?

Yes, you can install a smart thermostat yourself, but it depends on your HVAC setup and comfort with electrical work. Start by understanding what your system uses (gas, electric, heat pump) and the existing wiring. You’ll avoid common Smart thermostat myths by focusing on clear compatibility, not marketing promises. If you have a simple 2-wire heat-only or a standard 4-wire system, you may proceed with confidence. For multi-stage, 5+ wires, or systems with a C-wire, you’ll need careful wiring and possibly a jumper or power extender. Follow DIY installation tips: turn off power at the breaker, label wires, and reference the thermostat’s wiring diagram. When in doubt, consult the manufacturer’s guidance or a professional.
Check Compatibility and Safety First
Before you install, verify your system’s compatibility and safety requirements. First, check your existing thermostat’s wiring and compatibility list for the model you’re buying; some systems use proprietary controls or uncommon wiring that won’t support smart devices. Confirm drive voltage, common wire availability (C‑wire), and whether your furnace, boiler, or heat pump supports Wi‑Fi modules. Review your HVAC updater’s safety guidelines and any local code recommendations. Look for energy efficiency features your system can leverage with a smart thermostat, such as optimized heating cycles and scheduling. Assure your electrical panel and circuits can handle added load and that there’s reliable network access for updates. After confirming, you can expect improved user comfort and measurable energy efficiency gains.
Wire It Up: Step-by-Step Installation
Begin by powering down your system and removing the old thermostat to expose the wiring. You’ll label each wire and note its color, then verify the furnace or air handler is powered off. Connect the install base to the wall, ensuring a secure, level mount. Insert wires one by one into the corresponding terminals on the new unit, tightening screws firmly but not over‑torquing. If your system uses a common wire (C) for power, attach it to the C terminal to support reliable power sourcing. Avoid piggybacking wires or using adapters that aren’t rated for your model. Route and tuck cables cleanly, then reattach the faceplate. Double‑check that the thermostat sits flush and that all terminals are occupied as required by your wiring diagram.
Connect, Configure, and Test in the App

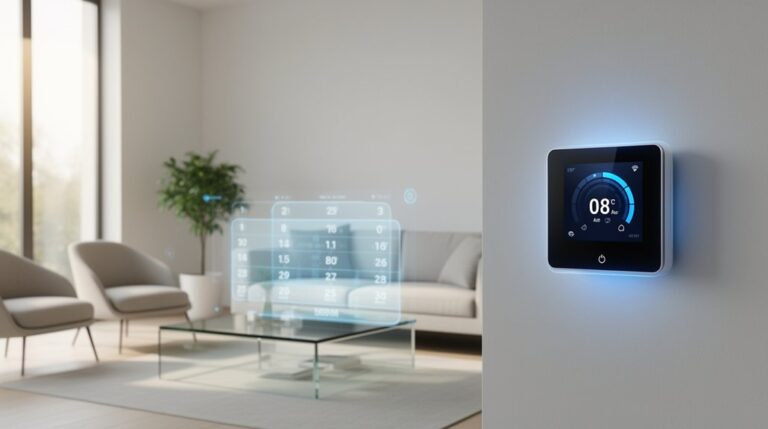
After wiring is complete, you’ll connect the thermostat to your home network, configure device settings in the app, and run a quick test to confirm everything operates as intended. Open the thermostat’s companion app and sign in. The app’s user interface should present a clear dashboard with temperature, mode, and schedules. Connect to Wi‑Fi if prompted, then sync your device to the cloud for remote control. Review basic settings: scheduling, hold temperatures, and auto‑away. Enable energy savings features like adaptive recovery and smart scheduling, calibrating that your locale’s seasonal changes are reflected. Run a test by adjusting setpoints, switching modes, and confirming responsive changes on the display and in the app. Confirm data shows current readings and a visible efficiency trend for ongoing optimization.
Troubleshooting and When to Call a Pro
If you notice the thermostat isn’t responding as expected, start with quick checks before calling for help: confirm the device is powered, verify Wi‑Fi is stable, and guarantee the user interface isn’t paused or in a dimmed display mode. If issues persist, confirm compatibility with your HVAC system and verify the correct wiring labels were used during setup, then recheck the app’s device status and firmware version. Common DIY pitfalls include skipping a power cycle, ignoring firmware updates, and misinterpreting error codes. When troubleshooting fails, a professional assessment becomes prudent to avoid safety risks or further damage. Schedule an inspection if the unit overheats, emits irregular noises, or if performance remains inconsistent across zones. Seek professional help promptly to restore reliability and maintain system efficiency.
Frequently Asked Questions
Will My Existing Wiring Support a Smart Thermostat?
Your existing wiring might be compatible, but you should perform a Smart wiring check first. Do a thorough Compatibility check, verify C-wire presence, and confirm you won’t overload circuits before proceeding with installation.
How Do I Hide Exposed Wiring Safely?
To hide exposed wiring safely, use wire concealment by routing cables inside walls or along baseboards, securing with clips. Follow safety precautions: shut off power, test circuits, use a low-voltage box, and avoid overloading outlets.
Can I Power a Thermostat Without a C-Wire?
Yes, you can power a thermostat without a C-wire, but you must confirm compatibility first. Imagine tight wiring savings becoming real as you perform a precise compatibility check, then you’ll enjoy energy savings without compromising safety or performance.
Is a C-Wire Required for Wi-Fi Connectivity?
No, a C-wire isn’t strictly required for Wi-Fi, but it helps with reliability. Confirm Smart thermostat compatibility with your system; wireless connectivity may work, yet some setups perform better with a C-wire. Consider compatibility and power needs.
What Maintenance After Installation Is Needed?
Like clockwork, you’ll need ongoing maintenance after installation: check Thermostat calibration monthly and after seasonal changes, and replace the battery when dim display or alerts appear. You’ll perform battery replacement promptly to prevent power interruptions.
Conclusion
You can absolutely install a smart thermostat yourself—if you follow the steps, you’ll feel like you just rewired a spaceship. Check compatibility, shut off power, and wire with care; one loose wire becomes a gremlin under your thermostat. Configure in the app, test every function, and watch your energy bills shrink before your eyes. If a fuse blows or you see sparks, don’t be heroic—call a pro. Most folks nail it and brag about DIY mastery tomorrow.
About the Author