

To install artificial grass in your garden, start with planning: map sun, shade, and foot traffic, then choose a climate-appropriate grass with the right pile height and drainage. Measure the area precisely, add a 5–10% waste factor, and prepare the ground with a weed barrier and a well-graded base. Lay perforated drainage, align seams tightly, and secure with edging. Brush and infill correctly, then maintain with regular debris removal—you’ll discover lasting beauty and low maintenance, with more steps awaiting you.
Key Takeaways
- Plan the layout by mapping sun, shade, foot traffic, drainage, and seasonal sun angles to choose suitable turf and placement.
- Measure accurately, add 5–10% waste, and budget for turf, tools, labor, and contingencies.
- Prepare the ground with a weed barrier, proper edging, and a slightly sloped, level base for drainage.
- Install a drainage layer (gravel or perforated pipe) and use breathable fabric to separate layers and prevent soil intrusion.
- Lay turf with tight seams, secure edges, brush to align pile direction, and add appropriate infill for durability and safety.
What You’Ll Achieve With Artificial Grass in Your Garden

Artificial grass transforms your garden by delivering a pristine, evergreen lawn year-round with minimal maintenance. You’ll observe immediate, uniform turf that eliminates brown patches and reduces mowing cycles, freeing time for purposeful planting and seating arrangements. With consistent blade height, you gain precise edging and cleaner lines, enhancing garden aesthetics and boosting curb appeal. You’ll experience durable resilience under foot traffic, pets, and seasonal weather, maintaining color without irrigation concerns or soil compaction. The surface supports multi-use spaces for entertaining, play, and relaxation, while reducing mud and puddling after rain. As you optimize drainage, you’ll notice steadier ground conditions and easier cleanup. Garden aesthetics improve through cohesive color progressions and defined zones, and wildlife attraction expands modestly when native plantings complement the synthetic turf.
Assess Your Space: Sun, Shade, and Foot Traffic
To plan effectively, start by mapping how sun, shade, and foot traffic interact with your space after choosing artificial grass. Identify sunny zones, shade pockets, and the paths that will bear the most wear. Consider how heat retention from synthetic fibers may affect play areas and seating spots. Assess drainage: a compacted, water‑retaining area can cause puddling beneath turf, while well‑graded soil promotes drying. Observe seasonal sun angles to anticipate shade shifts and potential turf shadowing. Monitor garden pests and signs of soil acidity that could influence installation details, edge securement, and weed suppression under the mat. Finally, align light exposure with maintenance needs, making sure edges are treated to prevent weed ingress and promote consistent, durable performance.
Choose Artificial Grass for Climate, Use, and Longevity
Choosing the right artificial grass starts with climate compatibility, ensuring it performs in your conditions year-round. Consider your use-case—pets, kids, or high-traffic areas—to select a pile height and density that resist wear and look fresh longer. This sets the framework for longevity and low maintenance, tailored to how you’ll actually use the space.
Climate Suitability
Climate suitability matters: selecting artificial grass that matches your local conditions guarantees ideal performance, longevity, and visual appeal. To guarantee climate compatibility, assess sun exposure, temperature ranges, and moisture patterns for your site. Consider seasonal variations and how they affect fiber stiffness, drainage, and maintenance needs. Your choices should reflect the realities of your climate to minimize early wear and maximize usability year-round.
- Evaluate sun hours and peak heat zones to select heat-resistant fibers and backing.
- Match product density and pile height to rainfall and moisture cycles for optimal drainage.
- Plan for temperature swings and UV exposure with color-stable materials and warrantees.
Longevity and Use-Case
Longevity hinges on selecting grass that suits your climate, anticipated use, and expected wear. You’ll maximize lifespan by matching pile density, drainage, and UV stability to local conditions, then balancing maintenance needs with performance. For high-traffic zones, choose renditions designed for wear resistance and recovery, not just appearance. If you want garden privacy, select taller, denser fibers that retain shape and screening even after seasons of use. In pets or kids play areas, prioritize drainage and safety-backed textures to reduce wear and keep infill stable. For wildlife attraction, consider grasses with realistic texture and color that resist fading, ensuring sustained appeal year after year. Finally, plan for seasonal maintenance—brush, rinse, and vacuum as needed—to preserve form, color, and function.
Measure the Area for Accurate Turf Needs
Accurately measuring the area is essential to order the right amount of turf and avoid waste. Before you start, define boundaries clearly and account for irregular shapes. Use basic geometry to split areas into rectangles and triangles, then total the square footage.
- Measure length and width for each rectangular section, multiplying to get area.
- For irregular curves, divide into triangles and use standard formulas to sum areas.
- Add a 5–10% waste factor if you expect cuts or pattern repeats for garden décor and wildlife attraction features.
Keep measurements precise with a laser or steel tape, and record edges to avoid miscounts. Double-check slopes or drainage gradients, as these affect turf alignment and stability. Accurate data supports efficient installation and a clean aesthetic.
Budget for Materials, Tools, and Labor

With your area measured, you can translate those figures into a precise budget for artificial turf materials, tools, and labor. Start by itemizing durability-focused turf rolls, adhesive, edging, and infill, then estimate quantity with waste tolerance in mind. Include underlayment or padding if you want a softer feel, and budget for weed barrier where needed. Tools fall into two groups: installation essentials (knife, spline, seam tape, seaming tool) and finishing supplies (brush, weed killer, protective gloves). Labor costs hinge on scope: DIY saves, while professional installation adds reliability and warranty options. Plan for extras like Planting trees alongside the project and coordinating garden lighting for ambience, ensuring all components align with your budget and timing. Reconcile costs with a contingency of 5–10 percent.
Prepare the Ground: Clear and Grade Properly
Clear the site and establish a solid grade before laying any turf. You’ll set a stable foundation by removing debris, grading to drain, and confirming level surfaces. Precision now prevents reseeding later and optimizes drainage for artificial grass performance.
- Inspect the soil profile with soil testing to confirm compaction and moisture levels, adjusting as needed.
- Implement pest control measures if signs of insects or rodents appear, ensuring a clean, intact base.
- Establish a uniform grade with a slight slope away from structures, using a straightedge and strings for accuracy.
Proceed only after tests and adjustments, then compact lightly to create a firm, even plane. Mark high spots and low spots, relevel, and verify drainage before moving to the base preparation stage.
Create a Solid Sub-Base: Weed Barrier, Edging, and Slope
Now that the ground is prepared, you’ll establish a solid sub-base that keeps the artificial turf stable and drains correctly. Begin with a weed barrier laid over the soil, extending beyond the turf footprint, to prevent weed intrusion and reduce capillary rise. Compact the sub-base material evenly, avoiding low spots that could cause water pooling or turf wrinkles. Edging should define the perimeter precisely; use durable edging techniques to secure the limit and maintain a clean changeover between lawn and borders. Slope the base slightly away from structures to promote drainage, typically 1–2 degrees or about 1/8 inch per 12 inches. Guarantee the edges align with the planned line, avoiding gaps. Confirm the surface is firm, level, and ready for the turf lay-down.
Install the Drainage Layer for Weatherproofing

You’ll establish a robust drainage layer to manage moisture and prevent pooling, setting the foundation for reliable weatherproofing. We’ll focus on the essentials of the drainage layer, how layering affects durability, and the correct sequencing to guarantee effective water movement. Proceed with precise techniques for proper layering to deliver a stable, long-lasting lawn.
Drainage Layer Essentials
A proper drainage layer is essential for weatherproofing and long-term performance, so install it beneath the base and pavers to prevent water buildup and freeze-thaw damage. You’ll focus on effective water drainage and minimizing soil compaction to sustain grass integrity.
- Assess site grade and install a perforated pipe or gravel layer to channel water away.
- Use angular, well-graded aggregate to promote voids for drainage while reducing soil compaction.
- Compact lightly in stages, testing drainage after each pass to prevent future pooling.
Maintain a consistent thickness per zone, ensuring the layer remains able to drain freely under traffic. Avoid clogging by separating the drainage bed with geotextile fabric. Check and adjust slopes seasonally to preserve runoff efficiency.
Weatherproofing Through Layering
Weatherproofing hinges on a well-designed drainage layer that protects the turf from moisture-related damage. You install a perforated pipe or slotted drainage bed beneath the base to move water quickly away, preventing pooling and root rot. Compact layers above it, with a breathable geotextile, ensure separation from soil while maintaining flow paths. You then add a coarse aggregate or crushed stone layer to create a stable, sloped surface that directs runoff toward outlets. Confirm the layer thickness supports traffic from garden furniture and vehicles without compressing excessively. Keep the installation uniform to avoid gullies. This drainage-focused approach also influences wildlife attraction, as proper water management maintains a hospitable microclimate. Finally, verify accessibility for routine inspection and repairs, maintaining consistent performance and long-term weatherproofing.
Proper Layering Techniques
To install the drainage layer effectively, start by selecting a permeable base material and a properly sized perforated pipe or slotted drainage bed that directs water away from the turf. You should then add a compacted sub-base, followed by a breathable filter fabric to prevent soil intrusion. This layering ensures weatherproofing and longevity.
- Choose a base that drains easily and remains stable under frequent use.
- Install a perforated pipe or drainage bed with outlets directed to an appropriate discharge area.
- Cap with a filter fabric and granular top layer to balance drainage and turf support.
This approach preserves garden aesthetics and supports wildlife attraction by reducing puddling, keeping surfaces safe, and maintaining realistic footing without compromising flow.
Lay the Turf: Align Seams and Position for a Seamless Look
Seam the turf pieces with careful attention to alignment, then position them so that the seams butt tightly and the edges meet without gaps. You’ll verify straight lines across runs, rotating pieces as needed to maintain uniform grain direction. For Seam arrangement, avoid overlaps and ensure no underlapped edges create trip points; use a straightedge or chalk line to confirm staggered joints follow a natural, offset pattern. When laying, place the seams so they run in low-visibility zones and sketch out where transitions occur. For Seam joining, press edges firmly together and align backing perforations if present, preventing lift at the seam. Taper cuts to fit irregular borders, then recheck alignment after initial flattening. Once satisfied, proceed to secure edges in the next step.
Secure and Join Rolls for a Tight, Clean Finish
To secure a tight finish, you’ll align each roll edge precisely and fix the seams so they sit flush with no gaps. Match tack points carefully along the joint to guarantee consistent tension without pulling the turf. Verify continuous seam strength by inspecting both alignment and attachment before trimming excess carcass.
Secure Seam Alignment
Securing seam alignment starts with precise roll placement and consistent tension, so the seams meet evenly without gaps. You’ll achieve this by aligning edges carefully, then using a short roller to set the seam while maintaining uniform pressure along the joint. Focus on maintaining flat, wrinkle-free surfaces to enhance seam durability and overall appearance.
- Align edges meticulously to prevent overlap or gaps.
- Use steady, even pressure along the seam to reinforce joint security.
- Re-check with a straightedge to confirm continuous seams and uniform height.
This approach ensures seam alignment remains tight and visually seamless, contributing to lasting joint security. Maintain awareness of roll curvature and temperature effects, adjusting tension as needed for a professional finish.
Proper Tack Matching
Have you confirmed that your tack lines up perfectly before joining rolls? Proper tack matching requires precise alignment along both edges to prevent gaps or overlaps. Start by laying the first roll with a straight, tensioned pull, then position the second roll to meet the tack lines without distorting pile height. Use a sharp utility knife to trim uneven progressions, and secure joints with overlapping tacks that create a continuous surface. Check that each tack is driven flush, not cocked, to avoid ridges that disrupt artificial aesthetics. Maintain consistent tension across the seam and verify that adjoining edges remain parallel as you advance. This method supports eco friendly options while delivering durable, visually seamless results.
Clean Joint Seams
Clean joint seams are the benchmark of a professional install, ensuring a tight, clean finish from edge to edge. You’ll secure rolls and prevent gaps by focusing on seam integrity, proper adhesive selection, and precise alignment. Follow these steps to achieve lasting results:
- joint sealing: apply compatible seam tape and adhesive with uniform pressure to create a seamless bond.
- seam repair: inspect for gaps or lifts; re-adhere promptly to maintain uniform height and appearance.
- test and trim: roll the area, verify level edges, and trim excess material to maintain continuity.
Trim and Shape Edges for a Neat Border
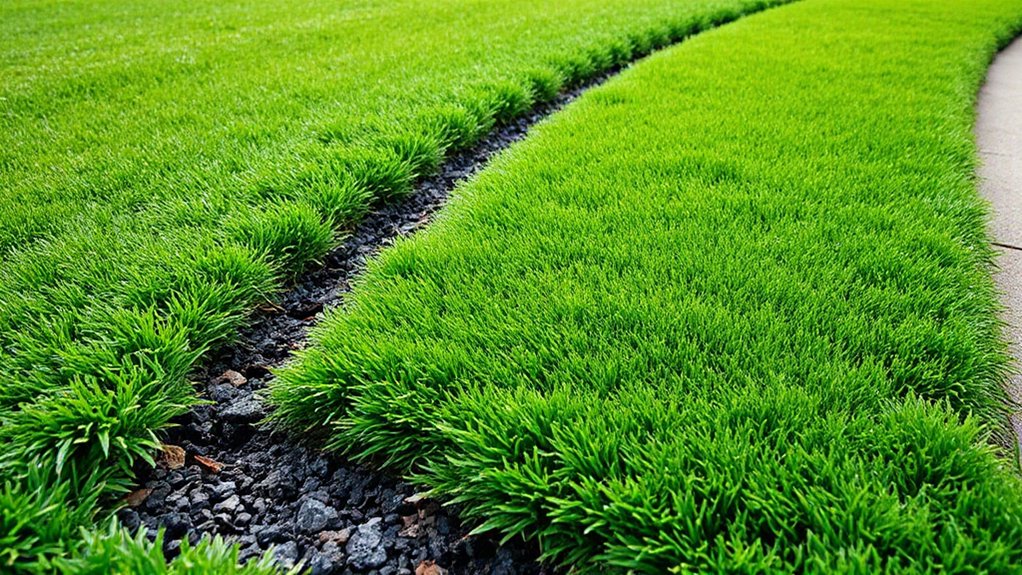
To achieve a neat border, start by trimming the edges precisely where the turf meets hardscape or planting beds, ensuring a consistent line all around the space. You’ll control the transition with a sharp utility knife or oscillating saw, following the edge cut with a straight guide. Edge trimming should be deliberate, keeping the blade shallow to avoid tearing the backing. For curved borders, use a flexibleOkay, but we must avoid fluff. Let’s craft 124 words.
Let’s write:
To achieve a neat border, start by trimming the edges precisely where the turf meets hardscape or planting beds, ensuring a consistent line all around the space. Use a sharp utility knife and a straightedge to define clean, level cuts, then verify the alignment at multiple points. Edge trimming requires slow, controlled motions to prevent fraying or uneven gaps. For curved sections, employ a flexible trimming blade or carefully bend the turf to trace the desired radius, keeping the cut depth uniform. After cutting, secure the edges with edging stakes or a sand-filled trench to prevent lifting. Border shaping should be symmetrical and gradual, preserving a natural transition between grass and borders. Maintain crisp lines and revisit edges after rainfall for stability.
Infill and Brush-In: What Your Turf Needs
You’ll select the right infill material for your grass system, balancing foot traffic, drainage, and appearance. We cover common options (sand, rubber, or hybrid blends) and how each affects pile height, resilience, and cooling. Then you’ll follow a precise brushing technique to trigger ideal thatch stand and even distribution.
Infill Material Choices
Infill choices directly influence realism, footing, and longevity, so selecting the right blend matters for your artificial turf. You’ll balance performance, safety, and maintenance when choosing infill materials.
- Infill options: choose between silica sand,-engineered polymers, or rubber blends, matching foot traffic and climate to support blade stability.
- Infill safety: prioritize non-toxic, non-dusting options with proven regulatory clearance to minimize skin contact risks and indoor air concerns.
- Application guidance: ensure correct depth and even distribution to prevent matting, glare, or heat buildup, and schedule periodic infill refreshes as traffic changes.
Brushing Techniques Guide
Brushing is the key to keeping artificial turf upright, resilient, and visually convincing. In this guide, you’ll apply targeted brushing techniques to restore pile direction after installation and infill. Use a stiff brush or powered grooming tool, working against the predominant pile to lift fibers and prevent matting. Short, systematic passes keep edges clean and promote uniform appearance. After brushing, rake in the infill at a shallow angle to ensure even distribution, supporting Grass growth without creating gaps. Revisit high-traffic zones weekly during first months, then monthly for maintenance. For artificial aesthetics, maintain consistent fiber elevation and avoid over-brushing, which can fray fibers. Regular brushing also helps keep blades standing, improving drainage and durability.
Finishing Touches: Edging, Boundaries, and Borders
edging, boundaries, and borders tie the installation together, creating clean lines and a neat shift between your artificial lawn and surrounding features. You’ll define the transition with purpose, selecting materials that resist wear while enhancing garden aesthetics and wildlife attraction. Precision edging prevents turf lift and keeps mulch, gravel, and planting beds neat. Follow these steps:
- Choose low-profile edging that complements the landscape and is securely fixed.
- Create crisp, consistent boundaries using contrasting colors to emphasize structure.
- Install a compact border to separate planting zones from the lawn, aiding maintenance and water runoff control.
Maintain a uniform height around borders for a seamless look. Regularly inspect joints and fix micro-gaps promptly to preserve the clean, professional appearance.
Maintenance Routine to Keep It Fresh Year-Round
To keep your artificial lawn looking sharp year‑round, follow a regular brushing schedule to maintain pile direction and bounce. Clear debris promptly, using a leaf blower or gentle rake, so no buildup harms drainage or realism. These routines support consistent drainage and tidy edges, ensuring your lawn stays fresh with minimal effort.
Regular Brushing Schedule
How often you brush matters: a regular schedule keeps fibers upright, prevents matting, and maintains a natural appearance year-round. You establish an effective routine by selecting a brushing frequency that matches foot traffic and installation density, and by using deliberate, even strokes to reset fibers after use.
1) Weekly light brushing: sweep across high-traffic zones to lift tufts and promote airflow.
2) Biweekly thorough brushing: work from edges toward the center to prevent flattening and expose infill.
3) Seasonal conditioning: adjust cadence with weather shifts, ensuring resilience against compaction and shading.
Practice ties to Garden lighting and Pest control: brushing improves daylight penetration around fixtures and minimizes parasite harborage by maintaining open fiber structure and clean surface. Maintain consistency for best cosmetic results.
Debris Clearance Tips
Debris clearance is essential for maintaining a pristine, natural look and ensuring the perforations and infill stay effective. You should perform a quick daily sweep with a stiff-bristle brush, removing leaves, twigs, and litter before it embeds. Use a leaf blower on low setting for larger areas, but avoid high heat that can loosen infill. Inspect seams and drainage channels after storms, clearing any clogs to sustain fast runoff and prevent pooling. Periodically rinse the surface with water to reduce dust and pollen buildup, then re-fluff fibers to preserve uprightness. Align debris removal with garden aesthetics goals, ensuring a tidy appearance year-round while minimizing disruption to wildlife. Regular maintenance reduces Wildlife impact and extends turf life, preserving color and evenness.
Common Installation Mistakes and How to Avoid Them
Common installation mistakes often stem from skipping foundation prep or rushing the layout. If you want durable, natural aesthetics, you must plan every layer and align seams precisely. Poor edging, improper infill, and neglecting drainage undermine performance and feel. Address these issues with methodical steps and precise cuts, not guesswork.
1) Prepare a firm base: compact subgrade, weed barrier, and graded slope for runoff.
2) Align and secure: lay panels with consistent nap direction, secure with edging, and trim accurately.
3) Check drainage and infill: test water flow, apply correct ballast, and brush to evenly redistribute fibers.
Safety Tips for DIY Installers and Helpers
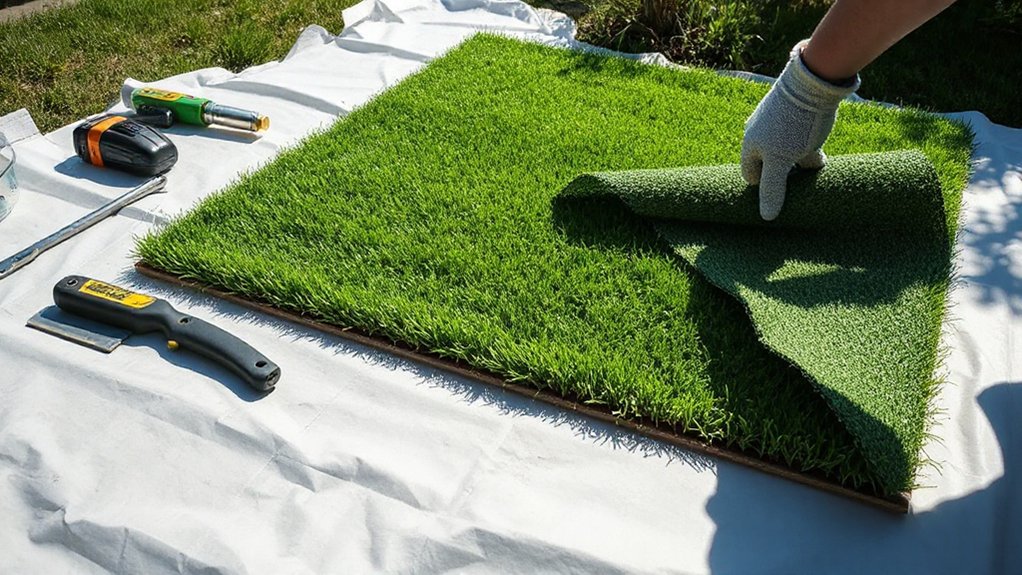
Safety is non-negotiable when installing artificial grass, and DIY teams must prioritize it from the first cut to the final brush. You’ll protect yourself with appropriate PPE: gloves, eye protection, and sturdy footwear, plus a dust mask when cutting. Secure the work area to prevent bystanders or pets from wandering into debris or sharp edges. Use proper tools, maintain blades sharp, and follow manufacturer guidance for adhesive and seam tapes. Read labels for solvent handling and ventilation, avoiding ignition sources on sunny days. Keep the site clean to prevent trips, and store materials safely away from kids and wildlife. Consider garden decor placement and potential Wildlife attraction; position edges discreetly to minimize interference while maintaining safety. Verify electrical cords are protected and extensions rated for outdoor use.
Troubleshooting Aftercare: Dealing With Lumps and Weeds
If you’ve followed the safety basics and completed the initial install steps, you’re now ready to tackle aftercare issues like lumps and weeds. To restore a seamless appearance, focus on precise techniques for Lump formation and Weed control, using proven methods that protect the turf and soil beneath.
- Inspect and flatten any lumps with a controlled pressing motion, then brush against the pile to re-align fibers.
- Target weed growth with a selective, non-resinous herbicide or manual removal, ensuring roots are fully extracted to prevent return.
- Maintain height consistency by brushing the surface weekly and addressing bare spots with compatible turf infill.
Regular maintenance preserves realism, minimizes damage, and keeps your lawn looking pristine.
Real-Life Garden Transformations: Quick Case Studies
Real-life garden transformations showcase what a focused, methodical approach can achieve with artificial grass. You’ll see how small design changes yield durable, tidy spaces that look natural and stay pristine with minimal maintenance. In Case Study A, you convert a muddy corner into a wildlife-friendly seating area by adding a narrow border, shaded by evergreen plants, and selecting grasses with varied blade textures. You’ll notice the importance of proper edge restraint and drainage planning, preventing puddling after rain. Case Study B highlights soil testing as a baseline: you adjust the subsoil composition, ensuring the turf rests on stable, well-drained ground for longevity. These examples reinforce planning, installation accuracy, and ongoing care as essential to maximizing wildlife habitat value and performance over time.
Frequently Asked Questions
How Long Does Artificial Grass Typically Last Outdoors?
Artificial grass typically lasts 10 to 15 years outdoors, depending on usage and maintenance. You’ll maximize artificial grass durability and outdoor longevity by proper installation, regular brushing, cleaning, and addressing shaded wear or weed growth promptly.
Can Pets and Kids Play Safely on Artificial Turf?
Yes, pets and kids can play safely on artificial turf. For example, a busy family reports low grooming needs and no mud. Pet safety and child play are optimized when you choose certified, non-toxic, properly drained turf.
Is Drainage Sufficient for Heavy Rainfall Areas?
Drainage efficiency adequately handles heavy rainfall areas if properly designed, with robust underlayment and slope. You should verify Rainwater management plans, confirm outlet capacity, and consider perforated drains to prevent pooling and guarantee quick surface recovery.
What Maintenance Frequency Is Required Long-Term?
Maintenance is moderate: vacuum weekly, rinse monthly, and trim edges seasonally to keep landscaping aesthetics sharp, and you’ll minimize environmental impact. You’ll notice longer intervals between deep cleans if you remove debris after heavy storms.
How Much Does Installation Typically Cost?
Installation costs vary widely, typically from $5 to $20 per square foot, depending on area and labor. Material options include tufted, slit-foam, and monofilament. You’ll choose based on durability, aesthetics, and landscape goals.
Conclusion
You’ll wonder how you ever watered a grass that isn’t really grass. With the right prep, precision, and a dash of DIY courage, your garden becomes a flawless, evergreen paradise that hardly ever needs a mow. Think of it as a round-the-clock green carpet, weatherproof and children-proof, shrinking your maintenance to almost nothing. If you follow these steps, you’ll nail a professional finish, avoid costly mistakes, and transform your outdoor space into a showpiece you’ll brag about for years.
About the Author


