

To install a durable, low-maintenance patio, start with a clear plan: define goals, map the space for dining, lounging, and circulation, and choose climate-appropriate materials. Prepare the site with proper grading, drainage, and a solid subbase. Lay pavers with consistent gaps, install edging, and compact for stability. Select joints and a sealer suited to your materials, then reseal as recommended. Stay on top of maintenance and drainage to extend life; more tips await.
Key Takeaways
- Define goals, budget, and layout to ensure durable, low-maintenance patio with clear zones for dining, lounging, and grilling.
- Prepare site with proper grading, drainage, soil compaction, and a stable subbase to prevent settling and water pooling.
- Select materials and colors that resist weather, stains, and wear while disguising wear and blending with surroundings.
- Install pavers with level bedding, edging, correct jointing, and careful sealing for durability and easy maintenance.
- Plan routine maintenance, drainage checks, sealing schedules, and timely repairs to maximize lifespan and safety.
Define Your Patio Goals: Durable, Low-Maintenance, Budget-Conscious
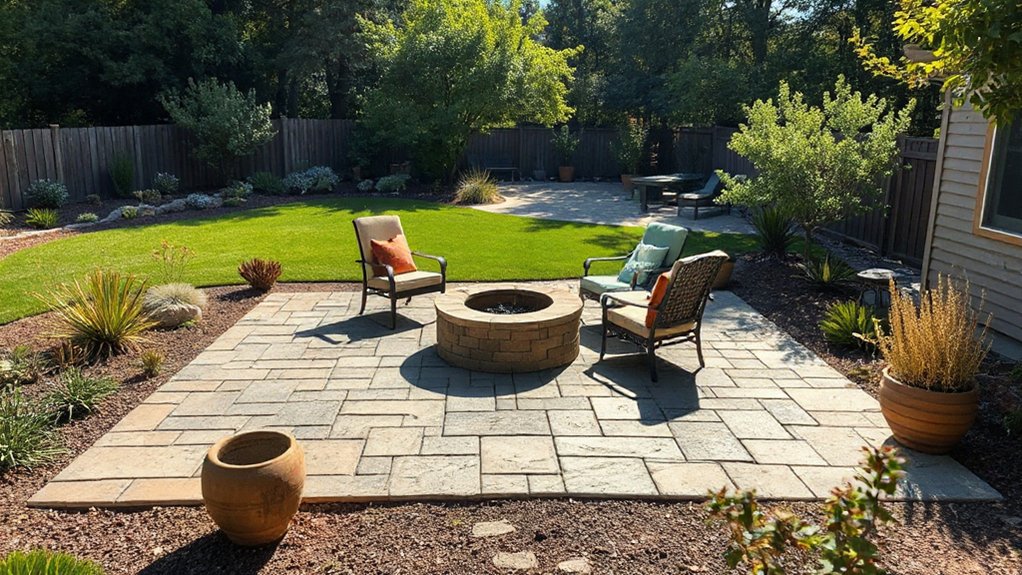
To define your patio goals, start with durability, low maintenance, and budget as non-negotiables. You’ll select materials that resist weather, wear, and fading, so your space stays usable year after year without constant upkeep. Prioritize low-maintenance options that clean easily and resist staining, mold, and cracking. Set a clear budget range and allocate funds for core components first, then accessories. When choosing garden furniture, look for rustproof frames, weatherproof cushions, and simple upkeep. For outdoor lighting, pick fixtures with reliable seals, LED longevity, and easy wiring or solar options to reduce ongoing costs. Document expectations for use, from dining to lounging, to guide material choices and warranties. This disciplined approach keeps your patio functional, inviting, and cost-efficient long into the future.
Plan the Space: Layout, Size, and Style Based on Use
Plan the Space: Start by translating how you’ll use the patio into layout choices. You determine traffic flow, seating clusters, and open zones to match daily routines and entertaining needs. Size your area to accommodate furniture, movement, and safety clearances without crowding. Choose a style that aligns with your home’s architecture and landscape, then map zones for dining, lounging, and a prep or grill corner. Garden furniture should be durable and easy to rearrange for events, while plant integration adds beauty without blocking paths. Prioritize sightlines to windows and doors so you feel connected to the garden. Leave room for seasonal adjustments and maintenance access, ensuring long-term usability without clutter or wasted space.
Materials That Fit Your Climate: Pavers, Bases, and Grout Choices
Choosing the right materials means matching climate, soil, and maintenance needs to your patio setup. When selecting climate specific pavers, you’ll consider freeze-thaw resistance, heat exposure, and shade. Pair these with a base that drains well and stays stable over time, so shifting soil doesn’t crack tiles. Grout color options should complement your pavers and the surrounding landscape, while resisting staining and mildew in damp climates.
- climate specific pavers that tolerate your conditions
- stable, well-draining base materials
- grout color options that hide dirt and match style
Opt for colors and textures that disguise wear. Test a small area first, and avoid overly porous grouts in wet regions. You’ll enjoy durable performance with minimal maintenance by choosing materials that fit your climate.
Prepare the Site: Grading, Drainage, and Compaction
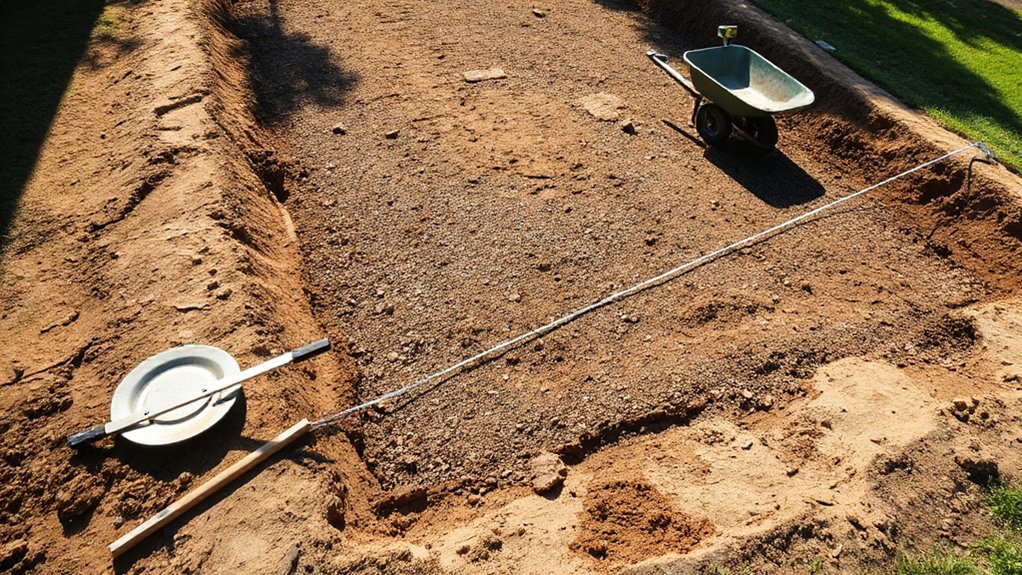
If the site isn’t graded and drained correctly, your patio won’t perform. Start with proper leveling to prevent ponding and shifting later. Mark high and low spots, then regrade to achieve a uniform slope away from structures—about 1/4 inch per foot. Ensure soil is compacted in lifts to avoid settling; don’t over-compact, which can trap water. In areas with poor drainage, add a compactable gravel base or install a subtle French drain to redirect moisture. Before laying, perform soil testing to tailor base materials and drainage plans. Weed control matters early—remove roots and apply a clean, residue-free surface to minimize future weed intrusion. Maintain a dry, stable subbase, and verify openings and transitions align with your paver pattern to prevent movement.
Step-By-Step Installation Essentials: Laying, Joints, and Sealing
Now you’ll tackle laying, joints, and sealing like a pro. Start with clean, level bedding, set pavers with consistent gaps, and verify tight, stable joints. Finish by sealing exposed surfaces to protect against moisture and wear.
Laying Prep Essentials
What’s the fastest way to lay a solid foundation for your patio? Start with a precise prep routine that sets the frame for long-lasting performance. Clear debris, measure square edges, and mark your layout before excavation. Excavate to the recommended depth, then compact the base in stages to prevent settling. Add a sharp, uniform sand or ballast layer, screed flat, and check for level across the area. Install edging to rein in movements and maintain shape. Compact again after laying to reduce future gaps. Plan for garden furniture and Plant integration by leaving clear zones for seating paths and plant beds adjacent to hardscape.
- Confirm level, edge, and compactness
- Create clear access routes
- Reserve space for furniture and greenery
Joints And Sealing Techniques
Joints and sealing are essential for a durable patio, so start by selecting an appropriate joint layout and sealing method that match your material and climate. You’ll guarantee drainage and relieve movement, preventing cracks. Begin with proper joint spacing to accommodate shrinkage and thermal shifts; this supports even load distribution and reduces stress points. Choose a compatible sealant and apply it after substrate cure, keeping joints clean and dry. Maintain a consistent bead depth and width to improve sealant longevity and curb moisture ingress. For permeable pavers, use a breathable sealer; for concrete or stone, choose a robust, flexible option. Refill gaps promptly when you notice settling, and reseal on schedule per product guidelines. Monitor joints for hairline cracks and reseal as needed to preserve appearance and stability.
Budget-Smart Tricks: Save Time and Cash Without Sacrificing Quality
If you’re aiming for a cost-friendly patio without cutting corners, start with smart planning and simple choices that pay off later. You’ll save time and cash by prioritizing durable materials, DIY-friendly installs, and modular layouts. Focus on practical decisions: reuse existing edging, select standard sizes, and batch tasks to minimize trips. Keep updates efficient with clear measurements and a phased schedule. Incorporate landscaping ideas to frame the space and garden lighting to extend usability after dark.
- Choose modular pavers or slabs that interlock for quick installation
- Reuse soil, mulch, and edging from existing beds to cut costs
- Plan lighting with low-voltage options to reduce electrical work and energy use
Budget-smart, time-saving steps ensure quality remains high without compromise. Landscaping ideas, garden lighting.
Troubleshooting and Maintenance Pitfalls: Fixes That Stand Up Over Time
Regular checks for seasonal maintenance prevent small issues from becoming big costs. Keep an eye on drainage and moisture to avoid standing water, and seal joints as needed to safeguard against weather cycles. Plan for proper sealing techniques, plus routine attention to moisture control and seasonal upkeep to ensure longevity.
Seasonal Maintenance Essentials
Seasonal maintenance is where small fixes pay off big, so plan ahead and address issues before they escalate. You’ll keep your patio durable by anticipating wear, sealing joints, and rejuvenating protective coatings as seasons shift. Stay vigilant about movement, and you’ll avoid costly repairs later.
- Garden lighting checks: test bulbs, tighten connections, and replace weathered housings to prevent outages.
- Plant integration: trim encroaching growth, reroute roots, and remove debris that traps moisture.
- Seasonal timing: schedule spring coatings, fall cleanups, and winter protection to extend life.
Drainage and Moisture Control
Drainage and moisture control is the backbone of a durable patio, helping you spot problem spots before they ruin joints or decks. You’ll map grade and flow, ensuring slopes carry water away from foundations and toward drainage points. Clean gutters and downspouts, and keep surface debris clear so rain doesn’t pool. Install proper subbase compaction and use permeable or well-graded aggregate for steady drainage, reducing frost heave and weed growth. Address any low spots with fill or regrading, then test with a light hose runoff to confirm. For aesthetics and safety, plan decorative accents and lighting options so wet surfaces don’t mirror glare or create trip hazards. Maintain joints, reseal periodically, and monitor seasonal shifts to preserve performance.
Proper Sealing Techniques
Sealing your patio effectively starts with choosing the right product and applying it correctly, because the seal is your first line of defense against water intrusion and UV wear. You’ll prevent color fading and cracking by selecting a compatible sealer and applying thin, even coats. For longevity, follow manufacturer guidelines and recoat on schedule to maintain color coordination and aesthetic appeal.
- Choose a penetrating or film-forming sealer suited to your material and climate, then test a small area first.
- Clean thoroughly, repair cracks, and apply even coats with proper ventilation to avoid bubbles and lap marks.
- Track weather and maintenance dates; reseal before the next season to preserve durability and look.
This approach minimizes failures and preserves your patio’s appearance over time.
Frequently Asked Questions
How Long Does a Typical Patio Installation Take?
A typical patio install takes several days to a week, depending on size and surface prep. You’ll weigh cost considerations and material options, plan contingencies, and coordinate weather delays to finish efficiently, ensuring durable results and upfront budgeting.
What Permits or Approvals Are Required Locally?
You’ll need to check your local building codes and start the permit application process with your city or county before starting. Make sure plans meet setback rules, drainage requirements, and pairing with any HOA guidelines to avoid delays.
Which Paver Patterns Hide Wear Best?
You should choose a running bond or basketweave pattern to hide wear well. Consider paver color choices that fade less and Maintenance tips like sealing and regular cleaning to maintain surface integrity and curb appeal.
Can I Install Myself Without Heavy Equipment?
Yes, you can, but plan carefully: DIY challenges include leveling and drainage, and you must follow safety precautions like wearing PPE and handling tools properly to avoid injuries while you complete the project yourself.
How Often Should I Reseal or Regrout Patios?
“Measure twice, cut once.” sealing frequency depends on use and material; typically every 2–3 years, check for cracks, and regrout tips: clean, dry joints, seal with compatible product, and reseal after cleaning for best longevity.
Conclusion
You’ve got a clear plan, the right materials, and a solid install routine. With proper grading, drainage, and a tight base, your patio will last years with minimal fuss. Worried about budget? You can save time and money by clever layout and smart jointing. Don’t fear the tasks—tackle one finish at a time, seal, and maintain. If anything shifts, recheck the base and drainage. Your durable, low‑maintenance getaway starts with smart preparation.
About the Author


