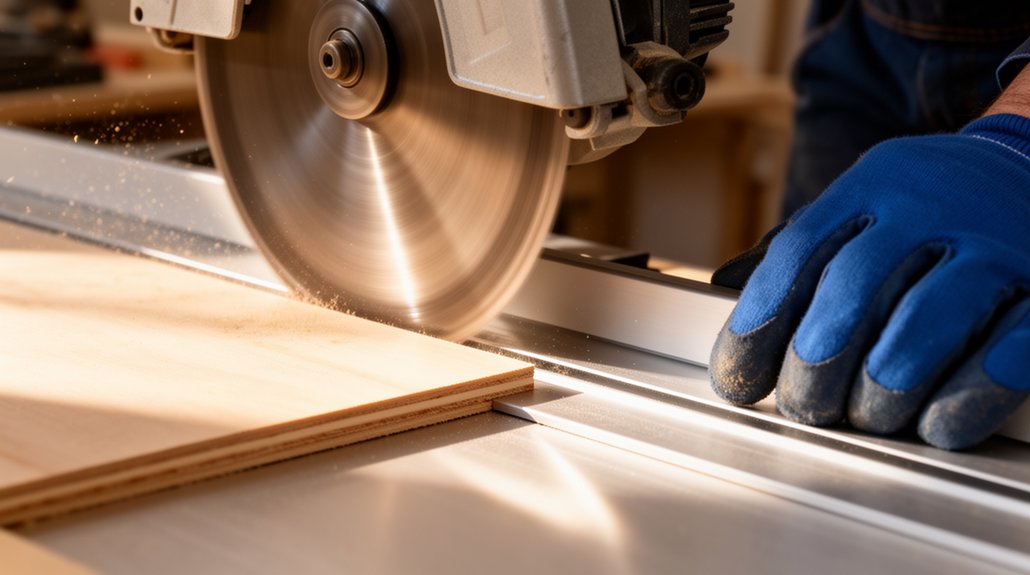
To cut clean lines with a circular saw, start with a square, secure setup. Mark the cut line, check blade sharpness, depth, and brake, then clamp the workpiece firmly and support it with backing blocks. Use a fine-tooth, carbide blade suited to your material, and guide the saw with a straightedge or fence for true cuts. Feed smoothly, start and finish slowly, and keep the guard and PPE on. Master these steps and you’ll reveal cleaner edges and fewer mistakes. If you keep exploring, you’ll learn more.
Key Takeaways
- Prepare and verify a clear cut line, set the blade depth slightly beyond material thickness, and test on scrap for accuracy.
- Securely clamp and support the workpiece, use guides or rails, and keep the fence square to the cut line.
- Choose the right blade (high-tooth count for smooth cuts, carbide tips, material-specific blades) and keep it sharp.
- Use a steady, deliberate cutting motion with slow starts/finishes, maintain proper stance, and let the guard and dust collection assist visibility.
- Perform final checks after cutting, recheck alignment and straightness, disconnect power, and store tools and blades properly.
Problem: Crooked, Rough Cuts-How to Get True, Clean Edges With a Circular Saw

A crooked, rough cut from a circular saw is almost always a sign you’re not supporting the workpiece properly or you’re pushing the saw too fast. To fix this, lock your stance, align the sole with the cut line, and use a straight edge as a guide. Keep the blade perpendicular to the surface until the cut starts, then ease into the material without binding. Inspect wood grain orientation; follow the grain to avoid tear-out, and slow your feed when crossing pronounced fibers. Confirm consistent dust collection so debris doesn’t drift and interrupt visibility. Clamp the work firmly, don’t overreach, and pause to check if the cut stays true. With control, you’ll produce true, clean edges and reduce chatter.
What Clean Cuts Deliver: Why Accuracy Matters for Plywood, Framing Lumber, and Panels
Clean cuts matter because accuracy affects fit, strength, and finish across plywood, framing lumber, and panels. When you measure and cut with precision, joints align tighter, adhesives grip evenly, and fasteners seat without gaps. For plywood, accurate cuts prevent edge splinters and minimize voids under edge finishing. In framing lumber, straight, true cuts maintain wall planes and load paths, reducing rework and misfits at corners. Panels benefit from square edges that resist chipping at joins and hinges on doors or cabinet backs. Your material selection should favor stable sheets and straight-grain stock that respond predictably to cuts. Edge finishing isn’t an afterthought; it preserves appearance and protects edges from moisture. Precision in cut quality saves time, materials, and labor, delivering reliable performance every build.
Choose the Right Blade for Clean Lines
Choosing the right blade makes clean lines possible, not optional. Start with high-tooth counts for fine work, and select carbide-tipped blades for durability in plywood or composite panels. A sharp blade reduces tear-out and keeps cut edges smooth, so you’ll see true lines rather than wandering gaps. Consider blade width and hook angle: thinner kerf and lower hook reduce wandering and provide smoother starts, especially when you’re riding along a guide. Always match your blade to material density and cut direction to minimize chipping. Practice blade maintenance between jobs—clear dust, inspect teeth, and replace worn segments promptly. Also mind saw ergonomics: maintain a stable stance, steady feed, and controlled off-cuts to sustain accuracy and reduce fatigue.
Match Blade to Material: Plywood, Framing Lumber, and Panel-Grade Stock

To match the blade to plywood, framing lumber, and panel-grade stock, start by aligning blade type and tooth configuration with each material’s density and fiber structure. You’ll select a fine-toothed blade for plywood to reduce splintering, while framing lumber benefits from a medium-tooth carbide blade for efficient, straight cuts. Panel-grade stock, with uniform density, responds best to blades optimized for smooth edges and minimal tear-out. Consider material thickness and grain direction when choosing tire-tooth geometry and hook angle. Maintain blade maintenance by keeping teeth sharp and clean, and replace worn blades promptly to prevent scorching. Prioritize material selection that matches your project’s load and finish requirements. This discipline supports cleaner lines and predictable results, reducing rework and preserving blade life.
Set Depth for True Cuts on Your Material
Set your depth to match the cut you need, not the blade’s maximum. Calibrate for the material by starting shallow and increasing in measured steps until you feel the bite without sawdust tearing. This guarantees true cuts with clean edges and minimal kickback.
Set Depth Properly
Determining the correct cutting depth is essential for true, clean cuts on your material. Set your blade so it just clears the material’s underside by a fraction of an inch, and never exceed more than needed for the cut. For most plywood and thin stock, a depth of 1/8 to 3/16 inch beyond the thickness is sufficient; for hardwoods, go one step deeper if necessary, but avoid full-thickness plunges. Check the blade’s top alignment with the shoe and snug the depth lock to prevent drift during the cut. Maintain blade maintenance; a sharp, clean blade reduces splintering and binds. Always wear safety gear, including eye protection and hearing protection, and keep hands clear of the cut line. This discipline ensures precision and reduces rework.
Calibrate For Material
When cutting, you must tailor the depth to the material you’re working with, not a one-size-fits-all setting. To achieve true cuts, begin with the blade just shy of the kerf’s bottom and test on scrap. Calibrate material by loosening the depth adjustment, then lower the blade until it barely kisses the surface without binding. Check several points along the cut—soft woods, plywood, hardwoods, and laminates demand different profiles. Use a depth gauge or the saw’s scale to lock in a precise setting, then perform a shallow trial pass to verify clean exit without tear-out. If you see fades or burrs, adjust incrementally. Consistent results come from careful material calibration and rechecking after any change in thickness or type.
Align the Saw for Straight, True Cuts Every Time
To guarantee straight, true cuts, align the saw before you start. Check the blade is perpendicular to the shoe and zeroed on the base plate’s measurement marks. Verify the fence or guide rail is square to the blade and secure to prevent drift. Hold the saw firmly with steady, controlled pressure, letting the blade do the work without forcing it. Set the depth so the blade just clears the material’s backside to minimize tear-out. Mark your cut line clearly, align it with the blade edge, and shave into the work at a steady pace. Tool maintenance and safety gear matter—inspect cords, guards, and switch, replace dull blades, and don appropriate PPE for reliable, precise results. Safety gear protects you while you cut.
Secure the Workpiece to Prevent Wobble
Secure the workpiece firmly before you start cutting. Use clamps to prevent wobble motion and keep the piece from shifting under pressure. Clamp for stability so every cut remains accurate and clean.
Secure The Workpiece
You must ensure the workpiece firmly to prevent wobble before you cut. A stable base ensures accurate lines and reduced kickback, preserving Cutting safety and control. Use clamps or a secure vise to immobilize the material, aligning edges for a true starting point. Check the Workpiece material’s density and grain direction, adjusting clamps to avoid pinching and surface damage. Test for movement with light pressure before powering up.
- Clamp at multiple points, not just ends
- Protect the surface with scrap stock or a sacrificial board
- Verify edges are parallel and square to the cut line
Prevent Wobble Motion
If wobble threatens the cut, secure the workpiece with sturdier clamping and careful positioning. You align the board to the blade line and verify that the clamps are snug without shifting as you start the saw. Use a secondary clamp or a feathered edge to prevent lateral movement during the initial bite. Maintain steady pressure straight through the cut, avoiding any twist that can transfer wobble to the blade. Dust collection helps you see the cut line clearly and keeps debris from binding the guard. Wear safety gear, including eye protection and hearing protection, and keep cords out of the cut path. Check clamps again after the first inch and adjust if needed for a clean, precise edge.
Clamp For Stability
To prevent wobble, clamp the workpiece firmly to the table or fence so it can’t shift as the cut begins. You’ll achieve clean lines by applying consistent pressure and choosing the right clamp setup for stability. Clamp stability depends on position, grip, and surface contact; verify that the clamp doesn’t mangle the wood or obstruct the blade path. Material selection matters: select corral clamps or non-marring pads for prime grip and protection. Use a backup block when necessary to prevent tear-out at the edges. Ensure the cut line remains visible and aligned before starting.
- Proper clamp placement toward the cut line
- Non-marring pads to protect the surface
- Backing blocks for edge stability and material support
Use Guides and Straightedges to Improve Accuracy

Guiding a cut with accuracy starts with steady, well-placed guides and straightedges. You’ll clamp a plywood or rail guide to the workpiece, ensuring the saw’s base aligns square to the line. Use a straightedge or a dedicated guide rail to maintain a consistent path; mark the line clearly and verify it from multiple angles before you start. Keep the blade depth just deeper than the material’s thickness to avoid chatter. Align your fence so the cut exits cleanly, not just starts well. Maintain smooth, steady feed—no forcing the saw. Check for any binding, adjust, then resume. In regards to cutting techniques, practice a dry run on scrap. Safety precautions: wear eye protection and hearing gear, and keep hands clear of the blade.
Bevel Cuts Without Drift or Tear-Out
Bevel cuts can drift or tear out if you don’t control the saw path and join the workholding properly. To avoid issues, set a precise bevel angle with a sharp blade and snugly clamp the workpiece. Maintain steady feed pressure, keep the shoe flat on the surface, and let the motor handle the cut without forcing it.
- Align the fence and baseplate for true perpendicular contact with the workpiece
- Use dust collection at the blade to minimize chip buildup and improve visibility
- Start and finish with slow, controlled passes to prevent deflection
Be mindful of saw blade quality, maintain consistent speed, and verify the cut’s integrity before removing clamps. This ensures clean bevel lines every time.
Make Precise Plunge Cuts With Control
Keep a steady hand placement to prevent wandering cuts, and set a precise depth with deliberate, incremental moves. Use depth control techniques that start shallow, advance smoothly, and stop cleanly, maintaining control through the entire plunge. Begin and end each cut with a smooth start/stop motion to avoid chatter and guarantee an accurate, repeatable result.
Steady Hand Placement
To punch clean, accurate plunge cuts, you need a steady hand and precise control. Achieve this with a steady grip and deliberate stance, keeping your wrists loose but controlled for micro-adjustments. Maintain hand stability by aligning your body with the saw’s guide line, not the blade’s arc, and engage the cut with a confident, continuous push. Your front hand should guide the shoe, while the rear hand controls the trigger and depth release in one fluid motion. Focus on a smooth start and gradual advance, avoiding jerky motions that deflect the blade.
- Steady grip
- Hand stability
- Controlled pressure
Depth Control Techniques
Depth control is about dialing in your plunge depth before you start and then maintaining it as the cut progresses. You set the blade to the exact depth needed for the material, leaving a precise margin above the cut. Start with a dry run to confirm alignment, then lower smoothly with steady pressure. Watch the saw’s reactions as you begin; any binding warns you to reduce feed rate or adjust depth slightly. Keep the base flat on the work surface to prevent wandering. Use blade maintenance practices to avoid dulling and chatter, and pause if you notice overheating or smoke. Prioritize saw safety by wearing eye protection, securing the work, and maintaining firm control. Precision comes from consistent depth and deliberate, controlled moves.
Smooth Start/Stop Motion
Smooth starts and clean stops are essential for precise plunge cuts. You manage depth and torque by easing the saw into the work and backing off smoothly at the exit. Keep your stance steady and your wrist aligned with the cut to prevent drift, then resume without jerks for a clean finish. This control hinges on deliberate muscle memory, not raw force, and it protects blade maintenance by reducing heat and wear.
- Pre-check the blade condition and amp up stability before plunging
- Maintain a smooth, constant pace; avoid sudden throttle changes
- Use proper safety gear and reset your position after each cut
Remember: consistent starts, controlled stops, and deliberate tracking yield the sharpest lines with minimal chipping.
Manage Kickback and Practice Safe Cutting
When cutting, stay alert to kickback signals and set up your workspace to minimize risk: keep the blade guard in place, use sharp blades, and secure the workpiece firmly. Kickback can surprise you, so adopt a stable stance, keep both hands on the saw, and avoid twisting the cut. Let the blade reach full speed before initiation, and maintain steady, even pressure without forcing the tool. Use a straightedge or guide for square, consistent lines, and never cut freehand through long boards. Safety gear—eye, ear, and respiratory protection—protect you during every cut. Tool maintenance matters: inspect blades for missing teeth, clean dust buildup, and lubricate moving parts as recommended. Stay disciplined, anticipate obstacles, and cut with controlled, deliberate rhythm.
Fine-Tune Cut Quality With Scoring and Controlled Pressure
Ever wonder how to get the cleanest edge without rework? You’ll fine-tune cut quality by scoring first, then applying steady pressure. Use scoring techniques to predefine the line, reducing edge tear-out and guiding the blade on the first pass. Maintain smooth, even feed and keep the saw’s base flat against the sheet to prevent drift. Control pressure through the cut: press just enough to keep the blade engaged without binding, and ease off as you approach the finish to minimize micro-chips. Monitor blade speed and let the teeth do the work; forcing heavy pressure only dulls edges. Practice with scrap pieces to calibrate your grip and feed rate.
- Scoring techniques
- Pressure control
- Consistent feeding
Sand and Finish Edges Like a Pro
Start with a clean edge by sanding gradually from rough to fine grits, keeping the workpiece flat and secured to prevent movement. Once edges breach the saw line, switch to light strokes with the last grit to blend. Edge stability matters: clamp firmly, support both sides, and maintain a steady pace to avoid gouges. Progressively refine the surface by inspecting for parallelism and straightness; ninguno of the edge should show torn fibers. Wipe dust between grits to reveal true texture. For paint preparation, mask edges to prevent chipping and apply a consistent, dust-free finish. Use fine-grit sanding on edges that will bear trim or hardware. After final pass, vacuum, damp-wipe, then deburr with a soft block. Edge polishing completes the surface; keep lines clean, precise, and uniform.
Quick-Pro Setup Checklist for Flawless Cuts
Before you cut, confirm your workpiece is square, flat, and free of debris, then square up the fence and setup to guarantee consistent line control. Secure the piece firmly, use clamps or a zero-clearance jig, and double-check that the blade, blade height, and feed rate suit the material. Keep your setup tight and deliberate, so your cuts stay straight, clean, and repeatable.
Quick Workpiece Prep
To prep your workpiece quickly and accurately, follow this Quick-Pro Setup Checklist to guarantee flawless cuts. You’ll optimize accuracy by inspecting the board and edges, indexing against the saw’s baseline, and marking a clear cut line. Keep movements intentional, maintaining steady pressure and controlled speed.
- Material storage: store stock flat, dry, and off the floor, with ends square and free of warp.
- Tool maintenance: verify blade sharpness, alignment, and brake function before cutting.
- Surface preparation: deburr edges, remove dust from the work area, and set a dust-free cut line for visibility.
Securement And Setup
Securement and setup are non-negotiable for precise cuts. You start by securing the workpiece firmly against a stable surface, with clamps that won’t slip under blade force. Double-check the saw’s base and fence are square to the cut line, then align your depth to just slightly deeper than the material thickness. Mark your line, set the shoe, and test with a scrap piece before committing. Confirm unplugged or switched-off power during adjustments, then reconnect and energize, keeping hands clear of the blade path. Maintain Tool maintenance by inspecting blades, guides, and the cord or battery. Wear Safety gear—eye protection, hearing protection, and a dust mask. Finally, verify everything again and proceed with deliberate, steady passes for clean, accurate results.
Frequently Asked Questions
How Can I Prevent Tear-Out on Plywood Edges?
To prevent tear-out, use a sharp blade and backer, feed steadily, and cut with full support. Edge finishing and plywood sealing before cutting reduce splintering, and apply edge sealant afterward to protect the surface.
What Safety Gear Is Essential for Circular Saw Accuracy?
“Safety first,” you know. You need Protective eyewear and Hearing protection to use a circular saw accurately, stay focused, and protect yourself; these essentials guard against debris and noise, helping you cut clean, precise lines confidently.
Can I Use a Circular Saw for Curved Cuts Cleanly?
Yes, you can use a circular saw for curved cuts, but it’s tricky. Choose blade types suited for curves, clamp the work firmly, and adjust cutting speeds precisely to avoid wandering or tearing. Practice curves before tackling final projects.
How Do I Align the Blade to Ensure True 90-Degree Cuts?
Blade alignment comes first: you tighten and center, then check perpendicularity with a square. Keep saw calibration precise, adjust until the blade runs true and flat against the line, then verify by a test cut for accuracy.
What Maintenance Extends Blade Life for Clean Cuts?
Keep a sharp blade with blade sharpening regularly, and rely on dust extraction to prevent clogging. Clean the teeth between sessions, check for wobble, and store properly to extend blade life and maintain clean, precise cuts.
Conclusion
If you want perfect cuts, you’ll learn to start precise and finish clean. Rely on a sharp blade and correct depth, but don’t rush—measured, deliberate moves beat brute force. The contrast is clear: rough edges waste time, true lines save it. When you balance blade choice with material, you *gain* accuracy; when you ignore it, you invite error. Practice with a steady hand, then let scoring, gentle pressure, and proper finishing seal the deal. Precision, over everything.
About the Author