
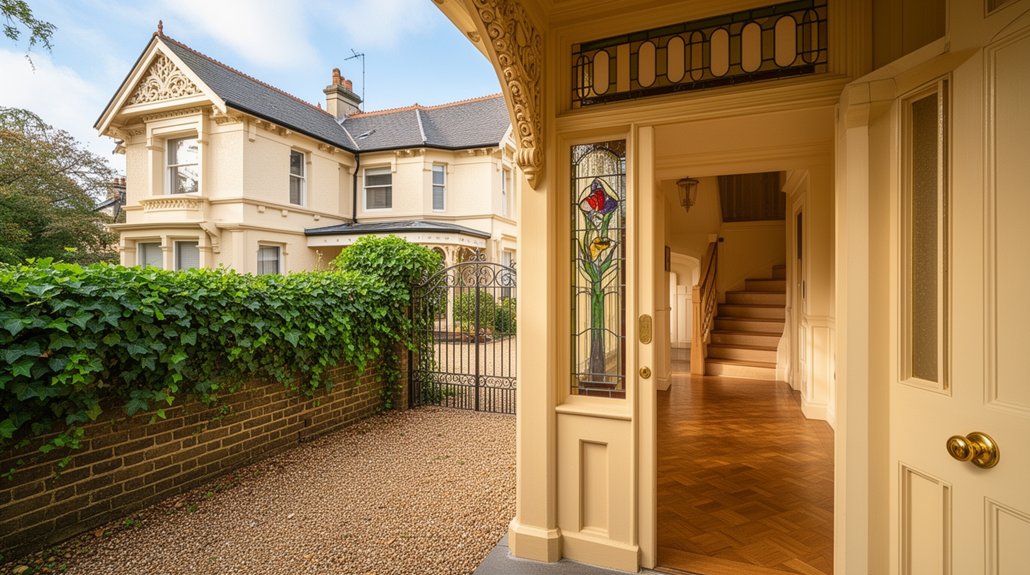
A guide to rejuvenating an Edwardian villa starts with identifying its authentic shell—refined yet robust, with sash windows, high ceilings, and restrained ornament. Set restoration priorities early, then assess floors, walls, and roof for structural health. Boost thermal comfort with discreet insulation and smart zoning, preserving period features like mouldings and timber details. Source reclaimed materials and sympathetic finishes to honor provenance. If you keep exploring, you’ll uncover practical steps that weave classic charm with modern comfort.
Key Takeaways
- Identify and preserve authentic Edwardian shell: restrained ornament, large sash windows, generous ceilings, brick or stucco façades, and robust craftsmanship.
- Restore features with period-appropriate repair: match materials, gentle plaster work, and paint schemes that highlight profiles while improving energy efficiency.
- Plan restorations to balance aesthetics and practicality: prioritize structural integrity, phased budgeting, and thorough documentation.
- Weatherproof and maintain exterior with breathable renders, proper seals, and regular inspections to protect character.
- Enhance gardens and outbuildings with simple geometry, restrained detailing, durable materials, and landscape that complements the villa’s lineage.
Identify the Edwardian Shell: What Defines Authentic Character

The Edwardian shell is defined by a confident blend of refinement and practicality, where restrained ornament meets robust proportion. You identify authentic character by noting proportions, materials, and detailing that endure beyond trends. Large sash windows, generous ceiling heights, and brick or stucco façades signal a period ready for daily use without excess. Look for modest decorative motifs, classically grounded cornices, and timber joinery that’s robust yet refined. Victorian influence surfaces in the disciplined ornament and emphasis on craftsmanship, while Modern reinterpretation appears in updated glazing, streamlined pans, and sustainable finishes that respect lineage. You differentiate genuine shell from later imitations by evaluating construction logic, weathering patterns, and functional layout. This foundation guides restoration choices that honor history while enabling contemporary living.
Pinpoint Your Restoration Priorities Early
Identify your restoration priorities upfront to set a clear, actionable path. Begin by listing what most strengthens Edwardian character while delivering daily value. Rank projects by impact on aesthetics, usability, and future upkeep, then sequence them into phases you can actually fund. Prioritize essentials: structural integrity of the core, preserving unique details, and establishing a coherent palette. Decide on a signature element—for example, vintage lighting—to anchor decisions without overcommitting. Consider garden landscaping as a companion priority, shaping views and循 long-term maintenance. Allocate budget conservatively, leaving a cushion for unforseen needs. Document decisions with rationale and photos to guide trades. Review progress after each phase, adjusting timelines and priorities to stay aligned with your villa’s authentic voice and your lifestyle.
Check Structural Health: Floors, Walls, and Roof
Start by inspecting the floor structure for even deflection and any sagging joints, then confirm wall integrity with a careful survey for cracks or movement. Assess the roof load by reviewing support conditions and ensuring rafters and ceilings are aligned and sound. Address any anomalies promptly to form a solid, unified foundation for the rest of your restoration.
Floor Structure Checks
Could hidden sagging or creaks reveal a bigger problem, or is the floor simply settling? You begin with a methodical inspection of the floor structure, prioritizing load paths, joist integrity, and clearances. Look for cracked or bowing timber, missing fasteners, or signs of previous repairs that hint at stress. Check subfloor connections, know your era’s typical framing, and verify that floor levels align with adjacent rooms. Assess spellings of dampness, mold, or wood rot at joist ends, since moisture erodes structural performance. Measure deflection under typical loads, and test for squeaks without disguising issues. Document findings clearly, comparing them to the historic landscape and how the system supports interior aesthetics. Plan remediation only after precise diagnosis, coordinating with specialists when necessary.
Wall Integrity Survey
A wall integrity survey assesses structural health across walls, ensuring they carry loads, resist damp, and align with the building’s historic fabric. You inspect plasterwork for cracks, then trace to both timber linings and masonry joints, noting movement indicators. Look for damp staining, salt efflorescence, and failed pointing that compromise breathable walls. Tap tests reveal hollow renders or decayed infill, guiding urgent reinforcement decisions without overburdening old timbers. Document lintels, arches, and column bases for uneven settlement, ensuring doors and windows remain plumb. Consider garden landscaping interactions that influence moisture, drainage, and ventilation, adjusting exterior detailing to guard against rising damp. Align interior color palettes with the villa’s heritage while preserving breathable finishes. Report findings succinctly, prioritizing safety, reversibility, and future maintenance.
Roof Load Assessment
Roof load assessment begins with a precise check of how floors, walls, and the roof interact under gravity and wind loads, ensuring the structure carries its loads without overloading older timbers or masonry. You assess timber sizing, beam connections, and wall ties for signs of distress, deflection, or creep, documenting any deviations from designed capacity. Consider the roof’s load path, including snow, live loads, and dead loads from finishes. Inspect fixings, joinery, and masonry restraint to prevent progressive failure. Evaluate roof ventilation to confirm adequate intake and exhaust without introducing moisture or uplift risks. Plan chimney repair where flue lines, crowns, or hearths influence load distribution. Conclude with a repair and reinforcement roadmap, aligning priorities with statutory requirements and long‑term villa performance.
Boost Thermal Comfort Without Sacrificing Style

To boost thermal comfort without sacrificing style, prioritize airtightness and intelligent zoning that subtly supports your Edwardian aesthetic. You maintain a confident, controlled climate by sealing drafts and deploying zoning that lets you tailor heat to each room without overburdening the system.
- Use high-quality insulation and draft-proofing aligned with your color palettes to preserve period character.
- Zone living spaces with smart controls that respond to occupancy and sun angles, not noise.
- Optimize furniture arrangement to enhance heat circulation while preserving formal sightlines.
- Select finishes and textiles that reflect authentic tones while improving thermal mass and comfort.
These steps deliver a balanced interior: consistent warmth, restrained energy use, and a refined, era-appropriate ambiance.
Restore Timber Sash Windows for Light and Air
Restoring timber sash windows is an investment in light and airflow that pays off in daily comfort. You’ll preserve original design while improving glazing efficiency and opening ease. Let’s consider your options for reveals, sashes, and weather sealing to balance character with modern performance.
Restore Timber Sash Windows
Restore timber sash windows to bring in natural light, improve ventilation, and restore the villa’s period character. You’ll approach restoration with precision, preserving original joinery while upgrading seals and hardware for modern comfort. Focus on careful dismantling, assessment of timber health, and authentic finishes that reflect Edwardian craftsmanship. Repaired frames resolve drafts, reduce decay, and enhance security, without compromising historic detail. When repainting, select period-appropriate hues that complement interior tones and vintage gardens, while *guaranteeing* you don’t overwhelm the architectural silhouette. Consider discreet weatherstripping and brush seals to maintain sash movement. Prioritize professional glazing where necessary to preserve glass integrity and antique lighting ambiance.
- Inspect joints, sills, and members for rot and plan repairs with minimal intervention
- Restore sash cord, weights, and pulleys to ensure smooth operation
- Match finishes to original palette for authenticity
- Schedule ventilation checks to balance airflow and comfort
Enhance Light and Air
Brighten interiors by maximizing daylight and ventilation through precise timber sash window restoration, ensuring each pane admits more light without compromising historic integrity. You assess wood condition, repair sashes, and replace glazing with sympathetic panes that mirror original thickness. You then balance draft-proofing with operable ease, preserving movement for easy airing. Consider strategies that reveal exterior views while maintaining security and energy efficiency. When repainting, choose interior colors that enhance light diffusion and highlight period details rather than overpower them. Integrate garden pathways into sightlines from the windows, guiding movement through outdoor rooms and extending the sense of space. Finally, document finish schemes and hardware choices to sustain authentic character while improving daily comfort.
Repair Historic Plaster Without Cracking
To repair historic plaster without cracking, begin by identifying the underlying cause—whether moisture intrusion, movement, or age—and address it before patching. You then select an appropriate patching method, matching plaster composition and thickness to preserve historic character, and you apply thin layers with controlled feathering to avoid sudden stress. Use compatible lime or gypsum mixes, dampened surfaces, and flexible joint compounds to absorb minor movements. Finally, finish with a breathable, whisper-thin plaster layer that resists future cracking and preserves texture.
- Assess moisture sources and repair leaks before patching
- Choose lime-based or compatible gypsum patches
- Apply in thin, feathered coats for even bedding
- Refinish to match texture, tone, and timeworn patina
Vintage lighting and Garden design considerations flavor your restored spaces without compromising plaster integrity.
Preserve Mouldings and Cornices With Thoughtful Modernization
Mouldings and cornices are silent witnesses to an Edwardian hallmarks; preserve them by balancing respect for their patina with thoughtful modernization. You approach restoration by first cataloging details: plaster lines, profiles, and cornice motifs that define the unit’s character. Then, select Modern paint schemes that enhance those profiles without overpowering them. Keep color contrasts restrained, using softer whites, warm neutrals, or slate accents to highlight ornamental edges rather than flatten them. When updating, choose Contemporary furniture with clean, simple silhouettes to echo, not mimic, the period. Maintain sightlines by avoiding heavy drapes over original mouldings. Repair cracks with pliable lime-based plaster where possible, and conceal repairs with subtle finishing compounds. Your goal is coherence: heritage authenticity fused with measured, legible modernity.
Kitchen Refresh: Brighten and Modernize an Edwardian Kitchen

In your Edwardian kitchen, brightness starts with thoughtful lighting and color choices that reflect the era while feeling fresh. Pair ample storage with sleek, period-appropriate cabinetry and smart organizing solutions to keep surfaces clear. Let light and storage work together to modernize without compromising the villa’s character.
Brighten With Light
Brighten the Edwardsian kitchen with strategic light: layer natural sunlight, task lighting, and a clean, reflective palette to transform the space without rewiring its character. You’ll enhance ambiance and functionality through deliberate placement and finishes, not drastic changes. Choose Lighting fixtures that harmonize with Edwardian details, favoring simple brass or satin metals and glass for a cohesive look. Maintain Color schemes that keep a bright, airy feel—soft whites, pale neutrals, and restrained contrast. The result is a kitchen that feels larger, sharper, and more inviting while preserving its historic personality.
- Maximize daylight with sheer window treatments and light-reflective surfaces
- Install targeted task lighting over prep zones and sinks
- Select period-appropriate but modernized Lighting fixtures
- Align color schemes with the era’s elegance and your daily needs
Modernize With Storage
To modernize with storage, start by rethinking how you use the kitchen’s footprint: prioritize streamlined cabinetry, integrated organizers, and discreet hardware that maintain Edwardian character while reducing visual clutter. You’ll implement tall, shallow shelves above work surfaces to keep essentials accessible without crowding rooms, and hidden pull-outs for lids, filters, and small appliances. Choose a cohesive palette and align drawer fronts for a seamless line, while brass or bronze trims nod to the period. Select insert systems that maximize interior space, and install lighting that highlights architecture rather than zufaces. Reference Vintage wallpapers for a restrained backdrop, and consider Garden ornaments only as curated accents near windows. This approach yields a calmer, more functional heart of the home without sacrificing charm.
Layer Lighting: Fixtures That Honor Past and Present

Layered lighting in an Edwardian villa blends historical charm with modern practicality, using fixtures that both nod to the era and illuminate today’s living.
- Choose Vintage lighting pieces as focal accents, pairing them with subtle, recessed controllers for seamless daily use.
- Favor Historical fixtures that echo crown moldings and fanlights, yet employ energy-efficient bulbs and dimming options.
- Layer ambient, task, and accent lighting to preserve the home’s architectural details without overwhelming them.
- Select materials and finishes that harmonize brass, bronze, or aged pewter with contemporary glass or acrylic for versatile appeal.
This approach guarantees warmth, readability, and atmosphere, while protecting period character and daily functionality.
Hidden Upgrades: Plumbing and Electrical With Era-Safe Methods
You’ll exploreHidden Plumbing Upgrades, prioritizing concealed routes that respect an Edwardian footprint while improving reliability. Era-Safe Wiring Methods will guide you to discreet, code-compliant upgrades that minimize wall disruption and preserve historic character. Consider Historical Material Considerations to balance authenticity with modern safety, selecting periods-appropriate fixtures, pipes, and insulation where possible.
Hidden Plumbing Upgrades
Hidden plumbing upgrades in an Edwardian villa should be approached with era-appropriate methods that preserve structure and aesthetics while delivering reliable performance.
You implement hidden plumbing by selecting discreet, compatible fittings and routing that minimizes wall damage and preserves plaster finishes. Focus on pipe upgrades that reduce friction, improve flow, and resist corrosion, using materials suited to vintage systems. Maintain original valve placement and access points for future service.
- Assess concealed routes before work and preserve ornamented walls
- Choose copper or PEX compatible with era-era sizing and modest insulation
- Upgrade main risers and branch lines with minimal structural impact
- Refit hidden connections behind access panels for ease of maintenance
Era-Safe Wiring Methods
Era-Safe Wiring Methods require equal care to preserve the villa’s character while ensuring modern reliability. You approach rewiring with a measured plan that respects fabric and finishes, avoiding invasive routes where possible. Begin by auditing existing circuits, labeling every run, and mapping loads to prevent overextension. Use period-appropriate conduits or discreet modern equivalents that blend with cornices and plaster, maintaining sightlines while meeting current safety codes. Install low-profile breakers, tamper-resistant outlets, and ground-fault protection in wet areas, prioritizing accessibility for future maintenance. You select lighting strategies that support modern lighting without erasing heritage, emphasizing efficient, steady illumination. Pair electrical upgrades with tasteful, contemporary landscaping to enhance curb appeal while minimizing risk. Document changes meticulously to support ongoing upkeep and future renovations.
Historical Material Considerations
Historical material considerations demand a careful balance between preserving period character and ensuring modern reliability. You’ll harmonize Victorian influences with contemporary needs, prioritising safety, durability, and discreet integration. Hidden upgrades should respect wall lines, cornices, and fittings while delivering upgraded plumbing and electrical performance through era-safe methods. Plan routes that minimize invasiveness, reuse authentic fixtures where possible, and select modern components that visually echo the era. You’ll document all changes for future maintenance, ensuring compliance without compromising aesthetics. Precision, not excess, guides every decision, from pipe sizing to cable routing. This approach yields a villa that looks untouched yet operates with dependable, up‑to‑date systems.
- Victorian influences inform material selection and detailing
- Modern adaptations must conceal new runs within original fabric
- Subtle upgrades preserve rhythm of rooms and ceilings
- Compliance and future maintenance stay integral to design
Insulation That Keeps Character and Comfort
A well-insulated Victorian-era villa doesn’t have to betray its character; with thoughtful material choices and smart detailing, you can achieve warmth and efficiency without compromising its aesthetic. You’ll prioritize continuous insulation around walls, roofs, and lofts, pairing breathable, low-odor liners with cavity fills that avoid bulk but boost performance. Choose heritage-appropriate materials with high R-values and discreet air-sealing to eliminate drafts at sash windows and doors. Consider mechanical ventilation with heat recovery to sustain freshness without heat loss. Integrate insulation into existing fabric through chased, reversible upgrades that preserve reveals and cornices. Coordinate garden design and interior color schemes so textiles and finishes complement warmth without overpowering the space. In practice, precision detailing and measured compromises deliver comfort, sustainability, and enduring character.
Floors and Footfall: Choosing Period-True Finishes

When selecting floors that stay true to an Edwardian villa, you balance durability with period-accurate appearance. You’ll choose finishes that age gracefully, resist wear, and echo early 20th‑century craft. Consider board widths, timber species, and traditional finishes that deepen with use. Subtle inlay or herringbone patterns can signal era without shouting. Pay attention to footfall dynamics across rooms, avoiding overly slick surfaces in high-traffic zones. Factor passages between rooms to preserve rhythm and authenticity. Pair floors with complementary lighting and décor to reinforce authenticity. Vintage wallpapers and period appropriate lighting should guide mood without overpowering floor character.
- Select width and species for authentic scale
- Favor durable finishes that patina with use
- Use careful passages to sustain flow
- Align with vintage wallpapers and period lighting choices
Staircase Details: Balustrades, Banisters, and Safe Gantries
You’ll assess balustrade design details to balance Edwardian aesthetics with modern safety expectations. Consider banister material choices for durability, finish, and visual weight that complements plasterwork, timber joinery, and stair geometry. Factor safe gantry considerations early, ensuring clearance, lightness of grip, and compliant handrail heights without compromising period character.
Balustrade Design Details
Balustrade design in an Edwardian villa blends safety with elegance, shaping stair travel as a refined experience rather’t just a functional feature. You’ll balance form and function by choosing balustrade materials that endure and delight, pairing sturdy timber or wrought iron with refined detailing. Decorative motifs return as crown accents, lattice work, and fine scrolls that echo period charme without crowding sightlines. Precision is key: joints tight, heights compliant, and caps comfortable to touch. Consider proportions that complement stair width, ceiling height, and wall treatments, facilitating a smooth progression through the home. Your aim is a seamless connection between levels, where ornament enhances usability and restraint preserves archival authenticity.
- Choose durable, authentic Balustrade materials for longevity and tone
- Integrate Decorative motifs with balance and restraint
- Guarantee safe, comfortable handrails and consistent heights
- Harmonize metal, wood, and plaster to your staircase narrative
Banister Material Choices
In choosing banister materials for an Edwardian villa, you balance durability with period-appropriate character. You’ll typically lean toward timber for authenticity, using oak or walnut for weight and a refined grain that ages gracefully. Alternatively, a high-quality pine with a clear finish offers cost efficiency while preserving Victorian decor cues. Where moisture resistance matters, consider treated softwood or engineered options that mimic traditional hues without sacrificing stability. Metal accents, such as wrought-iron balustrades or brass detailing, can punctuate the staircase with period-accurate contrast while remaining robust. Practically, you’ll weigh maintenance, patina development, and installation ease, ensuring joints are tight and smooth. Your aim is banister materials that endure daily use and respect the villa’s tasteful, vintage dialogue.
Safe Gantry Considerations
To guarantee safety without compromising Edwardian character, prioritize a gantry design that provides sturdy support and clear fall protection while keeping lines and materials true to the period. You’ll balance form and function by selecting durable timber or ironwork, with proportionate balustrades and a robust top rail. Gantry safety hinges on precise connection details, corrosion resistance, and continuous hand guidance along the staircase. Structural stability comes from verified load paths, secure anchorage, and compatible hardware that respects era aesthetics while meeting modern codes. Approach restoration with measured evaluation, then implement targeted upgrades that preserve sightlines and ornamentation. Your goal is a safe, seamless passage between floors that honors tradition without inviting risk.
- Gantry safety essentials
- Structural stability verification
- Material compatibility
- Period-appropriate fastening details
Bathroom Revival: Edwardian Flair Meets Modern Efficiency
A bathroom that nods to Edwardian elegance while embracing modern efficiency makes daily routines feel deliberate and revitalizing. You optimize space with built-in storage and clean lines that echo period charm, avoiding clutter while preserving symmetry. Choose modern fixtures that balance vintage aesthetics with reliability, such as pedestal basins paired with slim vanities and chrome detailing. Install efficient lighting that highlights tile work and architectural features without glare. Integrate Smart technology for temperature control, timed ventilation, and water-saving showers, ensuring comfort without sacrificing period ambience. Prioritize quality fittings, precise grout lines, and timeless tiling patterns that echo Edwardian grids. Keep hardware cohesive across taps, towel rails, and mirrors to sustain a cohesive look. This approach delivers practical luxury, seamless performance, and enduring value.
Exterior Refresh: Facade, Render, and Weatherproofing
With a careful eye for texture and longevity, start by evaluating the facade to identify cracks, signs of moisture, and failed render that threaten weather resistance. You’ll map defects, note material history, and prioritize repairs that preserve the villa’s Edwardian character, then plan an efficient weatherproofing strategy that respects aesthetics. Address substrate issues, choose breathable mortars, and seal joints to prevent water ingress while maintaining ventilation. Integrate discreet garden lighting and consider how exterior details align with interior decor to extend the home’s charm. Effective weatherproofing reduces maintenance, improves energy performance, and protects ornamentation. Your approach should be methodical, durable, and restrained, ensuring the exterior remains coherent with the interior narrative and the broader garden setting.
- Inspect cracks and moisture indicators methodically
- Select breathable, compatible renders and sealants
- Plan lighting to complement architecture without glare
- Align exterior updates with interior decor themes
Garden and Outbuildings: Extending the Edwardian Welcome
Garden spaces and outbuildings extend the Edwardian welcome you’ve begun preserving, so approach them with the same restraint and clarity. You’ll refine garden landscaping to echo period proportions, using formal lines, restrained plantings, and purposeful sightlines that frame the house’s detailing. Prioritize durable, low-profile materials that age gracefully, avoiding modern clutter in borders and paths. For outbuilding design, preserve the essence of a service wing: simple geometry, restrained ornament, and sympathetic fenestration. Treat sheds, potting rooms, or studios as functional complements, not afterthoughts, ensuring doors and windows align with the home’s rhythm. Integrate built-in storage, discreet lighting, and weatherproof finishes. Maintain surface textures that mirror the villa’s facade, so the exterior scene reads as a cohesive, timeless approach.
Sourcing Materials: Reclaimed and Sympathetic Finishes
Sourcing materials for a rejuvenated Edwardian villa means prioritizing reclaimed elements and finishes that echo the era’s tactility and patina. You’ll select surfaces and fixtures that age gracefully, aligning with the house’s historic character while meeting modern standards. Seek crafted timber, terracotta, and quarries that reveal their origins, and pair them with sympathetic adhesives and finishes. Plan for accurate proportions, authentic detailing, and durable, low-maintenance options. Consider how historical landscaping informs material choices around thresholds and paths, ensuring cohesion with interior color schemes rather than clashing contrasts. You’ll balance sustainability with provenance, limiting new production where possible while preserving comfort and safety. Thoughtful sourcing elevates the villa’s authenticity without sacrificing contemporary living.
- Historical landscaping-inspired material palettes
- Reclaimed timber, brick, and stone integration
- Authentic hardware and finish techniques
- Cohesive interior color schemes and textures
Real-World Inspirations: Edwardian Restorations That Work
Real-world restorations reveal practical tactics that keep Edwardian character intact while meeting today’s standards. You’ll see projects that blend period detailing with modern efficiency, proving authenticity and livability aren’t mutually exclusive. Focused restorations reuse original layouts and sash windows, complemented by sympathetic upgrades that minimize visible intervention. When you study these cases, you’ll note restrained color palettes, refined trims, and durable materials chosen for long service. Garden landscaping restores sightlines from house to garden, integrating ironwork railings and gravel paths without overpowering the façade. Interior color schemes emphasize airy rooms, soft neutrals, and occasional restrained accents that echo era hues while avoiding dated heaviness. The result is coherent, comfortable living spaces that honor Edwardian principles and sustain contemporary performance.
Budgeting Smarter: A Practical Cost Roadmap for Authentic Updates
Budgeting smarter starts with a clear, value-driven plan that aligns your Edwardian updates with authentic detail and lasting performance. You’ll map each decision to a measured outcome, prioritizing quality where it matters most and avoiding overinvestment. A practical framework centers on budget planning and accurate cost estimation, giving you confidence to proceed.
- Define core priorities and thresholds for each room
- Break projects into phases with fixed costs and contingency
- Compare materials and trades for authentic finishes at fair value
- Track progress with simple, transparent budgets and milestones
Maintenance Practices to Keep the Edwardian Spirit Alive
Maintaining an Edwardian home isn’t about periodic bursts of effort; it’s a disciplined routine that preserves character while ensuring long-term performance. You establish a seasonal calendar for core tasks: inspect masonry and woodwork for moisture and decay, repaint with period-appropriate palettes, and seal drafts without compromising historic features. Prioritize proactive maintenance over reactive fixes, documenting each action for future reference. Garden design should complement the villa’s form, selecting plantings that avoid root intrusion and allow airflow to foundations while enhancing curb appeal. Interior lighting warrants deliberate choices—sensitized fixtures that preserve ambience, restore original fittings where feasible, and improve energy efficiency. Regular detailing, like repointing joints, treating timber, and checking gutters, sustains structural health and the Edwardian spirit across years.
Frequently Asked Questions
How to Balance Authentic Design With Modern Sustainability Goals?
You balance authentic design with sustainability by prioritizing Eco friendly materials and integrating Vintage decor thoughtfully, ensuring efficiency upgrades fit the period. You choose durable, low-impact choices, optimize energy use, and preserve details while modernizing comfort.
What Are Cost-Effective, Low-Risk Restoration Shortcuts?
Yes, opt for budget friendly tips and DIY restoration ideas that minimize risk. You’ll cut costs with ready-made materials, simple fixes, and documented methods, while preserving authenticity and safety. Implement cautious planning, documented steps, and thorough quality checks.
Which Permissions and Approvals Are Typically Required?
Yes—heritage restrictions and planning permissions are typically required. You’ll need to consult your local planning authority, prove consent for alterations, and secure listed-building or conservation-area approvals where applicable to avoid delays or penalties.
How Long Does a Phased Restoration Timeline Usually Take?
A phased restoration typically spans several months to years, depending on scope. You’ll pace milestones for historical accuracy and material sourcing, coordinating assessments, approvals, and contractor work to maintain authenticity while meeting practical timelines.
What Are Common Hidden Problem Indicators in Edwardian Homes?
You notice warped floorboards and rising damp—hidden indicators you should investigate. Architectural details and interior features reveal cracks, peeling plaster, and faulty vents, signaling moisture and structural risk you must address before restoration proceeds.
Conclusion
You’ve got the blueprint to breathe life into a Victorian-era shell without losing its soul. Treat each room like a quiet chorus—timber, brick, and light in harmonious conversation. Priorities align with authentic craft: sound structure, thermal finesse, and sash-window glow, all backed by sympathetic finishes and reclaimed grace. Stay disciplined with budget and maintenance, yet let reverence guide choices. In the end, you don’t restore a house—you choreograph a living, Edwardian heartbeat.
About the Author



