To start, you’ll want a versatile core set: a drill (cordless for portability, with a hammer option for masonry), a circular saw for sheets, and a reciprocating saw for demolition. Include a level, tape measure, and a utility knife for layout and trims. Add a palm sander or orbital sander, plus a multitool for tight spots. Choose dependable hand tools, compatible battery ecosystems, and quality bits. With these, you’re ready for most home projects, and more tips await.
Key Takeaways
- A versatile drill (corded for steady power and cordless for portability) with a complete bit set for drilling and driving tasks.
- A circular saw and a miter box or square for precise cuts on boards and sheet goods.
- A cordless impact driver or drill-driver combo (with common driver bits) for fast, secure fastening.
- A random-orbital sander (with dust collection) for smooth finishes on wood projects.
- A multi-tool or oscillating tool for tight spaces, detail work, and quick repairs.
How to Build Your Starter Home Toolkit

Getting started on the right foot means choosing a compact, versatile set of tools you’ll actually reach for. You’ll build your starter toolkit by selecting essentials that cover most tasks without overloading you. Start with a reliable drill for driving fasteners and drilling holes, plus a set of driver bits for flexibility. Add a versatile hammer, a tape measure, and a utility knife for quick cuts. Include a level and square to ensure precision in home decor projects. Keep a small adjustable wrench and pliers for fast, secure grip work. For maintenance and gardening tasks, choose a compact saw and a basic tool bag to carry gardening tools. Prioritize quality over quantity, and store everything in a durable case for easy transport and organization.
Drills: Which Type to Buy and How to Use Them
Choosing the right drill is the first step to reliable results, and the key is matching the type to your tasks. You’ll benefit most from understanding three core options: corded, cordless, and hammer. Corded drills deliver steady power for long sessions, while cordless models win on portability and cord-free convenience. Hammer drills are ideal for masonry, providing percussive action that speeds drilling into brick or concrete. For lighter wood and plastic work, a variable-speed drill with a slim grip feels precise and controllable. Consider drill bit varieties, too: bits differ in shank size, material, and tip design, so pick masonry, wood, or metal bits as appropriate. Start with a versatile 20V cordless and add specialty bits as needs arise. Maintain bits; keep batteries charged and swap bits quickly for clean, accurate results.
Saws You’ll Actually Use at Home
Saws you’ll actually use at home pair versatility with safety, so start with a few core types and match them to common tasks. A handsaw handles quick, simple cuts in wood; use it for small framing tweaks or trim. A circular saw covers sheet goods and larger lumber, offering speed with care and proper stance. For precise joinery and finishes, a backsaw or japanese blade helps keep kerfs clean. A reciprocating saw excels in remodeling or demolition, tearing out old material without precision suffering. For garden pruning and light pruning tasks, consider a pruning saw as an add-on to your toolkit. When you tackle furniture refinishing, a fine-tooth saw keeps edges smooth. Choose blades designed for hardwood, softwood, or plastic as appropriate, and prioritize guards and proper technique.
Fastening and Measuring Essentials for DIY
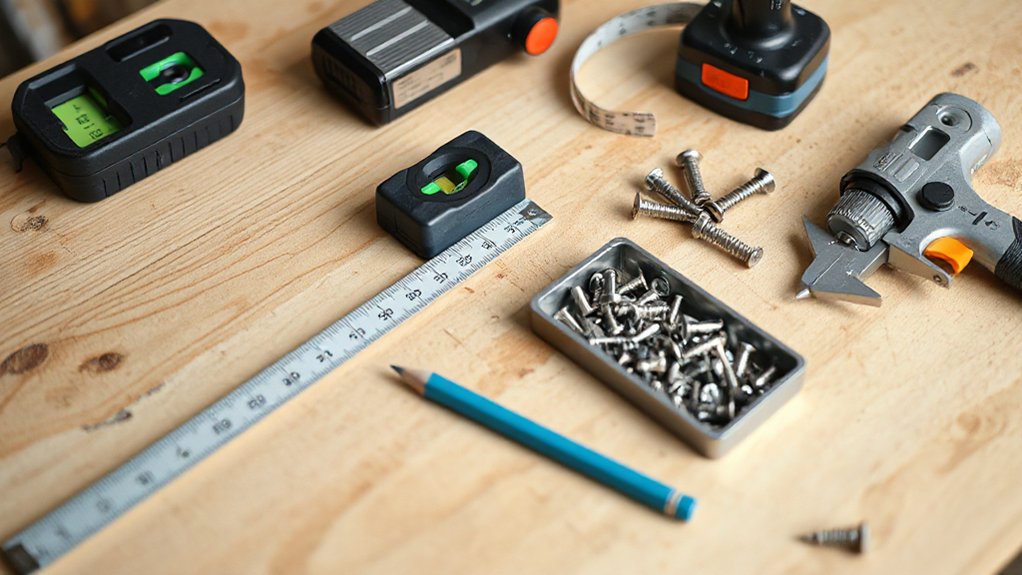
You’ll rely on precise measuring tools, from tapes to calipers, to plan cuts and alignments with confidence. Master fastening basics—choose the right screws, anchors, and adhesives for each material—and apply them with correct torque and technique. Keep accuracy and safety first: check measurements, use proper PPE, and follow manufacturer guidelines to prevent failures.
Measuring Tools Essentials
Measuring tools are the backbone of accurate, reliable DIY projects, and starting with the right set saves time and material. You’ll rely on a tape measure, a level, a square, and a ruler for fast checks and precise layouts. Prioritize durable tape measures with clear graduations and lock mechanisms that won’t drift. Keep a stainless steel ruler for edge work and a torpedo level for stable, true readings. For larger jobs, a laser measure speeds distance checks without error-prone guessing. Maintain measuring accuracy by inspecting tools regularly and replacing worn parts. Tool calibration matters: periodically verify against known references and re-zero when needed. Store tools clean, dry, and square to prevent drift and guarantee repeatable results.
Fastening Methods Basics
Fastening methods define how a project actually comes together, tying together the measurements and layouts you’ve been checking with your measuring tools. You’ll choose the right fastening techniques and materials to secure joints, panels, and frames confidently, resisting pullout and misalignment.
- Choose appropriate fastening materials for load, environment, and substrate.
- Match fastener type to application—wood screws, drywall screws, lag bolts, or confirmat fasteners.
- Use correct drive, spacing, and predrill guidance to prevent splitting and protrusion.
Effective methods rely on consistent practice and lubrication-free threads, clean holes, and clean surfaces. Apply clamps when needed, and verify alignment before final tightening. For durable results, maintain tool readiness, select corrosion-resistant fasteners in moisture-prone areas, and replace damaged pieces promptly. Fastening techniques ensure solid connections that endure.
Accuracy and Safety Tips
Accuracy and safety go hand in hand when fastening and measuring: precision in setup prevents errors that can compromise strength or cause injury, and safe habits keep you productive on the job. You should verify material, assess load, and select the correct fastener and bit for the task. Marking guides, jig use, and test fits reduce guesswork and rework. Maintain clean work surfaces, secure workpieces, and unplug tools before adjustments. Use appropriate PPE and follow manufacturer instructions for each power tool brand. Check torque settings, bit depth, and centerlines to guarantee alignment. Practice DIY safety tips with planned sequences, short dry runs, and staged steps to minimize surprises. This disciplined approach strengthens outcomes and supports consistent results with professional-grade accuracy.
Power Sanders and Surface Prep Made Simple
You’ll get a solid start on surface prep by choosing the right sanding surface and matching it to your project. Power sanders save time, but you’ll need the right grit sequence and pad for smooth results. We’ll cover sanding surface prep and the best power sander choices to keep projects clean, efficient, and repeatable.
Sanding Surface Prep
Sanding surface prep is the quiet work that makes all your finish coats look smooth and durable. You’ll set the stage for real longevity by controlling grain, dust, and texture before finish coats go on. Surface sanding demands deliberate technique, not brute force, to avoid gouges and torn fibers. Follow these steps:
- Choose the right grit sequence to balance material removal with fine smoothing.
- Maintain even pressure and steady motion to prevent low spots.
- Vacuum and wipe between steps to keep surface clean for finish smoothing.
Power Sanders Choices
Choosing the right power sander sets the pace for your surface prep. You’ll want a model that matches your project and grip comfort, because control determines finish. Start with orbital sanders for fine prep and raised-woodwork smoothing, then reserve belt sanders for rapid material removal on larger surfaces. Cordless convenience is a major plus, letting you work without cords snagging or limiting reach, particularly on decorative furniture or exterior trim. Dust management matters, so choose a unit with an integrated bag or a clear dust canister and compatibility with a vacuum. Sander selection should consider pad type, variable speed, and durability to withstand frequent use. Balance power, control, and portability to maintain a steady, precise workflow.
Multitools and Specialty Gadgets for Odd Jobs
Multitools and specialty gadgets save time and space by tackling small, tricky tasks without switching tools. You’ll find these compact aids excel at quick fixes, tight corners, and odd shapes, delivering precise results with minimal setup. Their value lies in multitool versatility and specialty gadget applications that adapt to common homeowner challenges.
- Tight-space access: reach nails, screws, and hinges where larger tools can’t.
- Fine-detail work: precision blades, hooks, and scrapers for clean finishes.
- Specialty tasks: wire strippers, cabinet pulls, and tile nippers for quick adjustments.
Choose a core multitool with sturdy blades, a compact glass cutter, and a versatile bit set to cover most odd jobs. Prioritize reliability, weight, and ease of blade changes for lasting usefulness.
Safety Gear and Tool Maintenance You Can’t Skip
Safety gear and tool maintenance aren’t optional extras—they’re the foundation of safe, effective home work. You protect yourself by using Personal protective equipment, selecting the right gear for each task, and inspecting it before every use. Maintain your tools with clean storage, sharp blades, and calibrated gauges; neglect invites accidents and mistakes. Establish a routine: wipe down, oil moving parts, and replace worn components promptly. Create disciplined habits around charging batteries, testing cords, and keeping blades covered when not in use. Organize your workshop with Tool storage solutions that prevent clutter and damage, and label extensions, chargers, and manuals for quick access. Follow manufacturer guidance, retire damaged gear, and record maintenance dates to stay proactive and precise. Safety and upkeep keep jobs predictable, efficient, and safer overall.
How to Choose and Build a Budget-Friendly, Versatile Collection

Why settle for a toolbox full of one-trick gadgets when you can build a budget-friendly, versatile collection that covers most home projects? You’ll optimize value by prioritizing core cordless tools, multi-use bits, and reliable hand tools, then expand strategically as needed. Focus on compatibility, battery ecosystems, and a compact setup for tool storage that minimizes clutter and maximizes accessibility. Plan with DIY project planning in mind, so every purchase serves multiple tasks.
1. Choose a modular system: base tool, common bits, and a compact charger or battery pack.
2.opt for quality over flash: durable motors, guards, and ergonomic handles.
3. Maintain an organized workspace: labeling, pegboard layouts, and a portable tote for on-site jobs.
Frequently Asked Questions
How Do I Decide Which Power Tool Brands to Trust?
Choose trusted brands by evaluating brand reputation and warranty coverage, then compare specs, service networks, and real user feedback. You’ll know you’re protected when reliable performance meets solid warranty terms and prompt, helpful customer support.
What Tools Are Essential for Small Apartment Repairs?
Surely you won’t need much for small apartment repairs—just the essentials. You’ll handle furniture repair and wall mounting confidently, using sharp, practical tools. Irony aside, these are your go-to, reliable, precise, and compact power tool choices.
How Can I Store Tools Efficiently in Tiny Spaces?
Store tools in wall-mounted racks, pegboards, and labeled bins; maximize vertical space and use narrow drawers. Implement modular, stackable organizers and magnetic strips. Maintain clear access with compact, space-saving tips and precise, practical storage solutions.
Which Accessories Extend a Tool’s Lifespan the Most?
Battery maintenance and blade sharpening extend a tool’s lifespan the most. You should regularly inspect batteries, keep contacts clean, store at proper temperatures, and sharpen blades precisely to minimize wear and maximize efficiency, reducing costly replacements long-term.
What Safety Steps Should Beginners Take Before First Use?
Start by saying: 70% of injuries happen within beginners’ first week; wear protective gear, follow safety guidelines, and inspect tools. You should unplug power, secure work, read manuals, and test controls before first use. Stay vigilant.
Conclusion
So there you have it: a starter toolkit that won’t quit, even if your skills don’t. You’ll drill, cut, sand, and pair down chaos with a thrifty grin, because a smart shopper beats a flashy toolbox any day. Build confidence, not clutter; measure twice, buy once; and treat safety like a feature, not a suggestion. When the project stumbles, your kit stumbles with you—only to recover faster, because you actually own the right tool for the job.
About the Author