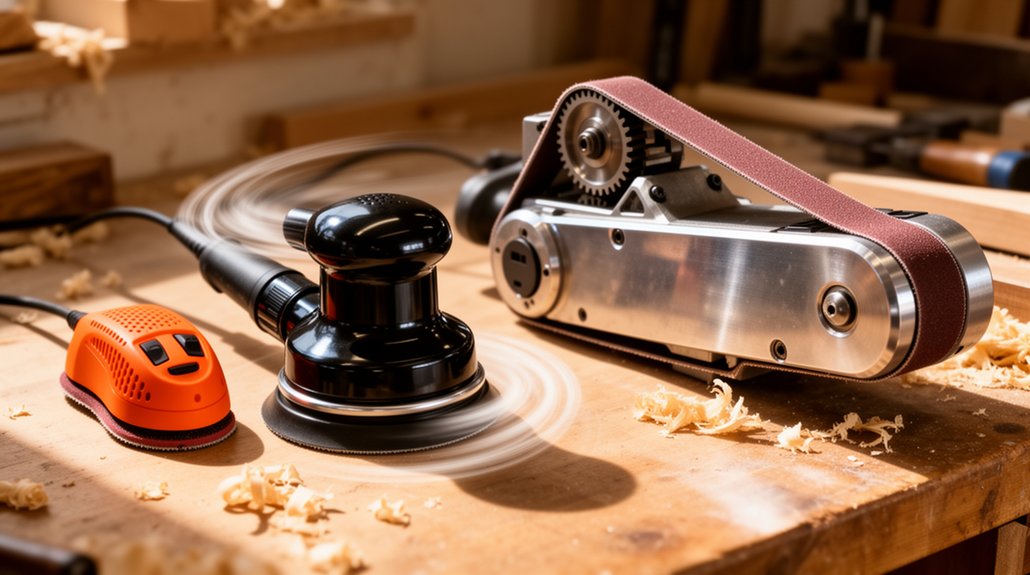
If you want fast material removal on flat surfaces, go belt sanding for the job, but guard against gouging with careful control and grit choices. For smooth, even finishes, choose an orbital sander to balance aggression and precision. For tight spots, contours, and fine detail, a mouse sander shines. Match tool to task, grip, and dust management to protect your work and your body. Keep exploring to master the nuances and elevate results.
Key Takeaways
- Orbit sanders are best for broad flat surfaces and even finishes with controlled aggression and stable RPM.
- Belt sanders excel at rapid material removal on flat stocks but risk gouging and heat buildup.
- Mouse (detail) sanders are ideal for contours, tight spaces, corners, and delicate work requiring precision.
- Match tool to finish goal: use belt for shaping, orbit for finishing, and mouse for detailed refinement.
- Consider ergonomics, dust collection, and grip comfort to maintain control and reduce fatigue across use cases.
What a Sander Really Delivers: The Core Capabilities

Sanding isn’t just about removing material; it’s about controlling finish quality, consistency, and time to completion. You’ll value a sander that delivers predictable material removal, stable speed, and minimal gouging. Core capabilities include chip clearance, dust control, and pad stability, all of which influence surface flatness and finish repeatability. An ergonomic design reduces user fatigue, letting you work longer with steady control and fine tactile feedback. Precision comes from consistent orbit or platen alignment, ensuring uniform abrasion across the workpiece. Low noise levels contribute to safer, more comfortable sessions, especially in shop environments with frequent use. Look for tools with responsive trigger control, robust bearings, and durable pads that maintain balance under load. When these elements align, your project moves faster, cleaner, and with repeatable results.
Orbit, Belt, or Mouse: Which Is Right for You?
When you’re choosing between orbit, belt, or mouse sanding, you weigh the benefits of orbit or belt efficiency against the precision and control a mouse grip offers for detail work. Consider how each type fits your project, the material, and your setup, and how the tool’s balance affects fatigue and accuracy. We’ll compare orbit vs belt advantages and how your hand-space and work fit drive the right choice.
Orbit Or Belt Benefits
Considering the job at hand, you’ll gain smoother finishes by weighing orbit sanders against belt sanders and traditional mouse practices. Orbit and belt sanders each offer distinct benefits for surface preparation and finish control, depending on the work you face and your power source constraints.
1) Surface preparation: Orbit sanders excel on broad flat areas for rapid material removal with less gouging, while belt sanders punch through stock quickly—use cautiously to avoid divots.
2) Power source: Corded options deliver consistent torque for extended sessions; battery models boost mobility but may fade in heavy use.
3) Control vs speed: Orbit centers on fine finish, belts prioritize aggressive smoothing; pair with appropriate grits to maximize results.
Mouse vs Tool Fit
Choosing the right tool hinges on your project’s specifics and your tolerance for grit. When you compare mouse, orbit, and belt options, focus on how each fits your grip, wrist angle, and stance. Mouse sanders excel at detail work and rapid material removal in tight curves, but they demand steady control to avoid gouges, and their compact design can limit aggressive stock removal. Orbit sanders offer balanced aggression with smoother finishes, reducing ripple risk, though they’re less precise on fine contours. Belt sanders blaze through flat stock yet can overwhelm delicate work and generate higher noise levels. Ergonomic design matters: select a model that maintains neutral wrist alignment and comfortable grip. Consider noise levels, dust collection compatibility, and room for long sessions to optimize tool fit.
How Each Sander Affects Finish: Performance by Type
Sanders differ in how they interact with material, and that matters for finish quality. You’ll see clear differences in defect potential, cut rate, and dust control, depending on type. For a precise, professional surface, align your technique with the tool’s strengths and keep surface preparation tight. Below is a concise performance snapshot.
- Mouse sander: Ideal for contour work and delicate work; delivers smooth finishes with careful sanding techniques, but watch for waviness on flat panels.
- Orbital sander: Balanced aggression and control; great for even, consistent finishes when you maintain flat, steady pressure during surface preparation.
- Belt sander: Highest material removal; risk of gouges unless you keep motion uniform and focused on flat areas only.
Use proper technique to maximize finish quality across all types.
When to Reach for a Mouse Sander in Tight Spaces
A mouse sander shines in tight spaces where larger tools can’t reach, thanks to its compact profile and precise grip. You reach for it when contours, corners, and small recesses demand control more than brute power. In these moments, ergonomic design matters: a comfortable trigger, balanced weight, and a palm-friendly shape reduce fatigue over extended sessions. You’ll notice improved maneuverability on narrow edges and detailed profiles, where steady, creeping strokes outperform bulkier sanders. Pay attention to noise levels, as quieter operation helps maintain line accuracy and reduces operator fatigue in confined workzones. Use light, frequent passes rather than heavy bursts to avoid gouging delicate profiles. Reserve the mouse sander for precision work, and switch to larger tools for bulk material removal when space allows.
Why an Orbital Sander Saves Time Without Gouging

Orbital sanders save time by delivering consistent, even finishes without gouging, thanks to their randomized pad motion and generous open-window dust paths. You’ll appreciate how this balance reduces material thinning and preserves edges, while you stay productive with minimal rework. To maximize benefits, focus on sander maintenance and ergonomic considerations, so performance stays reliable through long sessions.
1) Consistent finishes: randomized motion minimizes gouges, preserving stock integrity.
2) Quick setup and cleanup: clear dust paths improve visibility and reduce cleanup time.
3) User comfort: ergonomic designs cut fatigue, boosting accuracy on repetitive passes.
Remember to schedule regular sander maintenance, check dust collection effectiveness, and maintain a neutral grip for steady control. With disciplined maintenance and ergonomic awareness, you’ll sustain speed without sacrificing surface quality.
Where a Belt Sander Delivers Aggressive Stock Removal
When you need rapid material removal while keeping control over stock loss, a belt sander shines. You’ll cut through excess material fast, but you stay in charge by using the tool’s generous forward motion and flat sanding surface. This setup excels on flat or slightly curved stock, letting you level faces and thicknesses with minimal pass counts. Expect high material removal rates, which means you can reach your target thickness quickly—without dithering on finish quality. Emphasize stock management through deliberate passes and consistent pressure. Dust extraction matters here; a capable system keeps visibility clear and protects you from airborne debris. Ergonomic design matters, too, since balance and grip reduce fatigue during extended sessions and maintain consistent results.
Sander Specs That Matter: Amps, Dust Control, Disc Size
Sander specs that matter aren’t just numbers; they directly shape control, dust management, and finish quality. When you assess amps, dust control, and disc size, you’re picking how you work: steadiness, health, and precision.
- Amps define motor heft and sustained performance without bogging down; aim for a balance of power and heat management to keep your work smooth and thread-free.
- Dust control systems matter for visibility, filter life, and air quality; look for efficient vac-assisted or enclosed dust ports and chip ejection.
- Disc size and orbit/plate diameter determine cut footprint, surface feel, and finish consistency; match to your task and pad accessibility.
Ergonomic design and power efficiency guarantee you can work longer with less fatigue and energy waste.
Matching Sandpaper Grit to the Job: A Quick Guide
Your sanding results hinge on choosing the right grit for the job. Use the Sandpaper Grade Guide to match coarse grits for material removal and finer grits for finishing, adjusting to the surface and species. We’ll align the Job-To-Grade approach so you can predict outcomes—fast, clean, and repeatable.
Sandpaper Grade Guide
Choosing the right sandpaper grade is essential for efficient material removal and a smooth finish, so you’ll want a quick reference that matches grit size to the task. The Sandpaper Grade Guide helps you select the correct level of aggression, control, and finish quality for each step. Focus on practical grit ranges and how they translate to material, texture, and tool type.
- Sandpaper selection: match grit to material hardness and desired finish, from rough shaping to final smoothing.
- Ergonomic design: choose sheets or discs that stay flat, resist clogging, and feel comfortable during extended sessions.
- Process efficiency: pair the grit with appropriate feed rate and tool speed to optimize material removal and surface consistency.
Job-To-Grade Match
When you match grit to the job, you optimize material removal while preserving the surface quality you want. First, select coarser grits for heavy stock removal, then step down to finer grits to refine a finish. For profiling or end-grain work, use intermediate grits to minimize gouging while maintaining control. Your choice should reflect the material, the sander type, and your desired clarity of finish. Balance speed with control to avoid overheating and scorching. Consider ergonomics: ergonomic grip reduces hand fatigue during longer sessions and improves consistency. For precision work, prioritize finer grits and lower RPMs to keep chatter and scratch patterns to a minimum. Also evaluate noise levels; lower noise helps sustain focus and reduces fatigue without sacrificing effectiveness.
Practical Setup: Dust Collection and Safety Tactics
To guarantee safe, efficient sanding, set up a robust dust collection system from the outset and seal the workshop to minimize airborne particles. You’ll protect lungs, optics, and finish quality by controlling dust at the source and maintaining clear sightlines. Use the right combination of containment, filtration, and personal protection to stay productive and precise.
1) Install a dedicated dust collector with a tight-fitting cyclone or preseparator, and connect each tool for continuous extraction.
2) Use a dust bag for main bin disposal and replace filters regularly; keep airflow unblocked and seals intact.
3) Always wear safety gear—respirator, eye protection, and hearing protection—and verify ventilation before starting.
Common Pitfalls by Sander Type and How to Avoid Them
You’ll want to map common pitfalls to each sander type so you can spot them before they derail your project. We’ll flag how oversanding, clogging, or underpowered tools gain you poor finishes and wasted effort. Let’s start with practical guardrails to avoid the most frequent mistakes and keep your workflow precise.
Pitfalls by Sander Type
Sander types each carry distinct pitfalls that can derail a project if unrecognized, and understanding these common missteps helps you choose the right tool and technique from the start. You’ll run into issues if you ignore ergonomics or push against noise levels that exceed tolerance, which slows work and invites fatigue. Recognize where control, feed rate, and pad wear can sabotage finishes, then adjust approach before binding, gouging, or burning occur.
1) Mouse sander pitfalls: cramped grip, awkward wrist angles, and scattered dust can ruin uniformity.
2) Orbit sander pitfalls: inconsistent pressure, chatter, and excessive vibration degrade surface flatness.
3) Belt sander pitfalls: aggressive stock removal, heat buildup, and hard-to-control material bounce compromise detail.
Avoiding Common Sander Mistakes
Understanding the common mistakes by sander type helps you keep control, finish quality, and stay efficient. You’ll avoid overloading the pad, which causes gouges or burn marks, by matching sander speed to material and grit. Don’t neglect dust collection; poor extraction fouls finishes and shortens tool life. With a mouse sander, you’re prone to concentrated pressure near edges—ease off and use steady, light strokes. Orbit sanders demand even pressure to prevent swirl marks; keep the pad flat and move progressively. Belt sanders tempt aggressive passes; resist, and work in small sections with a consistent pace. Prioritize Sander maintenance to prevent underperforming brushes or loose housings. Ergonomic design matters: choose grips and weight that reduce fatigue, enabling longer, precise sessions.
Budget, Availability, and Longevity: Buying Smart
Choosing a sander starts with smart budgeting, solid availability, and proven longevity. You’ll optimize value by balancing upfront cost against long-term durability, spare parts access, and reliable warranties. Consider how ergonomic design and noise levels influence comfort during extended use, especially if you work on carpentry projects daily.
- Prioritize models with proven longevity, readily available spare parts, and reputable warranty coverage.
- Compare prices across retailers, factoring maintenance costs, grip comfort, and noise levels for all-day sessions.
- Verify supplier support, accessory ecosystem, and replacement pads or belts to minimize downtime.
Investing smart means selecting gear that remains serviceable, not merely affordable. You’ll save time, reduce fatigue, and sustain productivity by choosing wisely now.
Real-World Scenarios: Project A, B, and C
In Project A, you’ll tackle detailed finishing on softwood surfaces, so start by selecting a sander that delivers fine abrasion with minimal heat buildup and crisp dust control. You’ll assess ergonomic design to reduce fatigue during prolonged sessions, ensuring comfortable grip, balanced weight, and accessible controls. For Project B, prioritize consistent material removal without gouging; choose a tool that maintains steady RPM and steady dust collection. Project C demands portability without sacrificing performance, so weigh battery life against power output and vibration reduction. Consider noise levels alongside performance to protect hearing and maintain concentration on-site. Keep in mind dust control, swapability of sanding pads, and filter maintenance as real-world enablers of repeatable results. The right sander blends control, efficiency, and comfort for long, precise finishing tasks.
A 60-Second Evaluation Framework: Pick Your Sander Now
We’ve looked at how a sander’s features align with real-world projects; now you’ll size up options in a tight, 60-second framework.
- Evaluate Sander ergonomics: grip comfort, balance, and vibration transfer to minimize fatigue.
- Check Noise levels and dust control: a quieter unit with effective extraction improves accuracy and safety.
- Compare performance claims: orbit, mouse, or belt speed, dust collection, and pad stability determine finish quality quickly.
Use this framework as a quick screen: (1) purpose-fit, (2) comfort and controls, (3) output and cleanliness. In under a minute, you’ll identify the option that delivers steady control, low fatigue, and reliable results, aligning with Sander ergonomics and Noise levels expectations for professional, durable performance.
Frequently Asked Questions
How Do I Choose Between a Palm Sander and a Detail Sander?
A palm sander is faster for quick, broad panels; a detail sander tackles tight corners. You choose based on access and finish. Follow sanding techniques and safety precautions, keeping grips steady and dust collection effective for best results.
Can I Use Sanding Discs on a Belt Sander?
Yes, you can’t use sanding discs on a belt sander. Sanding disc compatibility is limited to orbital or palm models, and Belt sander maintenance matters if you switch wheels. Stick to compatible discs and inspect dust paths.
Do Sanders Require a Dedicated Dust Collection System?
Yes, you should use dust extraction with sanders; it reduces fine particles and fumes, boosting safety. Invest in a dedicated system, and wear safety gear. It’s proven to minimize health risks and improve finish quality.
Will Noise Level Influence My Sander Choice?
Yes, noise level should influence your sander choice. Noise impact matters for long sessions, so pick quieter models and wear hearing protection consistently to prevent damage while you work.
How Often Should Sanding Belts or Discs Be Replaced?
Think of your sander like a trusted hammer, wearing thin belts or discs signals retirement. You should replace sanding belts or discs when grit exposes wear or heat loosens, and always follow safety precautions for best results.
Conclusion
So you know what each sander delivers, you’ve weighed finish needs, and you spot the tight spots you’ll tackle. With the right pick, you shave time, avoid gouges, and finish smoother, faster. Ready to decide: will you reach for the mouse in tight corners, the belt for rapid stock removal, or the orbital for a balanced, finish-ready result? When you pair your project with the right tool, cutting is predictable, and your work shines. Which path will you choose?
About the Author