

A practical guide starts with a thorough damage assessment—check structure, fire exposure, and hidden costs like moisture, wiring, and permits. Take immediate safety actions: call 911 if needed, don’t re-enter until clearance, photograph damage, and begin insurer contact with solid documentation. Decide early between restore, rebuild, or renovate, guided by codes and permits, then design firewise landscaping and defensible space. Vet contractors, track changes meticulously, and maintain long‑term maintenance plans; more details await if you continue.
Key Takeaways
- Assess damage, safety risks, and hidden costs early to support claims and plan temporary housing and repairs.
- Secure permits, codes, and zoning requirements; coordinate with inspectors and maintain compliant, labeled plans.
- Decide restoration, rebuilding, or renovation based on scope, aiming for fire safety upgrades and durable systems.
- Plan construction with fixed milestones, buffers for weather, and clear budgeting for materials, labor, and contingencies.
- Implement fire-resistant design: defensible space, noncombustible siding/roofing, and moisture/ventilation controls to prevent future risk.
What to Expect When Rebuilding a Fire-Damaged Rural Home: A Practical Roadmap

When you begin rebuilding a fire-damaged rural home, expect a measured, step-by-step process rather than a single decisive moment. You’ll establish priorities, obtain permits, and secure temporary housing, knowing decisions compound over weeks and months. Begin with a clear assessment of what remains structurally sound, then move to code-compliant framing, utilities, and moisture mitigation. You’ll document your choices with precision to avoid costly backtracks. As you plan, balance practicality with personal taste, because Home decor and interior design choices shape daily life even during reconstruction. Maintain meticulous records, timelines, and budgets, and communicate with contractors in plain terms. Expect supplier delays, inspections, and iterative reviews, but keep your goals in sight: a safe, efficient, and thoughtfully finished residence that reflects your standards.
Assess Damage: Structure, Fire Exposure, and Hidden Costs
You’ll start by evaluating the structural integrity—looking for warped framing, compromised joints, and load-bearing changes that fire exposure can cause. Next, assess fire exposure risks, including smoke damage, heat zoning, and potential spread paths that affect future restoration choices. Finally, identify hidden cost factors such as moisture control, insurance gaps, and permits, so you can budget accurately from the outset.
Structural Evaluation Points
Structural evaluation starts with a clear, practical check of the main frame and supporting elements. You inspect for structural integrity, noting any warping, cracking, or corrosion that could compromise stability. Pay close attention to joints, beams, posts, and load paths, confirming they align with original plans or code requirements. Fire exposure exposes hidden damage: check for softened timbers, charred surfaces, and hidden burn-through in concealed cavities. Assess connections, fasteners, and foundations for heat-related deterioration or settlement signs. Document findings methodically to support fire safety decisions and insurance claims, detailing required repairs and replacement components. Prioritize safety, flagging compromised areas for temporary shoring and professional evaluation. Schedule expert reviews as needed, then align your plan with code compliance, material availability, and realistic timelines.
Hidden Cost Factors
Hidden costs extend beyond visible damage, and you must account for them as you assess the structure, fire exposure, and overall project scope. You’ll quantify hidden factors before sealing plans, because scope changes drive pricing and scheduling. Inspect for hidden structural weaknesses, unplanned code updates, and necessary permits that can surprise your budget. Fire exposure often affects insulation, wiring, and moisture barriers later, so document lingering risks even when materials seem sound. Consider temporary housing, site safety, theft protection, and debris removal—these logistics compound expenses you might overlook. Insurance claims require precise documentation to avoid delays, so track every line item and keep receipts. Emotional recovery matters too; plan support resources to stay resilient and focused during repairs. Meticulous record-keeping reduces uncertainty and accelerates recovery progress.
Immediate Safety and Insurance: Steps to Take Right Away
When a fire tears through a rural home, act quickly but calmly to guarantee everyone stays safe and nearby hazards are contained. You should call emergency services if needed, and then account for all household members and pets. Do not re-enter the structure; wait for official clearance before evaluating damage. Preserve evidence for insurance claims by photographing damage from a safe distance and keeping receipts for temporary repairs. Contact your insurer promptly to start the claims process and confirm required documentation. Implement temporary safety measures, such as securing doors and utilities, without making permanent changes. If you’ve considered wildfire prevention strategies, share them with your insurer to ensure your plan aligns with coverage. Keep a concise restoration checklist to streamline insurance claims and future rebuilding decisions.
Permits, Codes, and Local Regulations You Must Know
Rebuilding after a fire requires strict attention to permits, codes, and local regulations, because rushing can cost you time, money, and safety. You’ll coordinate with your local building department early, verify required permits, and understand whether you need a structural, electrical, or plumbing review. Keep plan documents precise and labeled, since approvals hinge on accurate drawings and specifications. Adhere to current codes for residential construction, fire safety requirements, and energy standards to avoid costly rework. Check setbacks, zoning constraints, and temporary housing rules that may apply during reconstruction. Track permit expirations, inspection timetables, and required post-construction sign‑offs for insurance claims. Stay proactive, document changes, and maintain open communication with inspectors to minimize delays and align repairs with safety and compliance goals.
Decide Your Rebuild Path: Restore, Rebuild, or Renovate?

Choosing the right path after a fire—restore, rebuild, or renovate—depends on damage scope, budget, and long‑term goals. You’ll assess structural integrity, utility rerouting, and the practicality of preserving original features. Restore if historic value and limited loss permit it, keeping your footprint mostly unchanged. Rebuild when framing, foundation, or critical systems are too compromised, demanding modern layouts and improved energy efficiency. Renovate suits partial damage with upgrades that fit current needs without a full tear‑out. Throughout, weigh the impact on home insurance coverage, timelines, and long‑term maintenance. Fire safety priorities should steer decisions: updated exit routes, noncombustible finishes, and smart detectors. Communicate clearly with your insurer and contractors, documenting scope, approvals, and necessary code upgrades to avoid future gaps.
Budget and Timeline: Realistic Costs for Rural Lots
You’ll start with a clear budget framework that reflects realistic ranges for rural lots and the typical cost components you’ll encounter. I’ll outline concrete timeline milestones—from site prep to permits to final finishes—so you can align cash flow with progress. This is your practical baseline to compare bids, adjust plans, and keep the rebuild on track.
Realistic Budget Ranges
For rural lots, realistic budget ranges hinge on site conditions, material choices, and permit requirements, so plan with a tight band and contingencies. You’ll want a conservative cushion for weather, access, and utility setbacks, since delays cost time and money. Start with structural and fire safety priorities, then allocate remaining funds to weatherproofing, cooling, and energy efficiency. Expect regional cost variations for materials and labor, and account for debris removal after a fire—this stage often uncovers unforeseen needs. Insurance claims can influence timing and scope, so align your budget with documented coverage and deductibles. Track contractor change orders meticulously, and keep a clear record of approvals. Realistic budgets require disciplined ongoing review, staged milestones, and written contingencies to survive permitting and site-specific challenges.
Timeline Milestones For Rural
Timeline milestones for rural rebuilds hinge on clear sequencing, strict budgets, and realistic weather and access assumptions. You’ll map the project in phases, assigning fixed windows for permitting, site prep, foundation, framing, services, and insulation. Expect weather contingencies to shift milestones; build in buffers for road access, material delivery, and contractor coordination. Budget realism means detailing unit costs, labor hours, and contingency—typically 10–20% for rural sites. Track progress weekly, updating timelines as subcontractors confirm availability and permits pull. Landscaping aesthetics should be planned early to align grading, drainage, and exterior finishes with landscaping goals, avoiding rework. Interior design decisions—layout, fixtures, and finishes—must flow from structural milestones to prevent delays. Maintain strict documentation to prevent scope creep and protect cost control throughout the rebuild.
Siting and Land Clearing: Protecting Against Future Fires
If you’re rebuilding after a fire, siting and land clearing must minimize future risk by designing a defensible property layout and reducing fuel around structures. You’ll prioritize spacing between buildings, access for emergency responders, and unobstructed evacuation routes, then position main structures to shield from prevailing winds. Create defensible space by clearing dead wood, pruning overstory, and eliminating dense fuels within 30 to 100 feet, depending on local code. Use fire-resistant landscaping choices and avoid highly inflammable materials near the home. Implement seasonal management like pruning, mowing, and thinning to maintain low fuel loads. Integrate wildfire mitigation into your land management plan, mapping slope, aspects, and potential ember paths. Regular inspections ensure maintenance and sustained protection for long-term resilience.
Foundation and Framing: Building a Durable Core
Start with a solid, well-anchored foundation and a framing system designed to resist fire, moisture, and seismic forces. You’ll choose a continuous, vented foundation or reinforced slabs, ensuring proper drainage and frost protection. Use corrosion-resistant anchors, approved joists, and fatigue‑resistant lumber or engineered wood that’s treated for moisture exposure. Align framing with fire‑safe clearances, and design openings to minimize heat transfer. Incorporate fire resistant materials where possible, including coated steel fasteners and mineral wool insulation, while meeting local codes. Whichever rural construction techniques you select, detail connections to resist racking and uplifting, and plan for moisture barriers behind all exterior siding. Maintain precise spacing, verify load paths, and document every step for future inspections. This core supports energy efficiency, durability, and long‑term resilience.
Fire-Resistant Materials for Rural Homes

You’ll start by choosing fire-resistant siding that stands up to rural exposure and ember attacks, prioritizing materials with tested ignition resistance and low flame spread. Then, consider noncombustible roofing options that balance durability, maintenance, and weather theology for long-term safety. This sets a precise foundation for evaluating material performance across both siding and roof systems as you plan reconstruction.
Fire-Resistant Siding Choices
What siding options best resist embers and radiant heat when rebuilding a rural home? You’ll prioritize fire resistant siding that maintains integrity under radiant heat and ember exposure. Choose exterior cladding rated for ignition resistance, with a one-hour or higher fire rating where codes allow. Opt for noncombustible or limited-combustion materials, such as fiber cement, metal, or masonry veneer, over traditional wood. Guarantee joints are tight and sealed, with proper sealants that withstand heat cycling. Consider venting, soffits, and eave detailing to reduce ember intrusion. Use a continuous, bonded cladding system rather than detached panels to prevent gaps. Confirm substrate compatibility, reflectivity, and thermal expansion tolerances. Pair siding choices with clean, defensible space practices to maximize overall fire resilience.
Noncombustible Roofing Options
For a fire-resilient roof, choose noncombustible or limited-combustion materials that resist embers and radiant heat while withstanding heat cycling in rural settings. Noncombustible roofing options, such as metal, clay, concrete, and certain high-fire-rated shingles, offer durability and stability after embers land. Assess seam protection, flashing quality, and attic ventilation to minimize ember intrusion and moisture damage. Consider metal panels with standing-seam designs for wind uplift resistance and long service life, or tile systems with proven fire ratings and low flame spread. Guarantee roof-to-wall connections are solid, deck tolerances are tight, and fire-resistant underlayment is installed beneath the final layer. Prioritize materials and installation that support wildfire prevention goals, reducing ongoing maintenance and exposure to risk in rural communities. roofing materials.
Roofing, Gutters, and Eaves for Firewise Protection
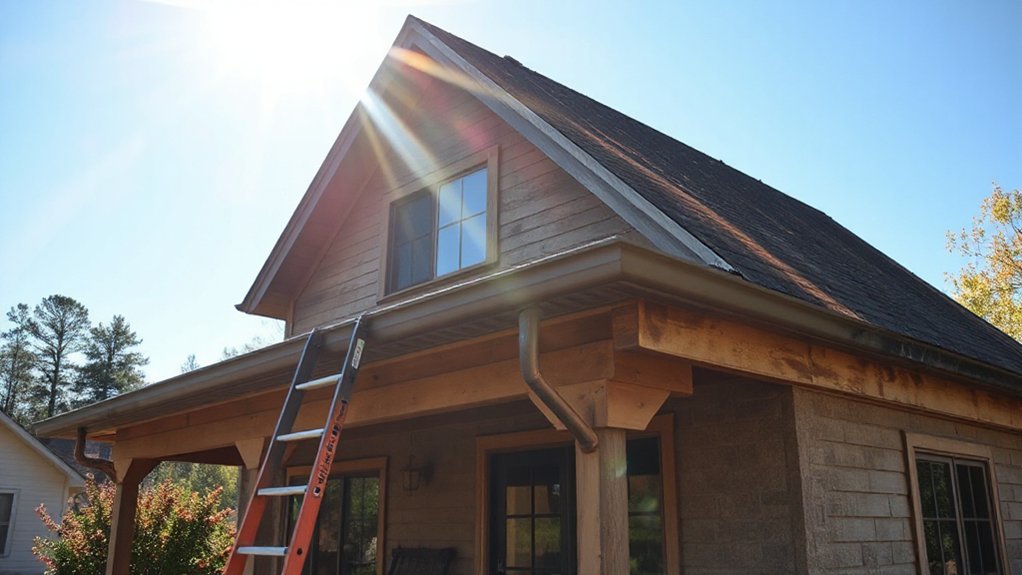
Roofing, gutters, and eaves are your first line of defense against embers and radiant heat, so start by selecting firewise materials and detailing that minimize fuel exposure around the roofline. Choose fire resistant roofing options with low fuel load, high heat resistance, and tested ember resistance. Install metal flashing at junctures to deter ember intrusion, and seal ridge caps to prevent gaps. Keep gutters clear and free of dry debris; implement gutter maintenance schedules and extend downspouts away from the structure. Use noncombustible soffits and eaves, and install ember shields where needed. Maintain a defensible space around the roof perimeter by trimming vegetation and removing debris, ensuring rapid access for maintenance and inspections. Finally, document materials and inspections for future fire events.
Windows, Doors, and Ventilation That Stand Up to the Elements
When selecting windows, doors, and ventilation, prioritize elemental resilience by choosing products with proven fire resistance, tight glazing seals, and minimal air leakage. You’ll want frames made of steel or fiberglass and glazing with laminated panes to reduce shattering risk. Guarantee exterior doors have reinforced hardware and ratings for high wind and heat exposure. Install gaskets and properly sealed flashing to prevent ember infiltration around openings. For ventilation, opt for systems with backdraft protection and automatic dampers that close during fire events, while maintaining indoor air quality during normal use. Maintain window safety by choosing operable units with secure, tamper‑resistant hardware and clear egress paths. Regularly test and service ventilation systems to preserve performance and reliability.
Firewise Upgrades for Plumbing, Electrical, and Mechanical Systems
As you rebuild, address the fire threats lurking in plumbing, electrical, and mechanical systems with targeted upgrades that restore safety and reliability. You’ll replace compromised pipes with fire‑resistant materials, install leak detection, and guarantee corrosion‑resistant fittings. For electrical, update panels to current code, add surge protection, and retrofit arc‑fault circuit interrupters in all living spaces. Consider sealed conduit, steel boxes, and flame‑retardant insulation to reduce fuel loads. In mechanical systems, shield heating units, relocate furnaces away from combustibles, and vent exhausts to exterior safely. Schedule professional inspections, test water heaters, and verify gas lines for leaks. These Fire safety improvements support smoother Insurance claims processes and minimize downtime, helping you recover with confidence while preserving long‑term home integrity.
Energy Efficiency and Heat Resilience for Rural Homes

You’ll begin by tightening insulation and air sealing to minimize heat loss and drafts, then evaluate thermal mass options to stabilize indoor temperatures with fluctuating rural conditions. Consider renewable heat strategies that pair with efficient layout and airtight envelopes, so system startup is reliable during power disruptions. We’ll address how insulation, thermal mass, and renewable heat integrate together to boost overall efficiency and resilience in your fire-damaged rural home.
Insulation and Air Sealing
Insulation and air sealing form the backbone of energy efficiency and heat resilience in a rural rebuild. You’ll select materials that deliver high R-values per inch and resist flame exposure, prioritizing fire resistant insulation where heat and embers threaten once‑vulnerable gaps. Identify air leaks around doors, windows, service penetrations, and attic access, then seal with appropriate products to meet local code and climate needs. Use continuous sheathing and an exhaustive air barrier strategy to minimize drafts and moisture transport. In attics and crawl spaces, ensure proper ventilation without creating cold bridges. Install sealed, well‑fitted batt or spray foams where appropriate, avoiding gaps. Maintain airtight sealing practices during finishing, test with a blower door, and document performance for future resilience.
Thermal Mass Strategies
Do you want to maximize steady heat storage and minimize temperature swings in your rural rebuild? In this section, you’ll implement practical, proven thermal mass strategies that improve energy performance without complicating construction. Use dense, low-void materials to store heat from a limited, predictable heat source, then release it during cooler periods. Plan interior layouts that place thermal mass where sunlit or stove-generated heat concentrates, such as living zones, near masonry fireplaces, or behind interior walls with controlled air flow. Prioritize slab-on-grade or concrete and masonry where feasible, ensuring proper moisture control and ventilation. Align finishes and furnishings to enhance heat retention without obstructing mass performance. Monitor cycles and adjust shading, insulation, and occupancy to optimize thermal mass benefits.
Renewable Heat Integration
Renewable heat integration blends energy efficiency with resilience, enabling your rural home to draw warmth from sustainable sources while reducing reliance on fossil fuels. You’ll assess current loads, then size renewable options to meet peak needs without oversizing equipment. Prioritize a diversified approach: solar thermal for hot water, biomass or pellets for space heating, and heat pumps where electrical demand is reliable. Use passive strategies—insulation, airtight envelopes, and glazing—to lessen input requirements. Integrate thermal storage to decouple generation from demand, improving reliability during power outages. Guarantee proper controls, zoning, and weather-responsive operation so your system runs efficiently year-round. Plan for maintenance access, fuel supply security, and local incentives. This approach reinforces sustainable energy usage and strengthens long‑term resilience for your home.
Firewise Landscaping and Defensible Space Strategies
What does it take to defend a rebuilt rural home from future fires? You implement Firewise landscaping and defensible-space practices that reduce radiant heat and fuel continuity around your structure. Prioritize a well-maintained, non-combustible zone directly beside the home, create a minimum 30-foot greenbelt with irrigation, and remove flammable debris, dead wood, and clutter. Use fire-resistant materials for siding, vents, and decking, and install ember-retardant screens. Maintain access routes for fire crews and keep egress clear. Plan for ongoing maintenance, inspections, and debris removal across seasons. Integrate wildfire insurance considerations and align your landscape with emergency preparedness drills, ensuring you can respond quickly if a threat arises. This disciplined approach minimizes risk while supporting rapid recovery and resilience.
Hiring Contractors: Vetting, Bidding, and Managing Local Teams
As you move from planning Firewise landscaping to rebuilding with reliable help, vetting, bidding, and managing local contractors becomes your next top priority. Start by evaluating contractor reputation through references, past projects, and on‑site visits. Verify licenses, insurance, and bonding, then confirm they understand your goals for fire resistance, material quality, and timelines. Invite at least three bids to illuminate the bidding process, check line‑item details, and ensure scope alignment with code requirements. Ask for a detailed schedule, milestone payments, and contingency plans for weather or supply delays. Maintain clear communication, document decisions, and designate a single point of contact. Track progress weekly, address deficiencies promptly, and hold trades to safety and quality standards to prevent costly backtracking.
Track Changes: Documentation for Permits and Claims
Documenting every change is essential when steering permits and claims. You’ll maintain a clear ledger of revisions, approvals, and dates to prevent gaps that stall construction, funding, or insurance reimbursements. Start with a centralized repository for insurance documentation and permit tracking, so every stakeholder can verify status at a glance. Label each entry with the action, responsible party, and timestamp to avoid ambiguity. Attach supporting documents—blueprints, change orders, inspection notices—directly to the relevant record. Regularly audit for completeness and reconciliation, especially after weather or material substitutions. Communicate updates promptly to insurers, lenders, and your contractor network to preserve momentum and accountability.
- Centralized insurance documentation and permit tracking
- Clear change orders with timestamps and ownership
- Regular audits and proactive stakeholder briefings
Long-Term Wellness: Maintenance Plans to Preserve Your Rebuilt Home
A disciplined maintenance plan protects your investment and extends the life of your rebuilt home, so you should establish a practical schedule that covers systems, structure, and preventative inspections. To sustain safety and comfort, set quarterly checks for electrical and HVAC performance, roof integrity, and drainage. Keep a log of repairs, part replacements, and protective measures to pinpoint emerging issues early. Prioritize fire safety by testing alarms, updating extinguishers, and reviewing escape routes with your household. Schedule seasonal inspections of plumbing, insulation, and ventilation to prevent moisture buildup and energy waste. Build a simple emergency kit and rehearse evacuation plans to support emotional recovery after incidents. Maintain clear boundaries between ongoing maintenance tasks and major upgrades, ensuring resources align with long‑term resilience and your home’s evolving needs.
Frequently Asked Questions
How Soon Can Occupancy Occur After Rebuilding Begins?
Occupancy can’t occur until inspections pass and you have approved permits; expect delays for fire safety and building code compliance. You’ll need to secure rebuilding permits, complete critical life-safety systems, and address any remediation before moving in.
What Insurance Coverage Should I Confirm Post-Fire?
You should confirm builder’s risk, dwelling, and contents coverage, plus fire damage endorsements. Verify fireproofing measures and emergency preparedness provisions are in place, including incidentals. You’ll want clear sublimits, claim deadlines, and documented receipts to expedite claims.
Which Utilities Require Temporary Shutdowns During Rebuild?
Like a well-ordered forest, you’ll shut down sure-fire zones: power, gas, and water lines paused; Electrical safety and Plumbing inspections guide every step, so you protect crew, property, and progress during the rebuild.
How Do I Assess Subcontractor Reliability and Past Work?
You assess subcontractor reliability by reviewing Subcontractor credentials and checking their Work portfolio, verifying licenses, insurance, and bonding; visit past projects, ask for client references, and confirm timeliness, quality, and problem-solving before you commit to hiring.
What Maintenance Schedule Prevents Future Fire Damage?
You should implement a schedule that includes monthly debris checks, quarterly chimney and wiring inspections, and annual professional audits; fire prevention and structural integrity rely on consistent maintenance, prompt repairs, and documented compliance with safety standards.
Conclusion
In the aftermath, you’ll establish a resilient routine: assess, adapt, verify, and document. You’ll assess structural integrity, confirm insurance coverage, verify permits, and track every change. You’ll adapt your plan—restore, rebuild, or renovate—without rushing. You’ll verify code compliance, verify contractor performance, and verify post-project maintenance. You’ll document lessons learned, implement firewise practices, and sustain defensible space. You’ll safeguard your family, your property, and your peace of mind by staying informed, prepared, and disciplined every step of the way.
About the Author



