

To modernize a 1980s suburban home, start with a practical assessment to identify priorities and preserve its character. Set a sustainable budget with contingencies, then tackle insulation and air sealing, upgrade windows thoughtfully, and boost energy efficiency with a high‑performance heat pump. Prioritize upgrades by impact and ROI, keep original massing intact, and layer in smart wiring, efficient lighting, and flexible layouts. DIY cosmetic fixes help, but hire pros for structural or electrical work. You’ll uncover smarter, durable choices as you proceed.
Key Takeaways
- Start with a practical assessment of layout, systems, and exterior conditions to prioritize phased, cost-conscious modernization.
- Improve energy efficiency with air sealing, higher-performance windows, insulation, and an efficient heat pump system.
- Preserve 1980s architectural cues (massing, roofline, materials) while upgrading finishes with timeless, durable materials.
- Enhance interior flow through flexible layouts, smart lighting, and kitchen/bath updates that nod to era charm.
- Boost curb appeal with cohesive color palettes, native landscaping, and discreet exterior lighting for safety and ambiance.
Why Modernize a 1980s Suburban Home Now
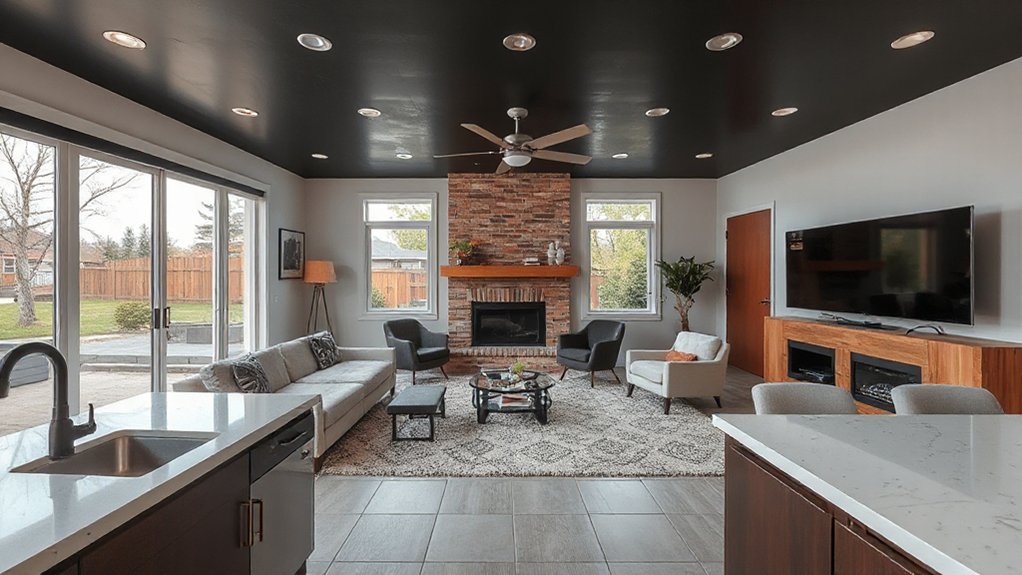
Modernizing a 1980s suburban home now makes sense because energy costs, comfort, and resale value have all grown in importance. You’ll gain immediate efficiency by upgrading insulation, windows, and systems, reducing monthly bills while improving living quality. This approach honors historical preservation by retaining original massing and key exterior cues, ensuring the home reads as the same property at a glance. At the same time, architectural authenticity guides your choices, so modernization respects proportion, roofline, and material tones that define the era. You’ll avoid overhauls that erase character, instead weaving contemporary performance into familiar aesthetics. With informed decisions, you protect value, reduce operating costs, and create a more livable space that still feels true to its period. Then, your home communicates progress without sacrificing legacy.
Begin With a Practical Home Assessment
Begin with a practical home assessment to set a clear, achievable path. You’ll map current layout, systems, and finishes, then identify quick win upgrades vs. long-term projects. Start outside: inspect roof, gutters, grading, and landscape health, noting drainage issues that affect foundations. Inside, test plumbing, electrical capacity, insulation, and HVAC performance; log uneven temperatures and unfamiliar noises. Prioritize safety and structural integrity, then efficiency gains that improve daily comfort. Create a simple, phased plan, grouping tasks by impact and cost. As you assess interior spaces, consider how Landscaping ideas could enhance curb appeal while minimizing disruption, and how Interior decor updates can refresh rooms without full remodels. Document measurements, costs, and a realistic timeline to guide decision making and avoid scope creep.
Set a Sustainable Renovation Budget
Set a sustainable renovation budget by anchoring it to your practical assessment: define total available funds, allocate reserves for contingencies, and assign targets for each scope—from quick wins to major overhauls. You’ll host a disciplined, forward‑looking plan that reduces waste and preserves essential value. Prioritize transparent budgeting, track every dollar, and align expenses with your project timeline. Consider Landscaping challenges early—allocate funds for soil prep, irrigation, and native plantings that reduce maintenance costs long term. Factor Historical preservation costs where relevant, distinguishing sympathetic updates from irreversible changes. Build in contingency buffers for unplanned repairs, and document decisions to justify deviations. Review quarterly, rebalance as scopes shift, and resist impulsive add-ons. A lean, meticulously managed budget keeps modernization purposeful, affordable, and true to your home’s character.
Prioritize Upgrades by Impact and ROI
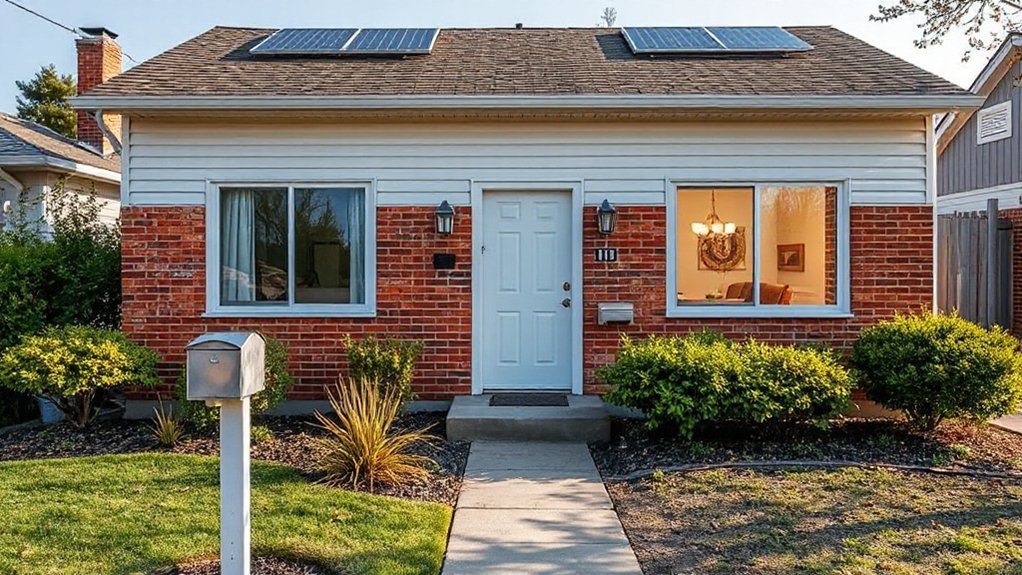
To make the most of your budget, focus on upgrades that deliver measurable impact and solid return on investment. You’ll map choices by tangible payoffs: energy savings, increased resale value, and daily livability. Prioritize improvements with clear metrics, like lower utility bills, faster ROI, or enhanced curb appeal. Start with upgrades that reduce operating costs and boost comfort, then advance to elements that preserve historical preservation values without sacrificing modern function. Balance practical gains with the opportunity for artistic expression, ensuring updates respect era cues while adding contemporary quality. Track results against a pre-set budget and timeline, and prune low-impact options. Clear decision criteria keep you disciplined, efficient, and decisive in deploying resources where they matter most.
Insulation First: Boost Comfort and Efficiency
You’ll start with air sealing gaps to stop drafts from sneaking in and heat from sneaking out. Then upgrade window performance to cut heat gain in summer and heat loss in winter, boosting comfort and efficiency. Together, these quick wins set a solid foundation for insulation-first upgrades later.
Air Seal Gaps Early
Air sealing gaps early is the fastest way to improve comfort and cut energy waste. You’ll tighten the envelope before upgrading aesthetics or systems, so improvements stick. Identify obvious leaks around doors, windows, electrical outlets, and attic access, then seal with appropriate materials: caulk for gaps, weatherstripping for moving joints, and expandable foam where needed. Don’t overlook recessed lighting, chimney chases, and HVAC penetrations. After sealing, you’ll notice drafts vanish, your furnace cycles less, and steady indoor temperatures that support better interior decor decisions. This step also keeps your garden landscaping outside climate-driven extremes and reduces noise intrusion. Prioritize efficiency now to protect investments in finishes, lighting, and furnishings, while avoiding premature window or appliance debates. Leave structural upgrades for methodical, next-phase improvements.
Window Performance Upgrade
If you’ve already sealed gaps, upgrading window performance begins with insulation-minded choices that pay off in comfort and bills. Begin with higher R-value glazing and low-E coatings to reduce heat flow year-round. Glass enhancement isn’t cosmetic here; it’s a cumulative gain that cuts cooling loads and drafts, especially in sunlit rooms. Pair this with properly insulated frames, because frame durability supports long-term performance and minimizes thermal bridging. Consider updating sash and seal systems to prevent air leakage, then choose spacers and gas fills that sustain insulating value. Install continuous weatherstripping at operable edges for reliable operation. Finally, align window upgrades with your home’s overall envelope priorities: prioritize insulation first, then aesthetic fit, ensuring durable, energy-efficient results that endure.
Windows That Save: Retrofit and Sealing Options
We’ll start with retrofit upgrades that fit your 1980s home’s layout and budget, prioritizing frames, sash efficiency, and glazing options. Sealing matters just as much as new glass, so we’ll target air leaks, drafts, and moisture paths first. This discussion focuses on practical, proven options that maximize energy savings without sacrificing style or curb appeal.
Retrofit Window Upgrades
Retrofit window upgrades focus on efficiency and seal, delivering noticeable comfort without a full replacement. You’ll target performance gains with minimal disruption, preserving the home’s character while boosting energy and daily usability. Consider options that respect vintage charm and architectural details, so the upgrade feels intentional rather than invasive.
- Replace sashes or add interior storm panels to reduce drafts without altering the exterior silhouette
- Install low-friction, dual-pane units that fit existing frames for a slim profile
- Add adjustable, weather-stripping kits to seal gaps around muntins and frames
- Use sash liners or insulated drapery systems to improve comfort without major renovations
These choices balance efficiency and aesthetics, keeping the house cohesive while delivering practical, measurable savings.
Sealing for Energy Savings
Sealing for energy savings is about stopping drafts and reinforcing comfort without a full window replacement. You’ll gain immediate benefits by focusing on gaps, cracks, and seals around frames, sashes, and exterior doors. Begin with a professional assessment to identify high-leak areas, then prioritize weatherstripping, caulk, and foam where appropriate. Use low-expansion foam for larger gaps, and choose interior or exterior gasket options that fit your window design. Consider upgrading to storm panels or draft-stoppers for period-appropriate aesthetics without compromising efficiency. While you seal, maintain landscaping aesthetics by trimming vegetation away from porches and vents, and plan landscaping irrigation so moisture won’t erode sealing lines. These steps deliver measurable comfort, lower bills, and cleaner retrofits for a modern shell.
Energy Upgrades That Pay Off
Wondering which upgrades deliver real savings? You’ll start by tightening the building envelope and swapping to high-efficiency insulation, windows, and doors that preserve architectural authenticity while cutting heat loss. prioritizing durable, historically sensitive materials keeps historical preservation intact while modernizing performance.
- Upgrade to double or triple-pane retrofitted windows that respect the home’s exterior rhythm and reduce drafts
- Install a high-efficiency, variable-speed heat pump system with smart zoning for comfort and lower utility bills
- Add radiant or advanced foam insulation to attic and crawl spaces for consistent temperatures
- Use energy-smart controls and LED lighting throughout, including outlets and appliances, to maximize savings without compromising style
These choices deliver measurable payoffs, balancing efficiency with architectural authenticity and historical preservation.
Quiet, Timeless Finishes That Age Gracefully
Quiet, timeless finishes do more than look good—they age with the house. When you choose surfaces and textures that resist dated trends, you reduce ongoing updates and maintenance. Opt for neutral palettes, classic materials, and durable finishes that patina well over time. timeless finishes create cohesion between rooms, while aging gracefully means your spaces remain relevant after years of use. You’ll notice fewer sharp contrasts, steadier resale value, and an easier palette revision when you need it. Prioritize workmanship over novelty: solid hardwood floors, stone or porcelain tiles, and well-sealed cabinets. Subtle sheen, matte textures, and low-contrast joinery keep rooms calm and timeless. Pair with adaptive lighting to preserve the refined, enduring look you’re after.
Flexible Layouts: Reconfigure Without Losing Charm

Flexible layouts let you adapt a 1980s suburban home to modern life without sacrificing its charm. You’ll reframe spaces with intention, preserving architectural cues while boosting flow. Prioritize open concept zones that still respect defined nooks and natural light. Use furniture placement to guide movement, not barriers, and keep sightlines clear from room to room.
- Open concept living areas that retain character through proportional furniture and visible architectural details
- Strategic zones for dining, work, and lounging without clutter
- Flexible partitions or screens that reconfigure spaces yet disappear when not needed
- Light, scalable furnishings that adapt with minimal effort
With thoughtful reconfiguration, you maintain charm, improve usability, and invite contemporary living without erasing the home’s soul.
Kitchens and Baths: Modernize Without Erasing Character
Kitchens and baths are where modern life meets 1980s character, so you’ll upgrade smartly without erasing the house’s soul. You balance efficiency with personality by preserving original fixtures or silhouettes that define the era. Prioritize quality materials and clean lines that nod to Vintage charm, while integrating contemporary hardware and energy-efficient appliances. Choose cabinetry that respects classic architecture, using soft-close drawers and timeless finishes rather than trendy details. Update lighting to enhance function without overpowering the space’s mood. Subtle plumbing, venting, and insulation improvements should support modern use while protecting the vintage feel. Use consistent grout, tile scale, and countertop materials that harmonize with the era’s proportions. The result is a cohesive, functional kitchen and bath that honor history and purpose.
Color Palettes to Bridge Decades Gracefully
Start with neutral base palettes to create a timeless foundation that doesn’t fight the era change. Balance warm accent strategies with modern neutrals so pops feel intentional rather than nostalgic. Integrate vintage textures to add depth without distraction, ensuring the result bridges decades with clarity.
Neutral Base Palettes
Neutral base palettes anchor a 1980s suburban home in a way that feels modern without erasing its charm. You’ll use restrained tones that let architectural lines breathe, adding cohesion across rooms. Color theory guides your choices, balancing cool and warm neutrals to prevent flatness. You’ll notice furniture placement shaping sightlines and flow, not clutter.
- Pair warm beiges with charcoal accents for depth
- Introduce airy whites to brighten hallways and ceilings
- Layer textures—wood, stone, and textile—for tactile interest
- Use a single, muted accent color to unify spaces
This approach keeps the decade’s character intact while delivering a timeless, restful backdrop. The result is a curated, cohesive palette that reads contemporary without screaming “renovation.”
Warm Accent Strategies
Warm accents act as a bridge between eras, weaving your 1980s shell into a more contemporary rhythm without erasing its character. You selectively layer warm neutrals, taupe, and soft caramel against cooler walls to create a grounded, timeless field. Introduce accent colors as deliberate notes rather than loud statements, ensuring they repeat across rooms for cohesion. Think vintage charm in small doses: a retro lamp shade updated with refined fabric, a vintage coffee table finished in satin, or brass hardware that ages gracefully. For textiles, choose nostalgic decor with modern threads—linen blends, soft wool, or velvet in blush, olive, or clay. Keep patterns minimal and proportional to space, letting texture and form carry the warmth. This approach preserves personality while achieving modern warmth.
Vintage Texture Integration
Vintage textures offer a tactile bridge between eras, layering materiality that reads as both nostalgic and fresh. You’ll select color palettes that blend warm neutrals with mid-century pops, ensuring Vintage charm remains at the foreground while preventing dated echoes. Texture layering becomes your organizing principle, pairing matte plaster with satin woods and tactile fabrics to create depth without clutter. Focus on surfaces that age gracefully and retain modern clarity, avoiding graphic contrasts that shout retro for retro’s sake. The result is a cohesive flow from then to now, where familiar hues invite contemporary furniture without losing personality.
- Subtle, unified neutrals that warm rooms
- Mixed textures: plaster, wood, fabric, metal
- Accent tones drawn from nature for balance
- Seamless progression between spaces, not windows into the past
Exterior Curb Appeal: Subtle Modern Cues

Exterior curb appeal isn’t about drastic changes; it’s about small, thoughtful cues that signal modern living. You’ll elevate the first impression with precise, purposeful updates, avoiding gimmicks. Focus on clean lines, restrained materials, and a cohesive palette that respects the 1980s footprint while nodding to contemporary sensibilities. Prioritize landscape design that frames the home without overpowering it: native grasses, low shrubs, and seasonal color placed to guide the eye toward architectural details. Integrate exterior lighting that enhances safety and drama without glare, using warm, discrete fixtures and layered layering—path, accent, and wall lighting. Minimize clutter by curating accents and sustainable hardscape choices. The result is a polished, inviting exterior that communicates modern living while preserving character.
Smart Home Basics for 1980s Suburban Homes
Smart wiring is the backbone of quick upgrades, so you’ll want a solid plan for safe, scalable circuits and centralized control. Next, we’ll map networked lighting that saves energy and sets the mood with simple, reliable commands. Finally, consider voice assistant integration to streamline daily routines without clutter or complexity.
Smart Wiring Basics
When you’re modernising a 1980s home, smart wiring lays the foundation for reliable, scalable automation. You’ll outline routes for power, data, and control—making future upgrades smoother and safer. Plan essential circuits first, then expand with growth in mind.
- Map centralary routes: conduit, accessible junctions, and labeled cables for easy upgrades
- Prioritize low-voltage intelligence: a dedicated home automation backbone separate from bulky mains
- Use standardized cable types: CATx for data, shielded where needed, with proper grounding
- Leave room for expansion: extra conduits, pull strings, and accessible panels
Smart wiring reduces retrofit friction and supports seamless Home automation, giving you a resilient, adaptable system you can trust as the rest of the home modernises.
Networked Lighting Essentials
Networked lighting is the backbone of a responsive, energy-efficient home. You’ll gain immediate control, precision, and consistency by integrating dimmable LEDs, smart switches, and centralized zoning. Prioritize reliability with a simple, scalable core—neutral wires, stable hubs, and standardized dimming protocols—so you can grow without rewiring. Consider scene-based lighting for different moods, tasks, and times of day to boost Lighting aesthetics while conserving energy. Schedule lights to mimic occupancy, reduce peak loads, and extend bulb life, all without sacrificing comfort. Choose robust, future-proof components that support Smart technology, secure connectivity, and easy firmware updates. Document wiring diagrams and key device locations to streamline maintenance and troubleshooting, keeping your retrofit clean, purposeful, and enduring.
Voice Assistant Integration
Voice assistants are the natural next step after setting up networked lighting, turning your smart home into a hands-free, responsive system. You’ll centralize control, simplify routines, and keep daily tasks on schedule without manual taps. Choose a voice platform with robust privacy controls and broad device support to maximize compatibility with your 1980s layout. Prioritize discreet integration to preserve vintage charm while enabling modern convenience. Plan a staged rollout that respects your facade updates and keeps the home’s character intact.
- Seamless voice control for lights, climate, and scenes that respect nostalgic decor
- Privacy-first settings and clear microphone indicators
- Quick setup with a concise routine library for daily life
- Subtle, non-intrusive hardware placement that preserves architectural lines
DIY vs. Pro: When to Hire Expertise
Deciding between DIY and hiring a pro boils down to safety, scope, and timelines. You weigh risk against skill, then assess whether the task impacts historical preservation or aesthetic consistency. For structural, electrical, or plumbing work, go pro to protect occupants and avoid costly mistakes. If the project falls within cosmetic upgrades or noncritical fixes, DIY can save time and money—provided you’re honest about your limits. Create a clear brief, set milestones, and vet license, insurance, and references before any work starts. Document decisions to maintain the home’s character while integrating modern systems. Remember that some vintage details demand professional judgment to preserve authenticity. When in doubt, consult a qualified contractor early to align on design intent and code compliance.
Maintenance Mindset: Keeping a Living, Aging Home Up-to-Date

Maintenance isn’t a one-time project; it’s a steady discipline that keeps your aging home safe, efficient, and comfortable. You’ll proscribe a simple cadence: seasonal checks, proactive repairs, and deliberate upgrades that respect structure and style. With that mindset, you protect current investments and guide future improvements.
- Schedule quarterly inspections for roof, gutters, and mechanicals
- Map garden landscaping to seasonal needs, reducing water and mess
- Refresh interior decor in measured steps, aligning with family routines
- Prioritize energy upgrades that yield tangible comfort and savings
These habits keep living spaces resilient while maintaining curb appeal. You’ll avoid reactive crises, extend lifespan of systems, and enjoy a coherent, practical modern vibe without overhauls. Consistency compounds value, so stay deliberate, informed, and purposeful about every improvement.
Troubleshooting Pitfalls and Quick Fixes
Troubleshooting pitfalls are where good maintenance pays off and bad habits show up. You’ll spot issues faster when you adopt a routine: test systems, document oddities, and act before they cascade. Prioritize quick, verifiable fixes over grand, risky rewrites. When a cabinet squeaks or a light flickers, check wiring, then bulbs, then switches—never assume. Maintain a simple ladder of interventions: tighten, replace, upgrade. In garden landscaping, address drainage and soil compaction before aesthetics; failing to do so can undermine new hardscapes. In interior decor, avoid cosmetic patches that ignore cause; fix root problems to preserve layout cohesion. Schedule seasonal checks, use labeled components, and keep a basics kit handy. Consistency reduces surprises, saves money, and preserves your home’s modernized integrity.
Frequently Asked Questions
How Do I Prioritize Upgrades for Max ROI?
You should prioritize open floorplans and energy efficiency upgrades first, since they deliver broad appeal and savings. Focus on efficient HVAC, LED lighting, insulation, and modern tenders; quantify ROI, plan timing, and balance costs with perceived value.
What Are Cost-Effective Insulation Options for 1980S Homes?
You’ll lock in comfort with attic insulation and wall insulation, cutting drafts and bills. You should prioritize compact batts, blown-in cellulose, or spray foams, choosing air-sealing first, then insulation for the most cost-effective gains.
Can I Retrofit Windows Without Compromising Character?
Yes, you can retrofit windows without sacrificing character; choose slim profiles and period-appropriate finishes. You’ll balance window aesthetics with energy gains, but expect retrofitting challenges like aligning trim and maintaining sightlines for authentic charm.
Which Smart Home Features Are Most Impactful yet Simple?
Smart lighting and voice assistants are the most impactful yet simple upgrades. You’ll gain convenience, energy savings, and hands-free control, so you can automate routines and scenes with confidence, keeping your space intuitive and future-ready.
How Do I Balance DIY and Pro Work for Renovations?
You balance DIY and pro work by defining scope up front, then coordinating timelines. Avoid DIY pitfalls by reserving electrical and structural tasks for pros, while you tackle finishes; maintain professional coordination to prevent delays and unsafe decisions.
Conclusion
You’ve got the blueprint to transform a 1980s suburban home without losing its charm. Start with a practical assessment, then tackle insulation and core systems for real comfort and savings. Prioritize high-ROI upgrades, set a clear budget, and decide what you can DIY versus what needs a pro. Maintain momentum with a simple maintenance routine. Stay patient and intentional—you’ll open a home that’s smarter, tougher, and more vibrant than you imagined. It’s amazing how fast progress compounds.
About the Author



