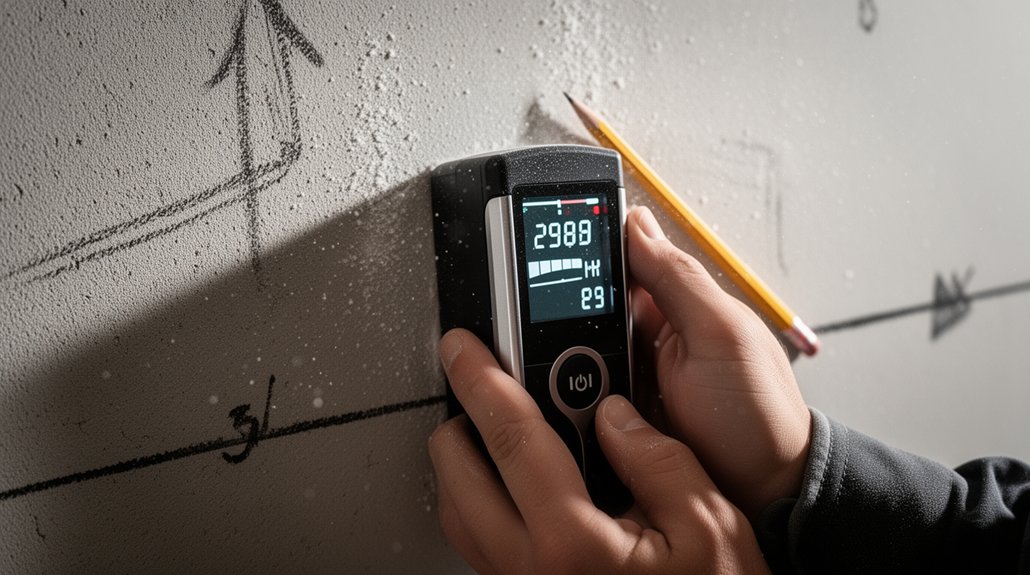
To avoid drilling into pipes, you’ll want to understand what a stud finder actually detects: density changes, not color, plus wall cues like nail patterns and outlet alignment. Tape two methods—magnet and a stud finder—before drilling, and tap-test for solid vs hollow areas. Scan slowly in a grid, especially near corners and outlets, and verify with light taps and cross-checks across adjacent spots. If you keep exploring, you’ll gain practical, safer mounting strategies.
Key Takeaways
- Use a stud finder with pipe/wire detection mode and cross-check readings with a metal detector to confirm non-metallic framing before drilling.
- Tap the wall while scanning to distinguish solid studs from hollow or pipe-filled sections by listening for solid vs. dull sounds.
- Probe suspected areas gently with a small drill bit or nail to verify depth and avoid hitting hidden pipes.
- Trace electrical outlets and plumbing lines by mapping around them; avoid drilling near valve boxes or behind fixtures.
- Re-scan with the device slowly in vertical and horizontal sweeps and mark confirmed safe zones before any drilling.
What a Stud Finder Actually Detects (The Basics You Need)

A stud finder detects the location of studs behind walls by sensing changes in the wall’s structure, not by “seeing” wood. You’ll rely on sensors that pick up density differences, not color. In practice, you’ll feel for the stud’s edge and confirm with a light tap that produces a solid, hollow, or muted sound. Most devices map studs in standard 16-inch or 24-inch intervals, with a center-mark when both sensors align. When you align to a stud, you gain solid support for fixtures and panels. Use this knowledge to plan decorative finishes and wall paneling without guessing. Remember that nails or screws should grip the stud, not just drywall. If you’re near fixtures, recheck with a second scan to avoid misreads.
Visual Clues That Reveal Wall Studs
You can spot studs by looking for visual cues like slight changes in wall texture or paint shade that align with a vertical frame. Shadow clues behind the wall can hint at stud positions, especially along edges or where outlets and switches sit. Nail and screw patterns often indicate where the studs run, so start there and verify with a quick measurement.
Visual Cues For Studs
Visual cues are your quickest way to find studs without a stud finder. You’ll notice gradual changes in wall texture at panels where studs run, so scan along baseboards for vertical lines that aren’t nails. Tap lightly; a solid, higher-pitched sound indicates denser framing behind drywall. Look for outlets and switches aligned in a vertical line; boxes are usually mounted on studs. Corner bead and crown molding often hug studs, so check near door frames and plaster seams for straight vertical cues. When you plan decorating tips, use these landmarks to position shelves without guesswork. If you must drill, start with a small pilot and verify with a level. Remember: consistent spacing and straight lines reveal the stud path beneath a smooth surface.
Shadow Clues Behind Wall
Shadow clues behind the wall come from subtle shadows and lighting effects that reveal where studs run. You can spot evidence without tools by watching how wall texture and paint color interact with light. Here’s how to leverage this technique:
- Observe seams and progressions where texture changes or paint shade shifts along vertical lines.
- Move a light across the surface at a low angle to cast precise shadows that hint at stud positions.
- Note where shading aligns with consistent vertical patterns, confirming likely studs behind the surface.
Using these cues, you map approximate centers for mounting, avoiding drilling where shadows indicate gaps. Remember: wall texture and paint color can disguise or reveal lines, so verify with other methods before fastening.
Nail And Screw Patterns
Nail and screw patterns offer reliable, observable clues for locating wall studs. You’ll notice clusters where fasteners align in vertical lines, typically spaced 16 or 24 inches apart. Start at a visible edge or near door frames, then scan horizontally to spot consistent nail marks. Tap the wall lightly to hear hollow versus solid backing, but confirm with a stud finder for accuracy. Pay attention to decorative finishes; irregular textures may hide marks, so use a flashlight at a low angle to reveal nail heads beneath paint. When you see multiple fasteners near a corner or switch box, you’re likely tracking a stud behind the surface. Acoustic panels, shelving, and heavier fixtures should anchor to these studied lines for secure mounting.
How to Use a Stud Finder Correctly: Step-by-Step
To use a stud finder correctly, start by choosing the right mode and placing the device flat against the wall. Then, slowly sweep horizontally and vertically to locate edges, marks, and centers. Once you’ve found a stud, test for consistency and mark its edges with a pencil.
- Switch modes for wood or metal studs, then calibrate as directed.
- Sweep gradually, pause at potential centers, and verify with a second pass.
- Mark edges, then confirm with light taps to ensure solid backing near wall insulation.
Note paint color and wall insulation don’t change the technique, but note them for placement context. With these steps, you’ll accurately locate studs without unnecessary drilling or guesswork.
Wall Materials and How They Affect Studs

Wall materials determine where studs run and how easy they are to locate, so understanding common substrates helps you plan your markings and potential fastener choices. In wood-frame walls, studs are typically 16 inches on center, but this can vary with openings or custom layouts. Gypsum board over metal studs behaves differently from plywood sheathing, affecting signal strength on a stud finder and the depth you probe. Concrete or brick walls require different methods, such as masonry anchors and longer fasteners. Consider wall insulation when sizing cavities, as it can obscure hits or shift expectations. Decorative finishes may mask joints or screws; you might need to probe with care and verify with light tapping. Use knowledge of wall materials to target reliable stud locations confidently.
Nail and Screw Patterns That Reveal Stud Locations
If you’re probing for studs, look for distinctive nail and screw patterns that hint at their locations. When you spot consistent rows or clusters, you’re likely near vertical framing. Use these cues alongside wall texture and paint color to confirm spacing and orientation.
- Look for evenly spaced fasteners at 16-inch or 24-inch intervals, often backing a stud.
- Notice nail or screw lines that run horizontally near base or ceiling colors, suggesting blocking or header tops.
- Compare rough patches, joint lines, and texture changes in paint color to verify continuous framing behind the surface.
Tip: light tapping should give a solid, dull sound; hollow areas align with non-stud zones.
Detecting Pipes and Wires Before Drilling
To detect hidden cues before you drill, use a stud sensor to spot pipes and wires and verify readings with a live check. Learn to interpret signals accurately, and mark any unsure spots to avoid surprises. By using the sensor properly, you’ll prevent drilling pitfalls and protect your project.
Detecting Hidden Cues
Detecting hidden cues isn’t guesswork; it’s a routine step before drilling. You’ll scan for signs that cues lie beyond the surface, using logic over guesswork. Observe wall traits and plan your approach around safety.
- Check color hints: paint color variations can indicate prior patches or outlets.
- Feel for irregularities: slight cool spots or raised areas may mask pipes or cables.
- Measure cautiously: note stud spacing and potential obstacles before any cut.
Use these cues to inform your path, not to panic. Also consider wall insulation cues, since density changes reveal cavities or suspect areas. By mapping cues, you protect utilities and achieve cleaner results, especially when you’re planning to run lines. Remember: accurate cues lead to safer, neater drilling outcomes.
Utilize Stud Sensor Properly
When you’re about to drill, use a stud sensor to map out pipes and wires first, then drill with confidence. Proper use starts with calibration: follow the device’s instructions, reset when needed, and test on a known stud to verify accuracy. Move slowly, marking each detected edge, and switch modes if you’re hunting live wires or behind metal. Keep the sensor flat against the wall, not tilted, to avoid false readings. Once you’ve marked boundaries, plan your hole location around obstacles and consider decorating tips to hide or complement the patch, like a subtle wall color change. Don’t rush; double-check hotspots and re-scan after minor wall adjustments. This disciplined approach minimizes surprises and preserves structural integrity.
Avoid Drilling Pitfalls
Before you start drilling, map out pipes and wires to avoid costly mistakes. You’ll reduce surprises by testing the wall before you bore. Use a stud finder with live mode, then confirm with a visual check of wall texture and surrounding outlets. Keep these steps in mind:
- Mark all detected lines and studs, noting any wall texture changes that hint at hidden cavities.
- Pause when you encounter inconsistencies in readings, and verify with continued scans at multiple angles.
- Choose a safe drill route based on your paint color contrasts and potential hidden features, avoiding high-risk zones.
Scanning Patterns: Where to Start and Why

You’ll get the best results by starting your scan with a simple, deliberate pattern that covers the most likely spots first. Begin near corners and outlets, then sweep outward in a grid that aligns with wall studs roughly every 16 inches on center. Use a vertical pass to catch studs behind wallpaper or uneven wall texture, then a horizontal pass to confirm alignment at each location. Prioritize areas where paint colors or wall texture hint at framing behind the surface; discolored patches can indicate panel joints or previous repairs. Maintain steady motion and pause briefly when the detector beeps. Document findings, marking confirmed studs and spacing clues to guide secure mounting later. This approach minimizes false positives and streamlines your next steps efficiently.
Use Tapping Sounds to Confirm Studs
You’ll confirm the stud’s location by tapping along the wall and listening for a solid, consistent sound. If the taps stay steady in one spot, you’re likely over a stud; fluctuations or hollow responses suggest voids. Use the pattern of tap consistency to distinguish solid wood or metal behind the surface from empty space.
Confirm Stud Location
To confirm a stud’s location, rely on tapping sounds as you move the stud finder along the wall. When you hear a solid, elevated tone, you’re over a stud edge; repeat, then mark the center. Use these steps:
- Move slowly, noting changes in tapping pitch, and verify with a second pass.
- Mark edges lightly, then locate the center where tapping peaks consistently.
- Compare wall texture and paint color around the mark to ensure alignment with structural framing, not loose lath or plumbing.
Tips: recheck after finishing a test area, since nails may shift. Keep patterns consistent for accurate results, especially on textured walls. This helps you avoid misplacement and matches wall texture and paint color with framing reality.
Listen For Tap Consistency
Once you’ve located the edges, use tapping sounds to confirm the center and verify stability. Listen for tap consistency as you move along the stud zone. A solid, even tone indicates a dense timber or drywall stud; inconsistent or hollow taps suggest voids or adjacent spaces. Keep your tapping steady, and note changes in sound waves as you progress. Compare adjacent taps to spot subtle shifts in resonance that signal edge boundaries or knots. Observe wall texture for clues—slightly rough patches may reveal joint placements, while uniform texture often marks solid backing. If a tap sounds dull, pause and recheck position before drilling. Combine tapping feedback with your previous scans to confirm a secure anchor point.
Distinguish Solid vs Void
Distinguishing solid wood or drywall backing from voids relies on listening for consistent tapping. You’ll hear solid studs produce a firm, high‑tone thud, while voids sound hollow or dull. Trust the rhythm, not a single click, and confirm twice before marking.
- Tap at regular intervals: solid sections feel steady, gaps feel inconsistent.
- Compare tones across nearby points; a true stud returns near-identical sound.
- Recheck with a lighter touch; if the sound changes, re‑evaluate the area.
Keep in mind decorative wall finishes and acoustic panel considerations, which can mask or alter tapping cues. Use a narrow, pointed bit to probe gently after you’ve located several solid taps, and confirm with a stud finder as a secondary check. This method minimizes wall damage while safeguarding your project.
Advanced Safety Tools: Metal Detectors and Multimeters
Metal detectors and multimeters are essential safety tools for any jobsite or home workshop. You’ll use a metal detector to locate hidden pipes, rebar, or wiring behind walls before drilling or cutting, reducing the risk of damaging infrastructure. A multimeter helps you verify electrical circuits, test continuity, and measure voltage, current, and resistance, so you don’t shock yourself or trip breakers. When scanning walls, move slowly and cross-check readings to confirm anomalies aren’t from nails or studs. Keep wall insulation in mind, as dense batts can mask metal or distort measurements. Before painting, assess the paint surface for underlying hazards; a hidden wire could heat up under a fresh coat. Tools in hand, plan, test, and drill with confidence.
What to Do If Your Stud Finder Isn’t Showing Any Studs
If your stud finder isn’t showing any studs, start by verifying the basics: fresh batteries, proper sensor placement, and correct mode for the wall type. If still blank, adjust your technique and inspect wall conditions for interference.
- Re-scan slowly in both horizontal and vertical sweeps to confirm consistency.
- Test on a known stud edge or outlet box to verify the finder’s response.
- Consider wall materials—decorative finishes or thick wall insulation can mask signals; switch to a deeper mode if available.
Next, look for clues beyond the sensor: outlets, baseboards, and crown molding can betray studs. If you still can’t detect, reassess wall composition and keep finishes intact to avoid damage while preserving decorative finishes and insulation integrity.
Mounting Heavy Loads: Stud-Based Anchors vs Alternatives
When you’re mounting heavy items, you’ll usually reach for stud-based anchors, but that isn’t the only option, and sometimes it isn’t the best. For heavy loads, you can use masonry anchors or toggle bolts in masonry walls, but confirm the substrate supports the weight. If you’re mounting on drywall, consider commercial-grade toggles or screw-in anchors rated for the load, and verify edge distances to avoid failure. In thin-wall constructions, distribute weight with a mounting plate or a spreader bar across multiple studs rather than concentrating pressure. Plan for wall insulation and acoustics; avoid compressing insulation unnecessarily, which can degrade performance and sound damping. For added sound control, install Acoustic panels after securing the load, preserving both structural integrity and room comfort.
DIY Tests to Confirm Stud Location Without Damage
A quick start is to use a magnetic stud guide to map potential studs without nails or screws. Combine solid wood cues with subtle wall taps to confirm spacing and consistency, then mark the edges for a safe drill path. Use these DIY tests—magnetic clues, wood cues, and tap test tips—to verify location before committing hardware.
Magnetic Stud Guide
Magnetic stud guides let you locate studs without drilling or damage by following the pull of a magnet along the wall. You’ll feel the magnet snag where a stud edge sits, then mark the spot and test across to confirm consistent density. This method respects wall texture and avoids unnecessary holes, so you can plan finishes before you hammer in anything.
- Sweep slowly in horizontal passes to map stud centers and confirm spacing.
- Verify with light pressure tests; a true stud resists wobble, a hollow patch won’t.
- Mark adjacent areas to gauge orientation and ensure you don’t chase a false cue.
Use your marks to choose paint color and align fixtures without damaging the surface.
Solid Wood Cues
Solid Wood Cues give you quick, damage-free ways to confirm stud location using natural wood properties. You’ll use grain patterns, knot placement, and consistency in board width to infer behind-wall framing. Start by locating two adjacent vertical boards; if their grains align in a parallel rhythm, you’re likely tracing a stud bay. Look for slightly wider, firmer sections where nails or fasteners anchor decorative wall finishes, then test with gentle pressure to feel resistance. Knots often align with stud edges, giving a clue to center or edge positions. Tap lightly and note changes in tone; a solid wood cue yields a crisp sound. Remember, consistency across sections improves accuracy and reduces wall damage when mounting shelves or art.
Tap Test Tips
Tap tests are quick, noninvasive ways to confirm stud location, so you can mount securely without drilling unnecessary holes. With practice, you’ll distinguish studs from empty spaces by the sound and feel of taps. Here are practical tips to keep you accurate:
- Listen for a solid, consistent tone that travels through wall insulation and framing; hollow patches indicate gaps or electrical wiring, not studs.
- Tap along a straight line, pause at each marked interval, and confirm resistance before driving anchors.
- Verify with a magnet or stud finder after locating a candidate, especially near outlets or switches where electrical wiring runs.
Use these checks to avoid damaged insulation and wiring, preserving wall integrity.
Common Pitfalls That Lead to Drilling Mistakes
Common drilling mistakes often stem from overlook rather than intention. In this topic, you’ll spot common missteps before you start, not after you’ve drilled. You might skip tracing behind walls, assuming surface markers are enough, which leads to hitting pipes or wires. Don’t rely on a single method; combine stud finders with tapping, cold read of wall texture, and a quick pilot hole check in a safe area. Watch for wall insulation that disguises studs or creates misleading signals, and adjust your expectations accordingly. Consider paint consistency near suspected framing; uneven coats can mask stud edges or pipe offsets. Pause to re-evaluate your target zone if readings seem inconsistent, and verify with a secondary method before drilling.
Quick Pre-Drill Checklist You Can Rely On
Before you drill, run through this quick checklist to confirm you’ve got the right target and safe plan: verify the location with at least two methods (not just a stud finder), check for electrical wires or pipes in the path, and confirm the wall surface hasn’t fooled you with insulation or paint.
- Double-check with a stud finder and a magnetic locator to confirm studs and avoid hidden utilities.
- Inspect the path for wires, pipes, and outlets, then measure offsets to stay clear.
- Note wall condition, especially wall insulation and Paint color, to anticipate weak spots or finish damage.
Keep your drill bit under control, and test a small pilot hole first.
Real-World Scenarios: Shelves and TV Mounts
When mounting shelves or a TV, you’ll want to translate stud-finder results into solid, load-bearing placements. Identify studs behind the wall, then align hardware with their centers for maximum support. If you must span between studs, use appropriately rated anchors and distribute weight evenly to avoid localized stress. Consider decorative finishes and cables; tuck wires along studs where possible to keep lines clean without compromising strength. For shelves, mount brackets into at least two studs or use a reinforced mounting rail rated for the load. For TVs, use a wall mount that matches stud layout and keep the mounting surface rigid, not hollowed by gaps. Acoustic panels can be placed nearby to reduce echo without weakening the mounting plan. Plan, measure, level, and secure with purpose-driven fasteners.
Frequently Asked Questions
Can Studs Be Behind Metal Lath or Masonry Walls?
Yes, studs can be behind metal lath or masonry walls. You’ll usually find wooden or metal studs behind metal lath, and masonry walls may hide steel or reinforced framing. Use a magnetic or electronic stud finder accordingly. Metal lath, Masonry walls.
Do Plastic Wall Plates Affect Stud Finder Accuracy?
Plastic wall plates can slightly affect accuracy, but you’ll still get reliable results if you recheck with calibration. Expect wall material impact to alter signals; perform stud finder calibration after removing plates and testing on each area.
How to Locate Studs Near Electrical Boxes Safely?
Hit the nail on the head: locate studs safely near electrical boxes by identifying consistent framing patterns, avoiding live wiring, and verifying with a stud finder. Electrical wiring and plumbing pipes run in fixed paths; drill cautiously, test retractively.
Can Studs Run Horizontal or Staggered in Walls?
Yes, studs can run horizontal framing or be staggered studs in some walls. You’ll see horizontal framing in remodels or retrofits, and staggered studs help reduce sound transfer and improve stiffness, so plan around these before drilling or mounting.
How to Identify Drywall-Only Spaces Without Studs?
Drywall-only spaces are detected by using drywall detection tools and tapping clues. You’ll locate edges, then verify with stud location techniques to confirm absence of studs before drilling, ensuring you hit only hollow drywall behind.
Conclusion
In the end, you’re the captain steering a safe harbor. The stud finder is your compass, and the drill is your ship’s wake. Treat every wall like shorelines you’ve mapped: listen for the heartbeat of studs, read the nail trails as constellations, and test softly before you bore. When you double-check, you’ll avoid hidden reefs—pipes, wires, hidden cavities—until your project rests firm, precisely where you aimed, without surprises along the way.
About the Author