A step-by-step approach starts with safety, so unplug tools, power down, and clear your workspace. Inspect cords and plugs for wear, then check blades, bits, and cutting accessories for nicks or dullness. Listen for odd noises, feel for excessive heat, and test performance to gauge motor health. Clean dust and debris, then lubricate pivot points and gears as advised. Set a simple maintenance schedule, track wear, and stock a basic parts kit for smoother, safer operation as you work. This routine pays off.
Key Takeaways
- Establish maintenance baselines with part-type replacement cues and track usage hours to forecast service needs.
- Prioritize safety: unplug tools, remove batteries, inspect guards, cords, and lubrication before starting.
- Inspect power tools regularly: check cords, plugs, blades, bits, and performance for wear or anomalies.
- Clean and deburr: remove debris, use appropriate cleaners, clear vents, and document routines for consistency.
- Organize storage: use labeled, sealed containers; store tools off the floor; keep batteries, cords, and accessories separate.
What Does Home-Power-Tool Maintenance Cover?
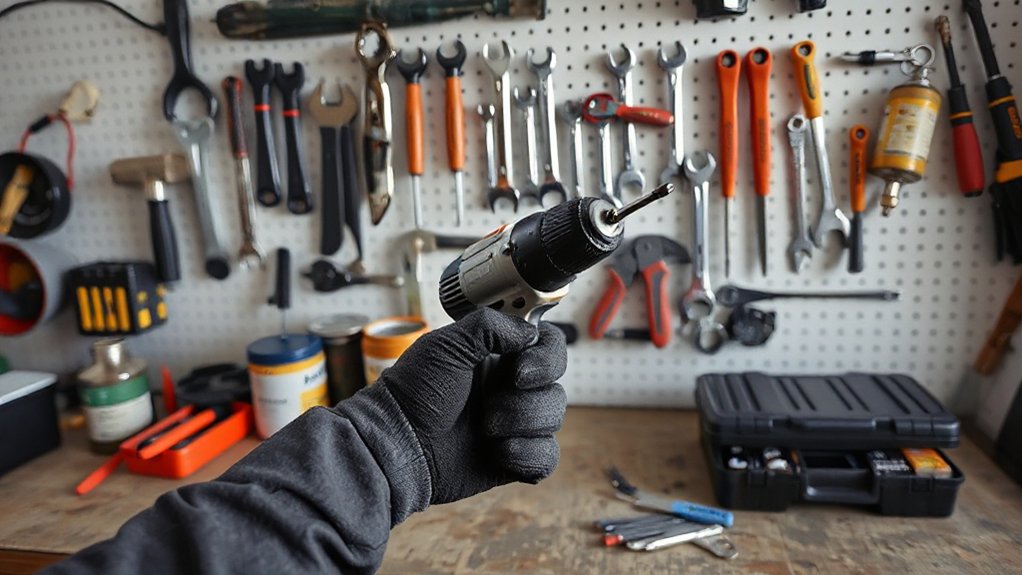
Home-power-tool maintenance covers the routine care you perform to keep tools safe, reliable, and performing at their best. You assess general condition, cleanliness, and proper operation to prevent breakdowns. You’ll address wear-prone parts, lubricant levels, and blade or bit integrity, adjusting as needed. Tool ergonomics matters, because comfortable grip and balanced weight reduce fatigue and error—inspect handles, triggers, and vibration dampeners for signs of looseness or deterioration. Maintenance scheduling keeps tasks predictable and consistent, so you don’t skip critical steps. Create a simple cycle: clean after use, check for loose fasteners, inspect electrical cords, and replace worn components before they fail. Document actions and dates to track life expectancy and plan replacements, ensuring safety, reliability, and *ideal* performance across your toolbox.
Safety Basics Before You Start: Unplug, Power Down, Prep
Before you start, unplug the tool and remove batteries to prevent accidental starts. Power down any residual controls and wait for moving parts to stop, then inspect for damage. Prep safely by clearing the work area and gathering the right PPE and tools to proceed.
Unplug Before Inspecting
Unplug the tool and disconnect the battery before inspecting anything. You’ll reduce shock risk and prevent accidental starts. Before touching moving parts, pull the plug or remove the battery and set the tool aside on a nonconductive surface. Check the power cord for cracks, frays, or exposed conductors, and replace damaged cables immediately. Keep the plug free of oil, grease, and debris to avoid slipping during use. Wipe the exterior with a dry, lint-free cloth; never use solvents near internal components. If your tool has a quick-release battery, ensure it’s fully disengaged before handling. Maintain proper plug safety by inspecting outlets and cords in good lighting, and store cords coiled loosely to prevent kinks. When in doubt, consult the manufacturer’s safety guide.
Power Down Tools
When you’re finishing a session, power down the tool first to prevent any unexpected starts. After stopping, unplug the cord or remove the battery, then set the tool on a safe surface. Confirm there’s no residual torque by giving a light manual check only if the manufacturer approves. Store with the switch in the off position to avoid accidental engagement. Maintain power efficiency by using the correct power source and honoring any cooling intervals the tool requires. Consider tool ergonomics by adjusting your grip and stance for comfortable, controlled handling next time. Always clean dust and debris from vents after power down, keeping airways clear. This routine reduces wear, protects you, and reinforces safe, efficient operation.
Prep Work Safely
Prep work starts with a clear plan: unplug the tool, power down, and assess the workspace before you touch anything. You’ll minimize surprises by checking cords, guards, and switches first. Clear the area of clutter, secure loose items, and ventilate if needed. Inspect for damage, then tag and set aside anything suspect. Remember tool ergonomics: position yourself to avoid awkward twisting or overreaching, keep wrists in a natural alignment, and adjust handles for a comfortable grip. Establish a quick maintenance scheduling routine: note upcoming tasks, calibrations, and filter changes in a dedicated log. Once checked, wipe down surfaces and store accessories separately. With safety basics in place, you’ll work steadier, reduce fatigue, and extend tool life.
Inspecting Cords and Plugs for Wear and Damage
Inspecting cords and plugs for wear and damage is your first line of defense against shocks and shorts. You examine the entire cord length for cracking insulation, bent or crushed areas, and exposed conductors. Look for loose or separated plugs, scorch marks, or loose prongs. Gently wiggle connections to detect looseness or overheating signs. If you spot any cut fibers, fraying, or insulation gaps, stop using the tool and replace the cord or plug immediately. Maintain cords away from heat, oil, and sharp edges; never wrap tightly or loop over nails. Practice proper cord safety by keeping cords untangled and away from foot traffic. Prioritize plug durability by inspecting the plug housing and strain relief. Replace damaged parts before operation to prevent shocks and electrical faults.
Checking Blades, Bits, and Cutting Accessories for Wear
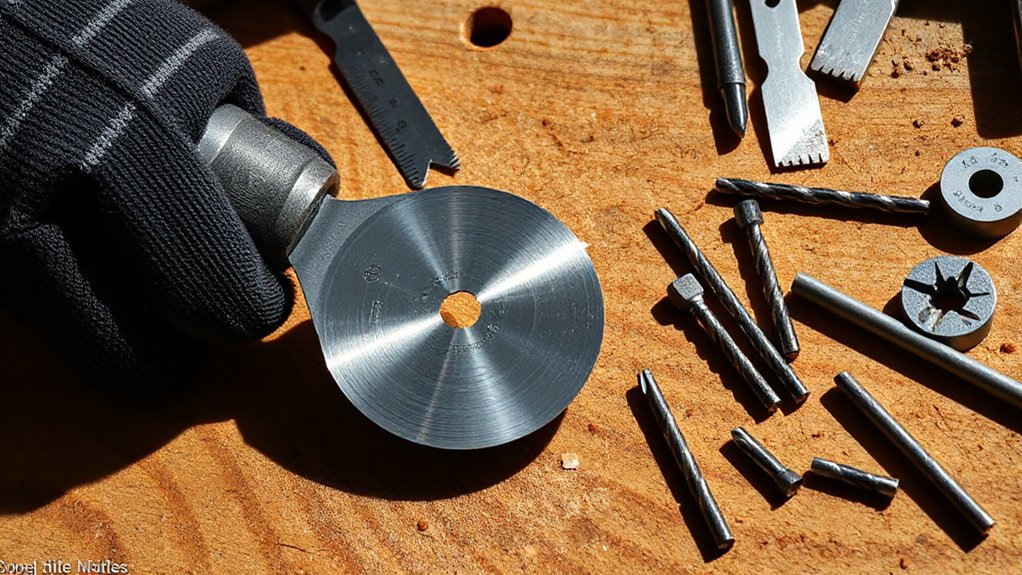
Start with a quick wear check: inspect blades, bits, and accessories for nicks, cracks, or rounded edges that signal replacement. Look for blade condition indicators like dullness, burning, or glazing, and note any rapidly worsening wear. If you spot issues, follow the quick replacement signs and swap in the correct part to maintain performance and safety.
Wear Check Checklist
Even a quick wear check can prevent accidents, so you should inspect blades, bits, and cutting accessories before each use to make sure they’re sharp, intact, and securely fastened. During the check, test for abnormal wobble, cracks, flat spots, and excessive aluminum or resin buildup. Replace worn edges promptly, and secure all guards and fasteners before powering up. Compare the item to its intended用途 and consider if vibration or noise has changed; don’t force dull tools through work. Track replacement needs for maintenance budgeting, and record findings for future reference. Prioritize tool ergonomics by ensuring grips are comfortable and balanced, reducing fatigue. Keep a concise checklist handy, use proper PPE, and quit if any doubt arises. Regular wear checks sustain performance and safety, shortening downtime and extending tool life.
Blade Condition Indicators
Blades, bits, and cutting accessories show wear in their own ways, and recognizing those signs early keeps your work precise and safe. Inspect for blade damage, including chips, cracks, or warped edges that reduce accuracy and increase kickback risk. Examine cutting teeth or flutes for rounding or hollow spots, which indicate dulling and uneven cuts. Check sharpness indicators by testing a light cut on scrap material; if it drags, resists, or grains instead of slicing smoothly, sharpen or replace. Look at the edge under light—discoloration or blue marks signal overheating and potential loss of hardness. Confirm mounts and arbor holes are intact and seating is flush to prevent wobble. Document findings, schedule maintenance, and rely on sharpness indicators to guide timely action.
Quick Replacement Signs
When you work, inspect blades, bits, and cutting accessories for quick signs that they need replacement: visible chips or cracks, severe dulling, or misshapen teeth indicate they won’t cut accurately or safely. Look for unusual vibration, increased heat, or burning smells during use, which signal wear or misalignment. Substitute worn components promptly to protect tool longevity and your safety. Keep a concise maintenance checklist and follow it before each project: check edges for chips, verify teeth alignment, test cuts on scrap material, and substitute dull or damaged items. Use the correct accessory for each tool to avoid overload. Record replacements and inspection dates to track wear patterns, and rotate stock to ensure freshness. A disciplined approach minimizes downtime and sustains power tool longevity.
How to Gauge Motor Health: Sounds, Heat, and Performance
Regularly listening for changes in your tool’s motor can prevent bigger problems: strange noises, excessive heat, and declining performance are all warning signs. You’ll gauge health by paying attention to motor diagnostics, noting deviations from normal operation. Start with sound analysis: a steady hum, grinding, or squeal indicates worn bearings, damaged brushes, or loose components. If you hear rattling at idle or a new, sharp tone under load, stop and inspect. Check heat: surfaces should stay cool to warm, not scorchingly hot after use. Performance matters too—slow starts, reduced RPM, or bogging under load signal electrical or mechanical drag. Regular checks, clean brushes, verify air flow, and tighten fasteners. Use tools as intended, and address issues promptly to prevent failures.
Cleaning Dust, Resin, and Debris Effectively
Dust and resin build-up your tools can cause overheating and binding, so start by removing loose debris, then use appropriate cleaners or solvents to loosen resin without damaging finishes. Clear debris from vents, gears, and crevices with a soft brush or compressed air, staying a safe distance and following tool manufacturer’s guidelines. Use safe disposal and reassembly steps, then wipe surfaces dry and test the tool before resuming work.
Dust and Resin Removal
How often do you clean dust, resin, and debris from your power tools to keep them running at peak performance? Regular maintenance starts with a quick inspection, then targeted cleaning. For dust buildup, use a soft brush or compressed air in short bursts to dislodge particles from vents, crevices, and gears—never force dust deeper into the tool. Resin removal requires a solvent recommended by the manufacturer; apply sparingly to a cloth, not directly on internals, and wipe away residue before it cures. Keep blades, bits, and guards clear of buildup to maintain cut accuracy and cooling. After cleaning, dry all surfaces thoroughly and reseat any components. Document when you clean each tool to establish a consistent routine.
Debris Clearing Techniques
To clear debris effectively, start with a quick visual check to identify where dust, resin, and grime have gathered, then prioritize those hotspots. You’ll tackle dust removal first, focusing on vents, crevices, and moving parts where buildup slows performance. Use a soft brush or compressed air in short bursts, keeping a safe distance to avoid lensing grime deeper into crevices. For resin, apply a quick, non-corrosive cleaner on exterior surfaces and wipe away residue before it hardens. Debris clearance hinges on consistent technique: wipe, brush, and inspect, repeating as needed. Never force parts; loosened debris reduces tool life and safety. Finish with a dry wipe to remove lingering particles, then test operation. Regular, targeted maintenance minimizes downtime and preserves tool performance.
Cleaning Tools Safely
Even when you’re careful, tools collect dust, resin, and debris, so clean them safely by starting with a quick inspection to identify hotspots, then work from the outside in. You’ll protect power tool ergonomics by choosing proper grips, low-resistance brushes, and gentle strokes. Use a microfiber cloth and a soft brush to whisk away particles; avoid harsh scrapers that scar surfaces. For liquids, dampen—not soak—rields and housings, and keep water away from motors. When you reassemble, check branding and controls for smooth operation, ensuring tool branding remains legible and intact.
- Inspect for hotspots, heat, and residue
- Dust with microfiber, brush, and compressed air carefully
- Dampen, don’t soak, and avoid water near electrical parts
- Reassemble, test, and note any branding or ergonomics issues
Lubrication: When and What to Oil or Grease

Lubrication is essential for extending your power tools’ life and keeping them running smoothly, so you should oil or grease the right parts at the right times. Determine your lubrication schedule by consulting the manual and inspecting screws, gears, and moving joints for stiffness, squeaks, or heat. Use light machine oil on pivot points and open bearings, and heavier grease on gears or sealed housings when specified. Avoid over‑lubricating, which can attract dust and grime. Clean parts before applying lubricant to prevent grinding contaminants. Choose oil types recommended by the manufacturer; if unsure, opt for a light mineral oil. Recheck after operation, and reapply as needed during routine maintenance. Consistency matters for performance and tool longevity.
Battery Care and Storage for Cordless Tools
Battery care is essential for reliable cordless tool performance and longer lifespan, so start with proper charging routines and storage habits. You’ll extend Battery longevity by using the charger specified for your pack, avoiding overcharging, and charging in a cool, dry spot. Keep packs away from heat sources and direct sunlight, and never store fully discharged cells. Regularly inspect for damage and replace compromised cells promptly. For storage environment, store at partial charge if long-term, and use a breathable, dry container. Maintain clean terminals and avoid metal contacts touching. Use original chargers and follow manufacturer guidance for cycle timing. Never stack packs while charging, and unplug tools when not in use.
- Use the correct charger for your battery
- Charge in a cool, dry place
- Store at partial charge for long-term
- Inspect for damage before storage
Exterior Care: Housings, Switches, and Seals
Keep the tool’s outer shell clean and intact, because a solid housing protects internal components and keeps switches and seals working. Exterior care starts with regular wipe-downs to remove dust, grime, and moisture. Inspect the exterior housing for cracks, chips, or warped edges that could harbor moisture or worsen damage. If you see minor scuffs, don’t ignore them—address them before they worsen. Check switch seals for wear, tears, or gaps that might let debris inside or dampen performance. Clean around the switch area with a soft brush; avoid water intrusion. Lubricate switch contacts only if the manufacturer directs you to do so. Store tools away from extreme heat and direct sun to preserve plastics and seals, and wipe away any lingering residue after use to maintain protective integrity.
Fasteners: Tightening, Replacing, and Alignment
As you move from exterior care to the fasteners that hold your tool together, you’ll want to establish a solid routine for tightening, replacing, and aligning them.
- Check fastener corrosion and remove rust with a wire brush before tightening
- Apply the correct fastening techniques and torque specs for your tool
- Replace worn or damaged fasteners promptly to maintain integrity
- Align components during reassembly to prevent misalignment and vibration
Keep fasteners clean, dry, and tracked in a maintenance log. Use the manufacturer’s torque values; overtightening can strip threads, while undertightening invites instability. When replacing, match thread pitch and length, and inspect surrounding parts for wear. Regular checks reduce downtime and extend tool life. Practicing consistent tightening, replacing, and alignment ensures safe, reliable performance and preserves performance standards over time.
Wear Thresholds and When to Replace Parts
Wear thresholds tell you when a part is near the end of its life, so you act before failure hits. Monitor signs like excessive play, unusual noise, reduced efficiency, or visible wear, and track parts against their rated lifespans. Replace parts on a timely basis to maintain performance and prevent costly downtime.
Wear Thresholds Clearly
When you’re using power tools, you’ll want clear wear thresholds so you know when parts need replacing. Set practical markers based on performance, sound, vibration, and visual wear. Establish limits tied to material fatigue, not just appearance, so you act before failures. Document each tool’s baseline and tracking points for consistency.
- Define replacement cues by part type (bearing, bit, blade) and wear rate
- Use measurable limits (dimension changes, runout, or noise increase) tied to material fatigue
- Record usage hours and cycles to forecast replacements
- Reassess thresholds after maintenance or upgrades to stay accurate
Replace Parts Timely
To keep your tools reliable, set a clear rule for replacing parts based on the wear thresholds you already defined. When a component hits its limit, replace it promptly rather than patching it. Prioritize battery longevity by swapping cells or packs before performance declines or safety becomes at risk. If a cordless tool shows rapid voltage drop, or the runtime shrinks noticeably, schedule a battery replacement rather than overtaxing the motor. For cords, monitor insulation and flexibility; replace the cord if you see exposed wires, cracks, or heat buildup during use. Keep a parts calendar and log replacements to avoid gaps in maintenance. This disciplined approach minimizes unexpected downtime and preserves tool efficiency, safety, and overall value.
Organized Storage to Prevent Damage and Corrosion
Proper organized storage protects your tools from moisture, dust, and impact, so you’ll extend their life and keep them ready when you need them. You’ll optimize every tool’s condition by choosing purpose-built storage and placing items where they’re easy to grab.
- Use sturdy storage containers with tight seals to prevent rust and corrosion
- Label drawers and bins for quick, accurate access
- Keep tools off the floor and away from humidity, using shelves or pegboards
- Group by use and weight to improve tool ergonomics during projects
Organize accessories separately from power heads, cords, and batteries. Maintain consistent humidity control in the shop and inspect containers for wear. This approach reduces damage and extends reliability of your equipment.
Cleaning Schedules: How Often to Perform Each Task
Regular cleaning should be scheduled around how you use each tool, not just on a calendar. You should set a routine based on usage, dust exposure, and storage location. Wipe down and inspect after every project to prevent buildup that can shorten battery longevity and compromise performance. For cordless tools, quick functional checks matter more than heavy scrubbing: unplug, remove batteries, and wipe terminals to avoid corrosion. Schedule fan and filter清 cleanup on dust-heavy tasks, and vacuum crevices weekly for tools stored long-term. For cords, inspect insulation and plugs weekly, replacing damaged cords immediately rather than postponing. Leave the battery contacts clean and dry before reassembly. Document dates to track trends and guarantee consistent care, keeping your toolkit safer and more reliable.
Quick-Diagnosis Checklists Before Each Project
Before you start, run through quick safety checks, ensuring guards are in place, blades and bits are intact, and cords or batteries are conditionally secure. Then verify tool calibration steps for accuracy and consistency, and perform a rapid condition and cleanliness review to spot wear, rust, or buildup. This fast diagnostic sets the tone for your project and keeps performance predictable and safe.
Quick Safety Checks
Quick safety checks should happen every time you start a project. Before you power up, inspect your tool for obvious damage, loose parts, and unusual smells. Make certain you’re using the correct accessory and that guards and safety switches function properly. Check that the battery is seated, not swollen, and note battery lifespan indicators if applicable. Verify cord safety: inspect the cord for cuts, frays, and secure strain relief; keep it away from moving parts and heat. Test triggers in a controlled stance, and confirm work surfaces are stable. If any doubt exists, don’t proceed.
- Inspect for damage and guards in working order
- Confirm battery seating, condition, and lifespan cues
- Check cord integrity and safe routing
- Test trigger control and stable setup
Tool Calibration Steps
You’ve already checked for damage and safety last time, so let’s zero in on calibration to keep results consistent. Start with a quick baseline check: verify that the gauge, scale, or digital readout aligns with a trusted reference. If it doesn’t, perform a precise accuracy adjustment per the tool’s manual, using the smallest feasible increments. Re-test after each adjustment until readings match within tolerance. For powered drills and saws, confirm bit or blade alignment remains true under load, not just at rest. Document the baseline, adjustment steps, and final readings for future reference. Use a calibrated square, depth stop, or laser guide as applicable. Regularly schedule calibration checks because consistent performance hinges on ongoing accuracy adjustment and verifiable measurements.
Condition and Cleanliness Review
Start your project with a quick, eyes-on sweep of the tool area and gear. A Condition and Cleanliness Review keeps you safe and efficient before you begin. Check for frayed cords, loose blades, and any residue that could clog performance. Verify the power cord is intact, the plug pins are clean, and the cord isn’t stretched or kinked. Inspect blade wear and mounting, replacing dull edges that reduce accuracy or cause kickback. Make sure guards move freely and clamps grip firmly. Clear dust and debris from vents, housings, and handles to prevent overheating. Confirm oil levels or lubrication points are addressed, if applicable.
- Inspect power cord integrity and plug cleanliness
- Assess blade wear and mounting security
- Clear dust from vents, housings, and handles
- Verify guards, clamps, and lubrication as needed
Tool-Specific Tips: Saws, Drills, Sanders, and Grinders
When you maintain saws, drills, sanders, and grinders, start with a clean, organized workspace, inspect all components for wear, and replace damaged parts before each project to prevent failure and guarantee precision. For blades, verify sharpness and alignment; dull or bent blades compromise cut quality and safety—blade safety matters most, so replace or resurface as needed. Check cords for cracks, fraying, and proper insulation to assure reliable power delivery—Cord durability prevents unexpected downtime. Tighten fasteners, lubricate moving parts per manufacturer specs, and test run briefly before cutting or shaping. Use guards and safety features consistently, and store tools in a dry, secure location. Develop a quick-check routine to catch issues early and maintain consistent performance throughout your project.
Common Maintenance Missteps and How to Avoid Them
Even with the best intentions, common maintenance missteps can derail performance and safety; recognizing and avoiding them keeps tools reliable. You’ll prevent issues by sticking to essential checks and avoiding shortcuts that compromise function.
- Skip regular Power cord inspection; inspect insulation, plugs, and strain relief before each use.
- Delay blade sharpening; dull edges strain motors and worsen cut quality—sharpen when needed, not after damage.
- Overlook lubrication limits; use manufacturer-approved lubricants only, and don’t over-apply.
- Ignore cleaning after use; wipe away dust and debris to prevent buildup that impedes cooling and performance.
Budget-Friendly Maintenance Kit Essentials
A budget-friendly maintenance kit covers the essentials you need to keep power tools reliable without breaking the bank. You’ll prioritize reliability, not novelty, by selecting core items that deliver real value. Start with a small, high-quality set of screwdrivers, a hex bit set, and a compact torque driver to reduce tool damage from slips. Include lubricant or grease, cleaning wipes, and contact cleaner to combat dust and grime. A soft-bristle brush and microfiber cloth help maintain grip and visibility without scratching surfaces. Add a versatile multi-tool for quick field repairs and a portable light to diagnose issues in dim spaces. Keep spare brushes, filters, and o-rings on hand, aligned with maintenance budgeting. Remember: proper power tool ergonomics and consistent care extend life and performance.
Creating a Simple, Stick-With-It Home-Maintenance Routine
Creating a simple, stick-with-it home-maintenance routine makes upkeep predictable and doable. You’ll keep tools ready and safe by embedding a few core tasks into a routine you can actually follow. Start with a weekly check, then expand to monthly and quarterly actions. Focus on tool ergonomics to prevent fatigue and injuries, and establish clear maintenance scheduling so you don’t overlook essentials. This approach reduces downtime and extends tool life.
- Define a weekly quick-check for cleanliness, lube, and grip condition
- Schedule monthly inspections of blades, bits, and attachments
- Log maintenance actions to track trends and stay consistent
- Align tasks with work goals and energy levels for steadier adherence
Frequently Asked Questions
How Often Should I Calibrate My Power Tools?
Calibrate when manufacturers recommend or after a drop, impact, or modification. Tool calibration should be part of your maintenance scheduling, ensuring accuracy and safety. Regular checks prevent errors, extend life, and keep performance consistent for every task.
What Safety Checks Before Storage Are Essential?
Before storage, perform safety checks: unplug, inspect cords and plugs, remove batteries, and secure blades; verify Tool cleaning is done and the Storage environment is dry, dust-free, and well-ventilated. Secure tools and store safely afterward.
Can I Mix Lubricants for Different Tools?
Mixing lubricants isn’t advised. You risk compatibility issues and tool damage. Lubrication compatibility matters; stick to manufacturer specs. If unsure, don’t mix—use the correct lubricant for each tool and consult guidance before proceeding.
How Do I Extend Battery Life in Extreme Temps?
Keep battery temperature in check by avoiding extreme temps, use insulated storage, and power down during heat spikes. Store at recommended conditions; avoid leaving chargers on. Practical tip: Power storage should be stable for best performance and longevity.
What Signs Indicate Imminent Motor Failure?
Listen: motor overheating and bearing wear signal imminent failure. If you notice unusual vibrations, smoking, or total power drop, shut down immediately and inspect mounts, air gaps, and bearings; address overheating promptly to prevent catastrophic motor failure.
Conclusion
You’ll stay safer, sight-saving, and song-simple when you stick with steady, smart steps. Sustain skills, seek superior specs, swap worn parts, and sweep aside surprises with scheduled servicing. Stay sharp, secure, and satisfied as you save money, space, and time. Simple, steady routines reduce risk, repair costs, and downtime. Commit, cause a calm correlation between care and capability. Consistent checks, clean tools, correct consumables—create dependable, durable power-tool performance you can rely on. You’ve got this.
About the Author