

We are talking about Restoring Original Timber Beams, why and how. You’ll restore history and strength in your space by carefully evaluating timber grain and age, stabilizing decay with reversible methods, and integrating reclaimed beams that honor the original patina while meeting modern safety and design needs. Begin with a structural assessment to verify load paths, then clean gently, stabilize without overdoing it, and document every treatment. When you’re ready, consider integrating restored beams into contemporary spaces with period-appropriate finishes. More insights await as you continue explore.
Key Takeaways
- Prioritize preserving original grain, patina, and joinery while ensuring safety and load stability through non-destructive assessment.
- Clean using soft tools, minimal moisture, and neutral cleaners; document finishes and patina for authenticity.
- Stabilize deteriorating beams with restrained, reversible methods like discreet plates or splines that respect texture and patina.
- Decide between reclaiming finishes or replacing components based on structural needs, provenance, and compatibility with era character.
- Use light refinishing to reveal grain, apply compatible sealers and a low-sheen topcoat to maintain rustic charm.
What Timber-Beam Restoration Entails: Goals, Limits, and Outcomes
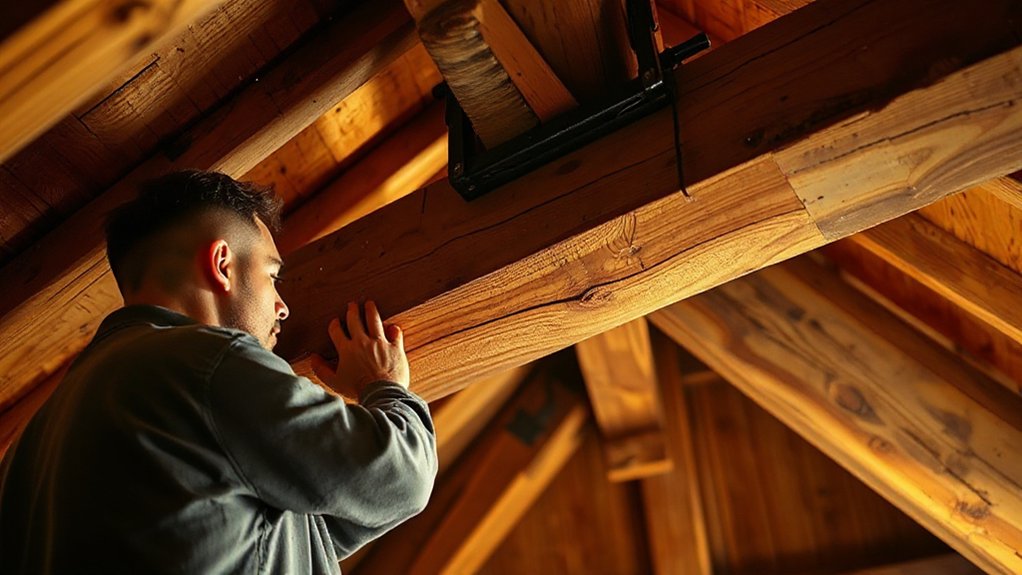
Restoration of timber beams centers on restoring structural integrity while preserving historical character. You approach this work with a defined scope: stabilize, repair, or replace compromised members, and document the process for future stewardship. Goals include reestablishing load paths, preventing further deterioration, and maintaining visual authenticity. You assess prior treatments, moisture history, and connection details to determine feasible interventions. Limits center on preserving original fabric; you avoid invasive methods that erase historic cues, favor non-destructive testing, conservative patching, and selective replacement with matched sections. Outcomes involve a reliable structure, clarified maintenance needs, and enhanced safety. You prioritize historical authenticity and compliance with preservation standards while considering Environmental impact, ensuring materials, finishes, and practices respect the building’s narrative and ecological footprint.
Assess Timber Grain, Age, and Significance
You’ll initiate by evaluating the timber grain to determine its pattern, orientation, and potential defects that affect strength and workability. Next, you’ll establish the beam’s age indicators and provenance to guide restoration decisions and compatibility with historical integrity. Finally, you’ll assess significance factors—conditioning, rarity, and provenance—that influence treatment choices and reporting.
Timber Grain Assessment
Timber grain assessment involves systematically evaluating the direction, alignment, and character of the wood to determine its authenticity, age, and architectural significance. You inspect grain patterns, growth rings, and tool marks to establish provenance and define the appropriate restoration approach. By differentiating plain-sawn versus quarter-sawn textures, you gauge stability, shrinkage behavior, and long-term durability. You document medullary rays, knots, and mineral streaks as clues to species, source region, and historical service conditions. This analysis informs decisions on appropriate finishes, joinery reconciliation, and moisture management. You prioritize timber preservation aims while preserving historic authenticity, ensuring that interventions respect original geometry and visual rhythm. Your assessment guides repair strategies, material selections, and documentation without compromising the beam’s legibility or its period character.
Age and Significance Evaluation
When evaluating timber grain for age and significance, you systematically compare growth-ring patterns, medullary rays, and texture to establish provenance, dating cues, and historical context. You assess growth rhythm, density, and tool marks to infer species, plane history, and use. Through cross-sectional analysis, you identify reaction wood, tight versus open grain, and weathering indicators that signal environmental exposure. You correlate findings with archival records and construction practices to determine material sourcing and era alignment. Establishing significance requires documenting stylistic motifs, joinery methods, and conservation risks. You prioritize minimally invasive methods to preserve integrity while capturing data for future work. Your conclusions guide restoration choices, ensuring authenticity, structural safety, and provenance traceability within the project’s broader historical narrative.
Ensure Structural Stability Before Aesthetics
You must assess the timber’s structural integrity and confirm load paths before considering cosmetic improvements. Start by verifying how loads travel through the beam and identifying any weaknesses, such as cracks, rot, or misalignments. This guarantees the restoration maintains safety and performance, not just appearance.
Assess Structural Integrity
Before any restoration begins, assess the existing structural integrity to guarantee the framework can safely support further work. You evaluate load-bearing capacity, connections, and signs of distress in all beams and joints. Conduct non-destructive testing where possible, noting cracks, seasoning checks, and moisture content that could indicate hidden weakness. Document rot, insect damage, and previous repairs to determine remediation priorities and sequencing. Compare beam dimensions and species against historical records to confirm suitability for restoration, aligning with timber selection criteria. Assess fasteners, brackets, and mortise-and-tenon integrity, replacing degraded components with compatible materials. Ascertain temporary supports are positioned to prevent movement during operations. Throughout, prioritize historic preservation goals by preserving original profiles, textures, and patina while maintaining structural stability for continued use.
Verify Load Paths
To guarantee ongoing stability, verify load paths by tracing each beam, post, and connection from the point of load introduction to the foundation, confirming no unintended transfers or discontinuities exist. You should map how gravity, live loads, and environmental effects travel through framing, joints, and fasteners, identifying any altered or shadowed routes. Assess whether load distribution remains linear and predictable across members, especially at mid-span hinges and transfer points where subtle shifts can propagate. Document any deviations and quantify their impact on overall stiffness. Implement beam reinforcement only after confirming paths remain intact and that reinforcement won’t create new discontinuities. Prioritize maintaining original timber behavior while ensuring safety, frame compatibility, and long-term performance under anticipated loads.
Clean and Prepare Beams With Gentle Techniques
Carefully remove surface debris and loose coatings with a soft-bristle brush and low-pressure methods to prevent scratching the timber. You’ll then gently dampen the surface with a minimal mist of water and allow it to equilibrate, avoiding saturation that could warp fibers. Use a mild, neutral pH cleaner only where residue persists, applying with a microfiber cloth in controlled, small sections. Test a hidden area first to confirm any finishes soften rather than lift. Document historical significance of original finishes and how gentle methods preserve patina. Consider environmental impact by selecting cleaner formulations with low VOCs and implementing containment to minimize runoff. Dry thoroughly with airflow, then inspect for raised grain and planing needs. Maintain consistent technique across beams to ensure uniform appearance and archival integrity.
Stabilize Deteriorating Beams Without Overdoing It
You stabilize deteriorating beams without overdoing it by applying timely reinforcement that preserves original charms. Focus on minimal yet effective methods that prevent further deterioration while maintaining the beam’s historic integrity. This approach emphasizes restrained intervention, targeted reinforcement, and structural reliability.
Stabilize Without Overtoning
When stabilizing deteriorating timber beams, the goal is to halt further movement while preserving as much original structure as possible. You’ll apply restrained methods that support load paths without masking decay or introducing heavy coatings, prioritizing wood treatment that doesn’t obscure grain. Maintain historical accuracy by selecting fasteners and treatments compatible with period aesthetics and timber behavior.
1) Implement light structural reinforcement only where necessary, using discrete steel plates or splines that don’t protrude or alter character.
2) Use breathable, non-degrading sealants sparingly to slow moisture ingress while preserving surface patina.
3) Document every intervention for future reference and matching materials, ensuring renovations respect the beam’s authentic appearance.
Preserve Original Charms
Preserving the original charm of deteriorating beams requires stabilizing the structure without erasing its character. You assess each member for active failure modes, prioritizing conservative interventions that respect grain, texture, and patina. Use timber preservation principles to identify reversible or noninvasive options before replacing any element. Targeted consolidation or pinning with compatible,低-impacted fasteners can arrest movement while preserving surface aesthetics. Document all treatments to maintain historical integrity and enable future evaluation. Avoid over-application of preservatives that alter color or stiffness beyond necessity. When in doubt, choose lower-impact methods and monitor changes over time. Your goal is rustic authenticity, achieved by balanced stabilization that supports loads without masking provenance or compromising the beam’s storytelling value. Maintain professional standards, communicate clearly with stakeholders, and ensure long-term performance.
Timely Structural Reinforcement
Timely structural reinforcement focuses on stabilizing deteriorating beams quickly and judiciously, using targeted measures that preserve timbers’ grain and patina. You’ll implement surgical interventions that halt progression without masking originality, prioritizing load paths, joinery, and monitoring. By aligning methods with Historical accuracy, you guarantee the restoration remains credible to craftspeople and guests alike, while maintaining authenticity in appearance and function. Material sourcing is deliberate, favoring compatible species and aged connectors to minimize diffusion of modern aesthetics into the historic fabric.
1) Assess critical support points using noninvasive techniques, documenting movement and gravity vectors.
2) Apply corrective measures that reinforce only what’s necessary, preserving as-built geometry and surface patina.
3) Vet suppliers for provenance, verifying material compatibility, durability, and long-term maintenance requirements.
Decide: Reclaiming Historic Finishes or Replacing Beams

Deciding whether to reclaim historic finishes or replace the beams centers on long-term performance and archival value. You evaluate preservation goals against structural integrity, moisture resistance, and load requirements. Reclaiming finishes preserves patina, historical authenticity, and documented provenance, but may necessitate stabilization, decontamination, or limited durability if original coatings degrade. Replacing beams offers predictable performance, standardized connections, and easier compliance with modern building codes, yet sacrifices historic veneer and potential craftsmanship. Consider how finishes contribute to overall spatial character and resale value, versus the convenience and reliability of synthetic materials or other modern alternatives. If you choose reclamation, plan for compatible restoration techniques and compatible finishes. If you choose replacement, document decisions, ensure compatibility with existing framing, and select materials that harmonize with the era while meeting performance needs.
Reveal Grain With Light Refinishing: Best Practices
Light sanding techniques set the stage for grain enhancement, removing surface grime while preserving timber integrity. With grain-pop restaining tips, you’ll reveal depth and texture without over-saturation, followed by a protective finish guide to lock in the result. Use these practices to achieve a balanced, durable reveal that respects the beam’s historic character.
Light Sanding Techniques
To reveal the grain without removing the timber’s character, light sanding uses only fine grit and rapid, strategic passes to soften surface flaws while preserving joins and existing contours. You focus on controlled pressure, keeping the plane parallel to the grain, and avoid broad strokes that dull texture. This approach preserves color transitions and helps color matching read true, enhancingVintage authenticity across the beam. The result is a refined surface that invites natural variation rather than masking it, ready for minimal finish coats or sealers.
- Choose fine-grit abrasives (e.g., 180–220) and inspect for flat spots before proceeding.
- Sand with light, even passes along the grain, pausing at joints to avoid rounding edges.
- Wipe dust complete, assess grain visibility, and plan the next precise step.
Grain-Pop Restaining Tips
Grain-pop restaining focuses on selectively lifting the grain so the timber’s natural texture reads clearly under a refreshed finish. You approach this by using light refinishing to preserve existing patina while enhancing contrast between raised grain and recessed areas. Begin with a precise scuff or micro-sanding to expose grain peaks without deep material removal. Wipe clean and apply a pre-stain conditioner to promote even uptake. For the finish, choose a compatible wood staining product and apply with minimal agitation to avoid blotching; the goal is controlled penetration that amplifies grain without obscuring it. Allow partial drying, then lightly wipe or brush to refine tone. Monitor color against natural light, adjusting application as needed. This technique delivers grain enhancement while maintaining authentic timber character.
Protective Finish Guide
How can you protect grain-revealing work while preserving the subtle contrast you’ve created? A thoughtful finish plan guards the restoration without masking character. Light refinishing enhances depth, then a purposeful protective layer preserves it. Choose UV-stable products to minimize color shift and commit to consistent application for even sheen. Prioritize materials that resist abrasion and humidity, while allowing you to maintain natural grain luster. Coordinate between wood staining decisions and finish sealing for cohesive tone.
- Apply a compatible sealer after staining to lock in contrast and prevent blotching.
- Use thin, even coats and a satin or low-sheen topcoat to balance protection with visibility.
- Reassess finish periodically, touching up only necessary areas to sustain original intent.
Color and Tone: Aligning Beams With Your Interior
Color and tone set the foundation for seamless integration of restored beams with existing finishes. You approach color and tone as a controlled system: first, establish a reference palette from your room’s dominant woods, metals, and whites; then, apply color matching to align beam hues with those cues. Maintain tone balancing by evaluating both lightness and saturation, ensuring beams neither dominate nor fade into surroundings. When selecting stains or finishes, test under similar lighting conditions to your living space, and document results before committing. Consider subtle variations across entire beam assemblies to preserve natural character while achieving cohesion. Finally, defer dramatic shifts; aim for harmony that supports architectural features without signaling a retrofit.
Sealing and Protecting Beams With a Natural, Low-Gloss Look

To achieve a natural, low-gloss finish, you’ll evaluate different natural finish options and their impact on grain visibility and color. We’ll explore protective techniques that preserve texture while resisting environmental wear, so you can select a method that remains vividly authentic. Start by weighing the balance between ease of application, durability, and the desired level of sheen to guide your approach.
Natural Finish Options
When sealing and protecting timber beams with a natural, low-gloss finish, you’ll prioritize durability, UV resistance, and minimal color change. A strategic approach balances transparency with protection, preserving the wood’s grain while resisting environmental exposure. You’ll select formulations that enhance surface clarity and resist ambering, maintaining a Vintage patina that reads as authentic, not processed. Consider finishes that reduce surface hardness without sacrificing breathability, enabling moisture equilibrium and long-term stability. Chemical treatments may be used selectively to inhibit staining or fungal growth, yet remain unobtrusive to the wood’s character. Apply in thin, uniform coats, allowing adequate curing between steps to minimize haloing and streaking. Finish choices should be compatible with existing finishes and substrate movement.
- Choose a clear, water-based hybrid or oil-modified formula with low refractive index.
- Validate UV resistance and field performance via accelerated aging tests.
- Document maintenance intervals and compatible cleaners for ongoing upkeep.
Low-Gloss Protective Techniques
Applying a low-gloss protective system to timber beams requires selecting finishes that preserve the wood’s natural character while delivering durable surface protection. You’ll balance penetration and surface sheen to maintain a tactile, non-glossy feel that still resists moisture, stains, and wear. Choose waterborne polyurethanes or ester-based hard wax oils that cure cleanly without ambering, and apply thin, even coats with controlled airflow to minimize dust intrusion. Sand between passes for flat, uniform film formation, then verify cure with a light flex test and wipe-off checks. Compatibility with existing finishes matters, so test on inconspicuous areas first. Plan lighting and adornment to complement the matte surface—modern lighting accents and decorative accessories should enhance texture rather than compete with it. This approach yields durability, ease of maintenance, and an authentic timber appearance.
When to Patch, Crack, or Address Fungal Issues

Cracks and fungal issues in timber demand timely, targeted action to prevent further damage. You determine whether to patch, crack, or address fungal activity based on mold extent, moisture levels, and structural implications. If decay is superficial, cosmetic patching can restore appearance without compromising integrity. When fungal treatment is necessary, apply it precisely to affected zones, followed by thorough drying and re-evaluation. For deeper or widespread rot, structural repair or beam replacement may be required to preserve safety and performance. Document conditions and monitor humidity to prevent recurrence. Prioritize noninvasive methods first, reserving invasive remediation for critical cases.
- Assess extent and moisture before choosing a path
- Apply fungal treatment selectively, then dry and recheck
- Reserve structural replacement for compromised beams
Tools and Techniques for Old-Beam Restoration
Old-beam restoration hinges on selecting the right tools and applying precise techniques to preserve structural integrity while enhancing appearance. You assess beam condition with noninvasive methods, recording moisture levels, grain direction, and decay indicators to guide intervention. Precision cuts, clean joins, and controlled drying prevent stress concentrations and distortion. Choose stabilization strategies that respect original geometry, using compatible fillers, compatible coatings, and lime-based mortars when appropriate. You prioritize historic authenticity by matching profiles and finishes, avoiding overt modern imitations. Material compatibility informs every step: delta moisture, hardness, and porosity alignments reduce mismatch risks and preserve breathability. Document every treatment, test compatibility on sample areas, and maintain reversible options wherever feasible to support future restoration decisions.
Hand Tools vs. Power Tools: Gentle Methods for Beams
When restoring timber beams, you’ll weigh hand tools against power tools to achieve precise, gentle results that preserve integrity. You’ll prioritize control, feedback, and surface quality, selecting approaches that minimize heat and vibration while supporting historic preservation goals. Modern machinery can accelerate tasks, yet timing and restraint matter; choose methods that respect wood fibers and patina. Hands-on techniques excel for localized detail, while selective power use handles bulk material with minimal risk. Align tool choice with beam condition, repair objective, and preservation standards.
- Assess surface texture with hand rasps for delicate feathering, reserving power files for controlled stock removal.
- Use low-speed, pendulum or ISO-compatible tools to limit heat buildup and tool marks.
- Alternate between methods to maintain structural integrity and historical authenticity.
Budgeting for Restoration: Costs, Tradeoffs, and ROI

Budgeting for restoration requires a clear, methodical plan that links cost estimates to expected performance and preservation goals. You assess scope, identify critical beams, and delineate tradeoffs between preservation fidelity and modernization needs. Costs break into labor, materials, treatment, and contingency, with a transparent rationale for each line item. Historical context informs pricing signals—legacy joinery, creosote remediation, and antique-grade coatings may command premiums or specialized subcontractors. Material sourcing matters as you weigh reclaimed versus new timber, restoration versus replacement, and treatment compatibility with existing finishes. ROI hinges on durability, reduced failure risk, and enhanced resale appeal, balanced against schedule impact and disturbance to occupancy. Document assumptions, milestones, and risk buffers to support disciplined decision-making throughout the project lifecycle.
Case Studies: Beams That Transformed Rooms
Beams can redefine a room’s character and structural clarity, as these case studies demonstrate how thoughtful selection, detailing, and condition assessment yield measurable architectural impact. You’ll see how historical authenticity informs decisions, while precise material sourcing guarantees compatibility and durability. Each example focuses on minimizing invasiveness while maximizing visual and structural integrity.
1) In a mid-century living room, careful seasoning, compatible species, and restored joinery created a luminous ceiling line that enhances space perception without compromising fabric.
2) A vaulted kitchen demonstrates how restored beams support modern loads while preserving patina, elevating tactile quality and room rhythm.
3) A timber-framed loft uses targeted cladding and strategic stain to reconcile original texture with contemporary finishes, delivering cohesive ambiance.
Historical authenticity and material sourcing underpin success across all transformations.
Maintaining Restored Beams: Routine Care Tips
Routine upkeep keeps restored timber beams performing and looking their best. You’ll establish a maintenance schedule that prioritizes humidity control, regular cleaning, and inspection for cracks or joint shifts. Use a soft-bristle brush and a damp microfiber cloth to remove dust, avoiding excessive moisture that can promote rot. Address surface checks promptly with light, targeted sanding and reapplication of eco friendly finishes, ensuring even penetration and breathability. When refinishing, select water-based or low-VOC products suitable for historical timbers, compatible with each beam’s original oils. In a Modern interior, you’ll preserve authenticity by avoiding overmodern coatings. Monitor for termite activity and structural settling, consulting a professional you trust if you detect hidden decay. Document treatments and recoat intervals for future preservation. Routine care sustains both character and integrity.
Integrating Restored Beams in Contemporary Spaces
Integrating restored beams into modern interiors requires careful alignment of historic character with contemporary function, ensuring both visual cohesion and structural integrity. You’ll balance period authenticity with current load demands, selecting proportions, finishes, and connections that respect the timber’s history while meeting today’s performance standards. Consider historical context when pairing beams with modern architecture, ensuring the warmth and texture complement minimalism or industrial design without overpowering the space. Material sourcing should emphasize certified reclaimed stock, compatible dimensions, and stable species to prevent movement or deterioration over time. Precision install details protect ceilings and aesthetics, from concealed joints to appropriate fasteners. This approach delivers a seamless integration that honors the beam’s lineage while delivering durable, contemporary utility.
- Assess historical context to guide design alignment
- Vet material sourcing for compatibility and longevity
- Implement precise, code-compliant connections and finishes
DIY vs. Hiring Pros: Making the Right Choice
Choosing between a DIY approach and hiring professionals is a practical decision that hinges on your goals, budget, and the specifics of your restored timber beams. You weigh control and timeline against risk, certification, and access to specialized tools. A DIY path suits smaller projects, routine finish checks, and controlled paint removal under safe, documented methods. For complex restoration—structural assessment, load considerations, or historical context—the pros bring engineering rigor, code compliance, and proven treatments that minimize long-term maintenance. Evaluate skill gaps, insurance coverage, and warranty implications before committing. If you pursue DIY, establish a formal plan with exact milestones, ventilation, and sample testing. Otherwise, request caveated quotes detailing scope, materials, and performance guarantees to guarantee durable, authentic results aligned with regulatory standards.
Documentation and Long-Term Preservation: What to Record
Begin with a precise, structured record that captures the beam’s current condition, provenance, and restoration steps; this foundation guarantees traceability and future maintenance. You’ll establish a formal log that documents material sourcing, historical context, treatment methods, joinery, fasteners, and protective coatings, with dates and responsible personnel. This repository supports future audits, repairs, and potential re-accession. Use standardized terminology, measurements, and condition ratings to assure consistency across projects and owners. Regular updates capture deviations, replacements, and performance over time, reinforcing integrity and value.
- Capture provenance and historical context, including prior uses and any documented restorations.
- Record material sourcing details, including species, thickness, grade, moisture content, and supplier certifications.
- Log maintenance actions, environmental conditions, compatibility of coatings, and inspection intervals.
Quick Start Checklist: Your First Steps to Restoration
To get started, assemble a concise, field-ready plan that prioritizes safety, documentation, and material integrity. Begin with a risk assessment, PPE requirements, and a temporary stabilization strategy to prevent further damage. Catalog all beams with photos, dimensions, and current conditions, noting any rot, cracks, or insect activity. Establish scope: which beams are repair candidates, which require replacement, and acceptable finishes for the space. Choose a baseline finish compatible with surrounding cabinetry and flooring, and document test results. Color matching should inform staining, sealant, and topcoat decisions, minimizing visible discrepancies. For finish selection, prioritize compatibility with moisture cycles and UV exposure, then verify with a small sample area. Maintain strict version control of products and procedures to ensure repeatable restoration outcomes.
Frequently Asked Questions
How to Tell if Beams Are Load-Bearing Without Removal?
Yes, you typically identify load-bearing beams by structural cues: header lines, adjacent joists, and wall continuity. Start with beam inspection and structural assessment, verifying support at supports, notchings, and connections before any removal or alteration.
Can You Restore Beams Without Changing Postwar Retrofits?
You can restore beams without altering postwar retrofits, preserving historical authenticity while using modern techniques. Assess structural compatibility, implement non invasive reinforcement, and document changes to maintain compliance, ensuring the restoration remains faithful, technically sound, and aesthetically integrated with existing elements.
What Environmental Risks Affect Old Timber During Restoration?
You face environmental risks: moisture, molds, pests, and tannin leaching. You must prioritize Sustainable sourcing and Eco friendly treatments, inspect emissions and volatilization, monitortf emissions, and guarantee ventilation, containment, and waste handling throughout restoration.
Are Reclaimed Finishes Legally Permissible in Historic Homes?
Yes, reclaimed finishes can be permissible in historic homes, provided you comply with Historic preservation standards and Legal regulations, including approved materials, documented provenance, and appropriate installation methods to avoid adverse impacts on character-defining elements.
How to Finance Restoration Without Compromising Authenticity?
You can finance restoration without losing authenticity by prioritizing grants, low-interest loans, and phased work, while leveraging modern techniques and material preservation. You investigate options first, and you responsibly compare contractors to guarantee authentic timber use stays intact.
Conclusion
You’ll feel the beams breathe again, their grain whispering stories through daylight. As you balance durability with character, the room holds steady like a quiet coastal cliff, while sap and history mingle in the air. The restoration isn’t just skin-deep; it’s a measured dialogue between time and technique, where every brace, stain, and polish proves you chose restraint over bravado. When done, you’ll stand in a room that respects origin and invites the present to linger.
About the Author



