
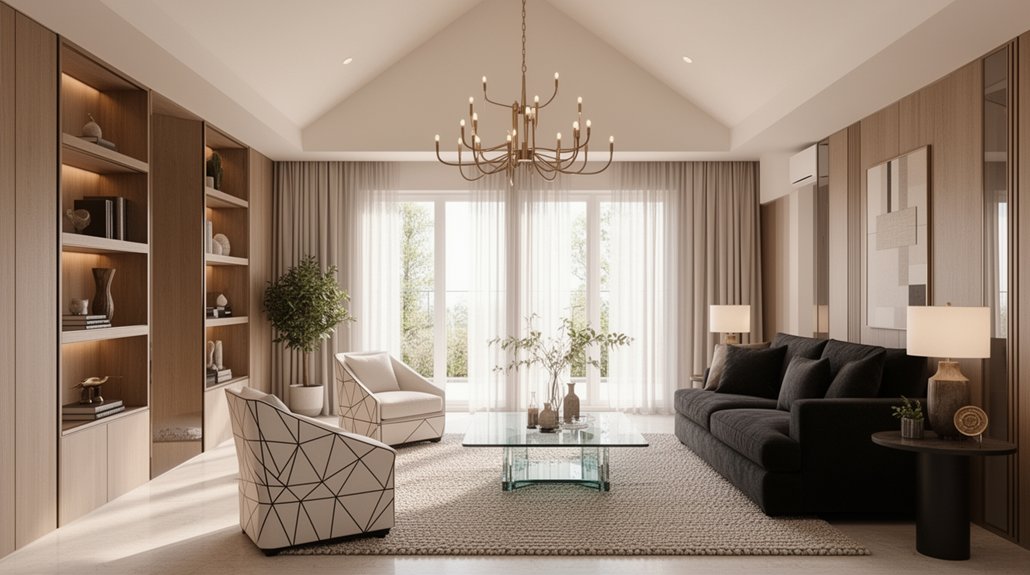
You can boost property appeal fast with a focused five-step plan. Start by staging rooms for flow, decluttering aggressively, and creating welcoming focal points. Brighten spaces with natural light, layered lighting, and a fresh, neutral palette that reflects warmth. Arrange furniture to define zones, use low-profile pieces, and repeat a cohesive set of finishes for cohesion. Enhance curb appeal with tidy entryways and potted plants. Small, powerful details matter—and you’ll uncover more practical hacks as you continue.
Key Takeaways
- Start with a quick 5-step staging plan to declutter, optimize flow, and create purposeful zones that boost perceived value.
- Maximize natural light with clean windows, mirrors, sheer drapes, and layered lighting for warmth and openness.
- Use a cohesive neutral palette with durable finishes, consistent trim and cabinetry, and low-VOC paints for air quality.
- Declutter aggressively, showcase clean sightlines, and balance spaces with minimal, cohesive decor and strategic focal points.
- Enhance curb appeal and on-site details with tidy entryways, landscaping, potted plants, fresh scents, and coordinated textiles.
Start Here: A Quick 5-Step Home-Staging Plan

Want a fast, effective way to boost your home’s appeal? Start here with a quick 5-step plan you can act on today. First, assess rooms with fresh eyes, noting any clutter and underutilized spaces. Second, optimize furniture arrangement to improve flow and sightlines, creating purposeful zones. Third, apply intentional home lighting—layer ambient, task, and accent lighting to transform mood and highlight best features. Fourth, neutralize color and decor choices, keeping fabrics and artworks cohesive to reduce visual noise. Fifth, stage focal points by showcasing an inviting seating area, a clean entry, and a well-made bed. Implement these steps consistently, and you’ll deliver a polished, market-ready impression that resonates with buyers and elevates perceived value.
Brighten and Freshen: Lighting, Paint, and Surfaces
Consider how bright lighting and fresh paint can instantly elevate a space, making rooms feel more open and inviting. Tackle walls and surfaces with clean, neutral tones and strategic accents to create cohesion throughout the home. You’ll set the stage for better photos and stronger curb appeal by balancing light, color, and texture.
Brighten Up Interiors
Brightened interiors instantly feel larger, lighter, and more inviting, so start by maximizing natural light with clean windows and strategically placed mirrors to bounce daylight deeper into rooms. You’ll enhance openness by choosing sheer or lightly tinted drapes and keeping window treatments minimal. Next, apply a fresh coat of neutral paint in warm undertones to reflect light without washing out character. Introduce natural lighting through well-placed lamps and ceiling fixtures that layer brightness without glare. Use vibrant accents—pillows, art, and upholstery—in bold tones to energize spaces without overwhelming them. Keep surfaces tidy and unbroken to reinforce a breathable vibe, and select reflective finishes on furniture or decor to amplify light. Finally, guarantee consistency across adjoining rooms for a cohesive, welcoming flow.
Freshen Walls And Surfaces
Freshen walls and surfaces by opting for a clean, cohesive palette and durable finishes. You’ll brighten spaces by choosing paint with a subtle sheen for easy wipeability, while keeping tones consistent across rooms to maintain flow. Consider wall textures that add depth without overwhelm, and match surface materials to your lifestyle—durable options for high-traffic zones, softer textures for bedrooms. Prioritize quality primers and low-VOC paints to preserve air quality. If you’re updating fixtures, extend the palette to doors, trim, and cabinetry for a unified look. Let natural light dictate brightness, and avoid heavy coats that create glare. Consistency, durability, and thoughtful material choices elevate appeal.
- wall textures that add depth without visual clutter
- durable surface materials for high-traffic zones
- cohesive color palette across rooms
- low-VOC paints and quality primers
- extended palette for trim, doors, and cabinetry
Decluttered Layouts: Create Welcoming Flow in Your Space
Decluttering isn’t just about tidying up; it creates a natural flow that lets buyers imagine daily living in the space. You’ll guide the eye through each room by removing excess items and selecting a few focal points. Favor clean lines, open pathways, and a clear sense of purpose in every zone. Open shelving can showcase curated essentials without crowding surfaces, while minimalist decor reinforces calm, breathable spaces that feel larger and more inviting. Storage solutions should appear unobtrusive, blending into the design rather than shouting for attention. When layouts are uncluttered, traffic patterns become obvious, and the home’s potential shines. You present a decisive, ready-to-live-in environment that appeals to practical buyers seeking comfort, clarity, and effortless style.
Furniture Placement That Maximizes Space and Style
Smart furniture placement builds on a decluttered, open backdrop by guiding movement and highlighting the space’s best angles. You’ll shape rooms with purposeful arrangement, balancing form and function to maximize flow. Prioritize seating and scale to maintain sightlines, letting natural pathways breathe. Use furniture arrangement that centers on conversation zones, aligning pieces to walls or islands for cohesive rhythm. Opt for multi-functional pieces to boost space optimization without crowding. Consider airflow, lighting, and access to outlets to maintain usability. Elevate style with cohesive finishes and intentional gaps between furniture sets.
- Define clear zones that align with daily activities
- Favor low-profile pieces to preserve openness
- Use ottomans or benches as flexible seating
- Position sofas to frame focal points without blocking paths
- Choose modular layouts you can reconfigure easily
Highlight Features With Focal Points and Thoughtful Accents

Highlighting features begins with intentional focal points that draw the eye and anchor the room’s rhythm. You plan deliberate focal points to guide sightlines, then pair them with decorative accents that reinforce the statement without shouting. Choose a primary feature—an art piece, architectural detail, or a sculptural fireplace—and let it set the room’s scale and mood. Layer in complementary textures and colors through accessories, ensuring each decorative element supports the focal point rather than competing with it. Use focal point lighting to emphasize the centerpiece; a sculpted lamp, wall sconces, or a discreet ceiling glow makes the feature glow, enhancing depth and atmosphere. Keep accents cohesive in tone and proportion for a polished, confident presentation that feels intentional and inviting.
Budget-Friendly Color and Material Coordination for Staging
You can start with a coordinated color palette that ties rooms together, using budget-friendly hues to create a seamless flow. Pair budget-friendly materials with cohesive finishes to maintain polish without overspending. This approach keeps the staging cohesive, while highlighting the key features you want buyers to notice.
Coordinated Color Palette
To stage on a budget, lock in a coordinated color palette and material mix that feel cohesive across every room. You’ll aim for harmony, using Complementary color schemes to create visual interest without competing accents, and choose materials that read consistently from room to room. Start with a neutral base, then layer in purposeful pops for mood and flow. Accent wall ideas should feel strategic, not gimmicky, choosing one focal wall per space and repeating a supporting hue elsewhere for continuity. Keep finishes matte or satin to unify textures, and avoid over-variation that trips the eye. Consistency sells; calculated contrast sustains appeal as rooms transition.
- Establish a neutral foundation and repeat a signature accent hue
- Limit wood tones to two or three complementary grades
- Use matte finishes to unify textures
- Reserve one bold wall as a focal point
- Coordinate textiles with core color cues
Budget-Friendly Materials Mix
Budget-friendly materials can still read cohesive and high-end when you mix durable essentials with carefully chosen finishes. You’ll pair solid basics—quartz countertops, engineered wood, metal accents—with budget-friendly surfaces that imitate luxe textures. Use eco friendly textiles for upholstery and drapery to introduce softness without high cost, and select durable, easy-care fabrics to minimize maintenance. Introduce repurposed decor thoughtfully: vintage display pieces, refurbished frames, and upcycled lighting can elevate a room without overspending. Balance is key: repeat a small number of finishes across furniture, textiles, and accessories to unify the space. Favor matte textures and restrained patterns to avoid visual clutter. Prioritize quality where it counts—stains, wear resistance, and protection for high-traffic zones—and curate accents that offer lasting appeal.
Cohesive Staging Finishes
Cohesive staging finishes align color and material choices across the listing to create instant appeal. You’ll maximize impact by pairing neutral walls with subtly textured accents, ensuring texture consistency throughout each room. Select finishes that share a common undertone—warm brass, matte black, or brushed nickel—to support finish harmonization without competing focal points. Use consistent cabinet, countertop, and flooring tones to anchor the space, then introduce small, cohesive details through textiles and art. Prioritize items that photograph well and resist dated trends. By controlling sheen levels, from satin to matte, you maintain a calm, professional feel that buyers can envision as their own.
- Consistent undertones across fixtures and surfaces
- Coordinated textures that read as one package
- Matched sheen levels for balance
- Repeated archive-worthy accents
- Strategic, budget-conscious refinements
Quick, On-Site Staging Hacks That Sell
Staging isn’t about perfection; it’s about making a potential buyer imagine living in the space. You’ll need quick, practical moves that translate into real value on day one. Start with furniture placement that creates clear funnels toward inviting focal points, and keep sightlines open so rooms feel larger. Add natural light where possible, and replace harsh lamps with softer, warm tones. Focus on a few high-impact details: a crisp throw, coordinated linens, and a single, fresh-scented diffuser. Outdoor curb appeal and landscaping enhancements matter, even in staging: a tidy entry, potted plants, and a welcoming mats set the first impression. Finally, declutter aggressively, edit accessories to a cohesive vignette, and preserve neutral palettes to help buyers envision their own style. Quick wins drive faster, higher offers.
Frequently Asked Questions
How Soon Should Staging Begin After Listing a Property?
Staging should begin as soon as your listing goes live. You’ll maximize impact with outdoor landscaping and lighting enhancements, attracting buyers early; quick, focused updates keep attention high while photos reflect a polished, inviting property from day one.
Which Rooms Yield the Highest ROI From Staging?
Staging the living room and primary bedroom yields the highest ROI. You’ll attract buyers by showcasing luxury upgrades and eco friendly materials, creating a polished look that feels spacious, modern, and move-in ready—while keeping costs controlled.
What Is the Best Neutral Palette for Resale?
Neutral palettes thrive: you choose soft taupe with cool grays, while white trim brightens. Juxtapose warmth and calm; color coordination stays cohesive, and paint selection leans to matte neutrals. You’ll transform resale allure with restrained, polished tones.
How Can Staging Reduce the Perceived Room Size?
Staging can make rooms feel larger by guiding furniture arrangement to open sightlines and create clear zones. You’ll boost space perception through scaled pieces, proper distance, and decluttering, emphasizingFlow, light, and function for prospective buyers.
Do Temporary vs. Permanent Changes Affect Value?
Temporary upgrades can boost appeal without lasting value loss, while permanent modifications often add durable value. You should balance immediate impact with long-term effects, choosing temporary improvements for flexibility and considering permanent modifications when customization aligns with market expectations.
Conclusion
You’ll see it all click once a buyer walks in. The room that feels twice as big, the calm that settles their nerves, the spark of “move-in ready.” But the true twist isn’t what you’ve staged—it’s how quickly a simple, confident choice tips the scale. Keep the essentials crisp and cohesive, then wait. The next step hinges on a single impression you’ve carefully crafted, and that impression could seal the deal before they even notice the details.
About the Author



