

To reform a traditional Welsh longhouse, start with a thorough structural and fabric assessment of timber, masonry, plaster, and joints, then map a planning path that respects heritage while delivering practical modern comfort. Prioritize breathable, lime-based finishes, reversible interventions, and authentic materials that match old textures and weights. Plan stages with clear budgets, timelines, and permits. Address damp, ventilation, and thermal bridging with breathable membranes and targeted insulation. If you keep going, you’ll uncover a practical roadmap for sustainable adaptation.
Key Takeaways
- Assess structure and materials first, prioritizing reversible, breathable interventions using lime-based mortars and traditional timber joinery.
- Plan phased restoration with long-term goals, ensuring authentic spatial flow, daylight, and acoustic separation.
- Preserve historic timber patinas and stone work while matching new materials for texture, weight, and breathability.
- Implement moisture management and ventilation strategies, including breathable barriers and controlled ventilation with heat recovery.
- Design flexible spaces and modular, reversible upgrades to accommodate future modern comforts and evolving uses.
Assess Structure, Fabric, and Heritage Value

Assess the structure, fabric, and heritage value by first thoroughly surveying the building’s bones: the load-bearing walls, timber frame, joints, and roofing. You’ll map materials, detect timber decay, and note joinery patterns that reveal construction phases. Document brick, stone, and plaster progressions, then test alignment, plumb, and level to identify past renovations. Record how roof sag or sagging rafters influence load paths, and flag moisture routes that threaten longevity. This clarity informs cultural significance and architectural symbolism, linking craft choice to regional identity. You’ll compare traditional mortars to modern substitutes, evaluating breathability and compatibility. Prioritize nonintrusive assessment, noting how interventions respect original sightlines, thresholds, and daylight. Your findings guide respectful preservation, ensuring structural integrity while honoring the longhouse’s historic narrative.
Create Your Longhouse Plan: Space, Budget, Priorities
When you plan your longhouse, start by mapping spaces to fit daily life, seasonal use, and future needs, then pin down a realistic budget and clear priorities. Begin with a schematic layout: kitchen, living zones, storage, and sleeping areas that flex with family size and guests. Prioritize efficient circulation, daylight, ventilation, and acoustic separation between public and private spaces. Set a budget that matches essential retrofits first—structural stabilization, insulation, and durable finishes—then allocate funds to upgrades that unlock Historic preservation value and Cultural significance. Build a phased schedule with milestones, cost buffers, and decision points for design tweaks. Track risks, permits, and supplier lead times, ensuring responsive adaptations. Finally, document decisions for future stewardship, maintaining authenticity while embracing practical modern comfort.
Damp Diagnosis: Causes, Risks, and Immediate Fixes
What’s really going on when damp appears in a Welsh longhouse, and how can you stop it fast? Damp signals moisture imbalance: condensation from daily living, ingress through cracks, or poor airflow. Start with a quick inspection: check gutters, chimney flue caps, and roof eaves for leaks; seal active gaps with breathable lime-based products. Ventilation matters: aim for consistent cross-ventilation during wet spells, and use trickle vents or extractor fans in damp-prone rooms. Wipe and heat: dry surfaces, remove mold promptly with a fungicidal wash, and raise interior lighting to reduce cold shadows that trap moisture. For Historical preservation, document findings and preserve original fabric where possible, avoiding harsh chemicals. Immediate fixes buy you time, but plan long-term breathable upgrades that respect the house’s fabric.
Insulation That Breathes: Timber and Stone Considerations

You’ll need to balance breathable timber ties with a stone substrate that dries and breathes, so moisture moves without creating cold bridges. Consider breathable membranes and lime-based mortars that accommodate seasonal movement while keeping joints open for vapor transport. Start with detailed, field-tested details on timber-tied connections and stone drying paths to set up practical tests and measurable outcomes.
Breathable Timber-Tied Details
Breathable timber-tied insulation relies on a careful balance of air flow, moisture management, and the hygroscopic properties of timber and stone. You’ll weave gaps deliberately, allowing vapor to move without convective losses, while keeping cold bridges out. This approach keeps walls dry and comfortable, yet robust.
- Inspect timber yields with timber harvesting sensibility, selecting pieces that bend without cracking and store them for stable moisture.
- Tie battens firmly but flexibly to permit venting between boards and stone, preventing stagnation and mold.
- Detail joint routes so moisture can travel outward, not inward, using breathable sealants only where they won’t impede diffusion.
- Document heritage preservation goals alongside practical performance, aligning techniques with historic fabric.
This method honors climate, craft, and conservation.
Stone Substrate Drying Effects
Stone substrate drying governs how well an insulating timber layer performs; if the masonry stays damp, warmth leaks and rot becomes more likely, so you must anticipate moisture pathways before you lay a single batten. You’ll inspect substrate texture, capillary traits, and any gallery cracks that invite moisture migration. Allow for a controlled drying path by introducing a breathable barrier that still sheds bulk moisture, and plan vent ports at low and high points to equalize humidity gradients. Use a proven rainscreen strategy with an air gap and solid damp-proofing where needed, ensuring stone preservation remains central. Monitor moisture levels after installation, then adjust ventilation or insulation fit accordingly to minimize condensation risks and preserve structural longevity.
Achieving Air Tightness Without Stifling Breathability

You’ll balance air tightness with breathability by applying clear Air Tightness Principles and selecting airtight yet permeable materials where needed. Consider Breathable Barrier Strategies that prevent moisture buildup while letting the house breathe, and plan practical, controlled air exchange through vents, fans, and smart controls. Start with a concise, performance-based checklist to keep each detailing step precise and innovation-focused.
Air Tightness Principles
Air tightness isn’t about sealing every crack to the point of stifling breathability; it’s about controlling where moisture and heat move. You’ll pursue measured containment that supports comfort, efficiency, and adaptability.
- Identify critical junctions: doors, windows, and service penetrations, then seal with breathable membranes where possible to keep moisture moving deliberately.
- Use controlled ventilation: run a demand-controlled or interval system that balances fresh air with heat recovery for steady indoor air quality.
- Specify insulation gaps: treat edges, corners, and mezzanines with continuous wraps to minimize thermal bridges without locking in damp spots.
- Integrate renewables: align heat sources with ventilation strategies to optimize energy use and reduce carbon footprints for a healthier home.
This approach supports renewable energy goals and comfortable, healthy living.
Breathable Barrier Strategies
Breathable barrier strategies weave protection with prudence, guaranteeing the building remains dry and comfortable while letting moisture move where it should. You start with a meticulous layout of layers, pairing airtight membranes with high-quality vapor permeable fabrics. Choose breathable barriers that resist wind-driven rain yet breathe across the humidity spectrum, preventing condensation pockets behind thick timber walls. Seal joints precisely, employ tape that stays flexible in seasonal shifts, and treat penetrations with compatible sealants to avoid cold spots. Prioritize continuity: align membranes with vapor retarders at ceilings and floorlines, and ensure they terminate at breathable fabric soffits for effective drainage. Test assemblies under load, adjust for seasonal moisture swings, and document performance. Breathable barriers protect structure, occupants, and comfort—without sacrificing airflow where it matters. Moisture barriers complete the system.
Practical Air Exchange
Ever wondered how you can lock in energy efficiency without turning your home into a fume chamber? Practical air exchange lets you breathe easy while tightening a Welsh longhouse. Focus on controlled ventilation that preserves warmth and prevents damp. Use a mix of natural ventilation and mechanical support to balance airs. Prioritize filtration to keep dust and allergens low without throttling airflow. Here’s a concise approach:
- Install well-sealed windows with trickle vents to enable steady, low-volume flow.
- Add passive solar well-placed openings to leverage natural drafts when conditions are favorable.
- Pair ceiling or ridge vents with smart dampers, adjusting during occupancy.
- Fit a compact air filtration unit in living zones for targeted cleanup while maintaining circulation.
Natural ventilation, air filtration integrate to maintain comfort, health, and efficiency.
Heating for Welsh Winters: Systems and Sizing
When sizing a Welsh longhouse’s heating system, start by mapping the building’s envelope and daily cycle patterns to practical load requirements, then choose modular options you can adjust as occupancy and use shift. You’ll prioritize hybrid strategies that blend Traditional craftsmanship with Modern materials, ensuring efficiency without sacrificing character. Use zoned approaches: core living spaces heated lightly, external additions heated on demand, and heat-recovery from exhaust air. Select scalable boilers, pellet stoves, or ground-source elements that can be modulated to match seasonal swings. Insulation upgrades and airtight detailing reduce waste, while thermal mass smooths fluctuations. Document commissioning results, set realistic temperature bands, and plan maintenance windows. This disciplined, modular mindset keeps comfort high, costs predictable, and the longhouse adaptable to evolving needs.
Ventilation That Prevents Condensation
You’ll start with clear moisture control strategies that balance air exchange, humidity, and warmth to keep surfaces dry. We’ll measure ventilation performance with practical metrics, so you can compare inflow, outflow, and dew-point risk in real time. We’ll share concrete condensation prevention techniques you can apply now, from smart vent placement to hygroscopic materials and targeted air movement.
Moisture Control Strategies
Ventilation that prevents condensation starts with steady airflow and targeted moisture removal. You’ll shape a strategy that keeps humidity low without chilling rooms or wasting heat.
- Identify hotspots: kitchens, baths, and drying zones, and install localized exhausts with controllable speeds.
- Balance air: pair exhausts with gentle make-up air from living spaces to avoid pressure swings.
- Use diffusion: employ interior membranes and short ducts to minimize condensation on cool surfaces.
- Maintain targets: set humidity bands (around 40–60%) and monitor with simple, reliable sensors.
Implement a simple routine: pre‑heat, vent during use, and post‑vent for a short while. Regularly service ducts, seals, and fans to sustain performance.
Ventilation Performance Metrics
Are you measuring the right signals to stop condensation, or just guessing based on comfort alone? Ventilation performance metrics give you objective checks, not vibes. Track air exchange rate (ACH) against hourly humidity spikes, and log surface temperatures on walls and windows to flag cold spots. Use inlet-outlet balance readings, differential pressure, and air quality sensors to verify steady, draft-free flows during worst-case conditions. Pair data with occupancy patterns to match ventilation to use, avoiding over- or under-venting. Consider practical aids: place indoor plants as micro-humidification indicators and to visualize air movement, while solar panels power continuous monitoring without grid reliance. Translate metrics into actionable tweaks—damper settings, fan speeds, and targeted sealing—keeping moisture at bay long-term.
Condensation Prevention Techniques
To prevent condensation, you’ll pair ventilation with targeted moisture control and surface management. You’ll optimize airflow paths, reduce humid pockets, and keep surfaces warm enough to avoid dew. Implement practical steps that blend efficiency with comfort.
- Align ventilation systems to continuous low-rate operation during cooking, showering, and laundry, reducing transient humidity peaks.
- Employ exhaust vents at moisture hotspots and balance with fresh air intake to avoid creating negative pressure zones.
- Seal and insulate cold surfaces, especially external walls and windows, to minimize surface condensation and mold risk.
- Use moisture monitors and daily checks to guide timely adjustments and reinforce mold prevention through proactive management.
This approach blends ventilation with moisture control, delivering reliable condensation prevention and safer indoor environments.
Reconfiguring Public Rooms and Private Nooks
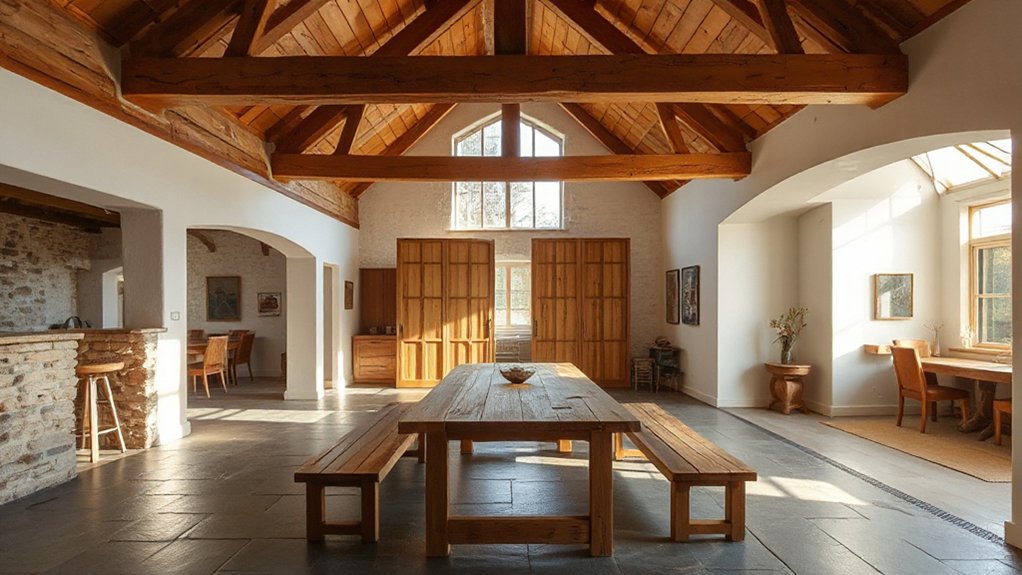
Reconfiguring public rooms and private nooks begins with a clear flow plan that respects both social needs and daily rhythms. You map zones, then assign furniture, storage, and traffic paths to minimize crossing. Start with a central gathering space sized for your family, ensuring sightlines to cooking, work, and exits. Use modular seating and movable screens to convert bold public areas into intimate corners for reading or lingering conversations. Prioritize daylight and ventilation by aligning seating with windows, while keeping clear routes for everyday chores. Integrate Garden landscaping edges to blur inside/outside living, and apply Interior decor cues that unify textures and color across rooms. Finish with practical storage fixes, like built-in cubbies and labeled bins, to maintain tidy, functional public-private progressions.
Light and Access: Windows, Doors, and Draft Control
Light and access hinge on smart openings and controlled flow. You’ll balance daylight with draft control, selecting strategies that respect historic preservation while embracing modern comfort. Start with material selection that breathes—timber frames, stone reveals, and precision sealing that won’t harm original fabric. Elevate shutters, vents, and skylights to suit daily needs and seasonal shifts. Consider passive cooling and targeted lighting to minimize energy waste.
1) Choose windows that match old profiles but improve glazing performance.
2) Install doors with insulative thresholds and secure weather seals.
3) Align draft-control measures with room use, avoiding cluttered air paths.
4) Use operable elements for ventilation during cooking and occupancy peaks.
Plumbing and Electrical Upgrades for an Old Home
Upgrade your old home’s heart with a plan that covers Electrical System Upgrades, Plumbing Upgrade Considerations, and Compliance And Safety Upgrades. Start by mapping existing circuits and water routes, then identify priority rewiring, panel upgrades, and any obsolete pipes or materials. Keep safety and code compliance front and center as you balance reliability, efficiency, and future needs.
Electrical System Upgrades
What practical steps should you take first when upgrading the electrical system in an old Welsh longhouse, and how can you do them safely and efficiently?
- Assess current wiring and loads, documenting ages, types, and breakers to plan updates around Electrical wiring efficiency and safety.
- Create a phased plan for new circuits, prioritizing essential lighting design, outlets, and waterproofing for damp areas.
- Install a modern service panel with surge protection, grounding, and proper conductor sizing to support future expansion.
- Schedule inspections with a qualified electrician to verify compliance, air-seal retrofits, and code-ready documentation for longhouse renovations.
Plumbing Upgrade Considerations
To plan plumbing upgrades in an old Welsh longhouse, start by mapping the existing system: locate all pipes, fixtures, and water sources, noting material ages, corrosion risk, and accessibility for future work. You’ll assess flow capacity, pressure zones, and drainage paths to prevent bottlenecks. Prioritize sleeved runs for walls and floors to minimize disruption during retrofit. Favor modern, discreet materials that mimic traditional aesthetics, while ensuring reliability and ease of maintenance. Plan to separate domestic hot water from heating loops where possible, reducing energy waste. Document junctions where ancient work intersects newer lines for future repairs. Balance upgrades with Historical preservation and cultural significance, selecting fixtures and finishes that honor era details, yet improve durability and sanitation. Keep reversibility and access at the forefront.
Compliance And Safety Upgrades
Wading into compliance and safety means aligning both plumbing and electrical systems with current codes while preserving the building’s character. You’ll plan upgrades that protect historic fabric without compromising performance, prioritizing reliability, water efficiency, and fire safety.
- Map existing layouts to identify where modern runs can piggyback on discreet paths, minimizing disruption to historical preservation.
- Choose materials and methods that honor heritage while meeting modern standards, balancing durability with cultural significance.
- Implement tamper-resistant devices, arc-fault protection, and proper grounding to reduce risk in living spaces.
- Schedule phased inspections, documenting changes for future stewardship and potential funding tied to cultural significance.
This approach keeps functionality sharp, respects tradition, and preserves the longhouse’s character for generations.
Flooring Foundations: Subfloor to Finished Surfaces
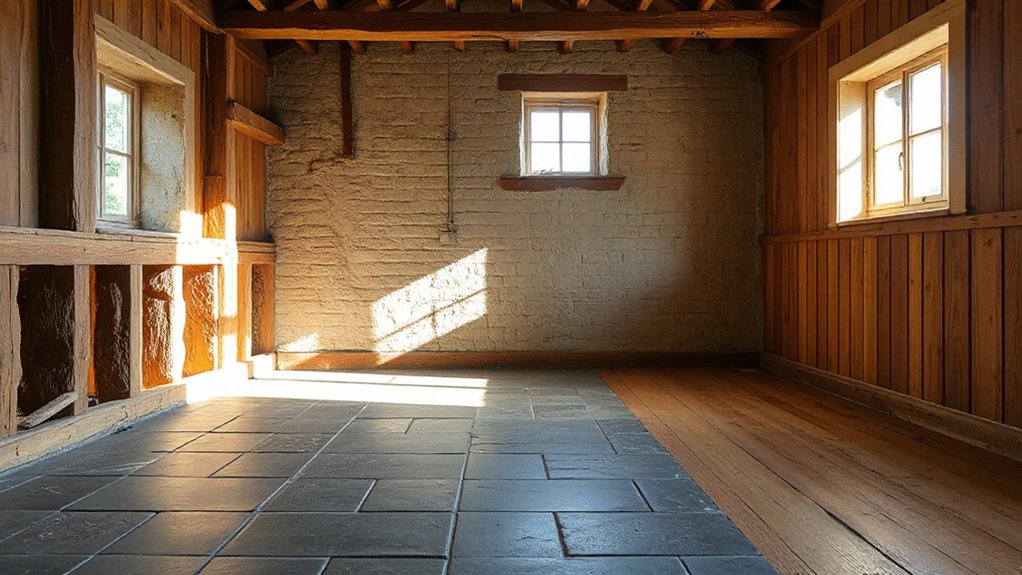
How does a solid subfloor set the stage for durable, comfortable living? You guarantee a stable backbone from joists up, prioritizing moisture control, insulation, and level planning. Begin with a breathable, rot-resistant subfloor material that resists damp ingress, then seal junctions to prevent cold drafts. Measure for evenness, correcting high spots and gaps that trap debris or cause squeaks. Choose fasteners and adhesives compatible with your finished surface, considering the historic fabric you’re preserving. Layer for thermal performance without sacrificing height, mindful of traditional Welsh longhouse aesthetics. With Historical preservation in mind, document substrates and shifts, so you can retrace decisions. Recognize Cultural significance in surface choices, balancing modern durability with authentic character. Finish surfaces deliberately, ensuring long-term integrity and minimal maintenance.
Structural Repairs: Restore or Reinforce?
You weigh whether to restore or reinforce based on observed wear and safety concerns, prioritizing a clear plan and minimal downtime. Start with a structural risk check—identify cracks, movement, and moisture cues, then decide if restoration retains historic fabric or if reinforcement is needed to meet current loads. Frame the decision around restoring integrity first, then reinforcing only what’s necessary to preserve stability and long-term safety.
Restore Or Reinforce
When deciding between restoration and reinforcement, start by evaluating the existing structure’s condition and the long-term goals for the Welsh longhouse. You balance historic preservation with practical reuse, choosing methods that preserve cultural significance while ensuring safety and longevity.
- Assess timber decay and masonry integrity with noninvasive probes.
- Prioritize reversible interventions that respect historic layers.
- Compare cost, performance, and disruption to occupancy.
- Plan phased work that preserves cultural rhythm during repair.
Implementation should favor stone and timber details that communicate authenticity, using traditional craft where possible. Document every decision and material provenance to support future stewardship. Emphasize minimal intervention for original fabric. Consider adaptive reuse scenarios that honor Historic preservation and Cultural significance, yet deliver modern comfort. Conclude with a clear path: restore where feasible, reinforce only where necessary to meet performance targets.
Assess Structural Safety
Structural safety hinges on a clear, data-driven assessment that distinguishes what can be restored from what must be reinforced. You begin with a measured survey: timber species, joinery integrity, foundation settlement, and moisture profiles. Map load paths, then test connections for stiffness and shear resistance. Prioritize structural elements—rafters, posts, and wall plates—before cosmetic fixes, because failures here threaten whole-house stability. Where gaps exist, specify reinforcement options that respect heritage: concealed steel ties, ready-to-install brackets, or retrofitted footings that preserve floor heights. Document decay sources, from rot to insect attack, and quantify remediation costs against performance returns. Consider cultural symbolism in choices—preserve visible timber patterns, patinas, and traditional craftsmanship details whenever possible. Aim for a robust, future-proof assembly without erasing the longhouse’s character.
Conserving Historic Features While You Modernize
Balancing modernization with respect for history starts with a clear plan: identify which features define the building’s character, then protect them while you upgrade.
1) Catalogue key historic elements—stone walls, timber framing, and open hearths—and decide which must stay untouched, which can be repaired, and which should be adaptively reused.
2) Match new materials to old where possible, prioritizing compatible textures, weights, and breaths to avoid clashes.
3) Integrate modern systems discreetly, preserving visual lines and craft details while upgrading efficiency.
4) Bring local culture into the project by weaving Welsh folklore and traditional crafts into fixtures, panels, and finishes for authenticity.
This approach keeps heritage alive, practical, and uniquely contemporary.
Sustainable Finishes Suited to a Listed Longhouse
What sustainable finishes best suit a listed longhouse, and how can you apply them without compromising its character? You select breathable lime plaster and natural oil-based finishes that let timber and stone breathe, preventing moisture problems and preserving patina. Use limewash in earthy tones to softly reflect light without masking features, and opt for low-VOC, plant-based paints for doors and interiors. For floors, choose untreated timber or natural linoleum that ages gracefully; seal joints with mineral-based waxes rather than synthetic sealants. Keep traditional crafts visible: exposed rafters, plaster textures, and lime-rendered walls. In gardens, pair wildflower meadows with exterior finishes that resist weathering. Document ongoing maintenance, schedule monitored re-plastering, and respect the building’s rhythm while upgrading sustainably.
Annexes and Extensions: Respectful Growth
Annexes and extensions should grow from the existing form without stealing its pace or texture. You approach expansion with restraint, ensuring new elements read as part of the whole, not grafts. Practical, precise strategies guide how and where to place additions, prioritizing symmetry, proportion, and timber language that echoes Traditional craft while respecting historic fabric. You balance utility with minimal intrusion, creating spaces that serve current needs yet remain reversible. Cultural preservation informs detailing, joinery, and materials, so the extension ages gracefully alongside the main house. Plan in stages, documenting decisions for future fabric checks. 1) Map access and sight lines to maintain flow. 2) Choose compatible materials and finishes. 3) Use modular, reversible design. 4) Preserve essential roofline rhythm and wall alignment.
Courtyards and Outdoor Spaces: Use, Drainage, and Drying Areas
Courtyards and outdoor spaces should be designed for efficient use, with clear zones for entry, drying, and leisure that minimize mud and overspill. You’ll plan a dry path between doors and main seating, using permeable paving to drain rainwater into planted swales. Position a sheltered drying alcove near the kitchen or laundry, with covered hooks and a bench for comfort. Define a leisure zone with durable outdoor furniture placed to overlook activity areas, keeping sightlines clear for safety. Integrate garden sculptures as pivot points for weathered rhythm and focal interest, while maintaining easy access for maintenance. Specify materials that resist wear and are easy to clean, and choose low-water plantings to reduce runoff. Guarantee edging and drainage gradients prevent pooling after storms.
Roof Choices for Longhouses: Flat, Thatched, and Rooflights
Choosing the roof for a Welsh longhouse hinges on climate, insulation, and use patterns, so start by weighing flat, thatched, and rooflight options against your site wind exposure and fire-safety needs. You’ll balance efficiency with practicality, selecting structures that ease maintenance while maximizing comfort.
- Flat roofs simplify drainage and future insulation upgrades, but guarantee robust fire barriers and weatherproofing.
- Thatched options offer natural insulation and aesthetic value, yet demand regular roof maintenance and fire safety measures.
- Rooflights boost daylight and heat gain in winter, provided glazing is well insulated and protected from glare.
- Hybrid systems blend materials for insulation, ventilation, and accessibility, reducing cold spots and maintenance overhead.
Roof insulation and roof maintenance are central to choosing a durable, efficient longhouse roof.
Planning Permission, Budgets, and Timelines
Getting planning permission, budgeting, and setting timelines are your concrete next steps after weighing roof options, because every choice has regulatory and financial consequences that shape the build. You’ll pin down essential permissions first, then map costs against your design goals, avoiding scope creep. Draft a tight budget that includes contingencies for unexpected site work and structural updates, not just finishes. Timeline realism matters: align approvals with material lead times and weather windows to keep momentum. Landscaping design should be integrated early, outlining access, drainage, and soil prep in the permit package. Document every step for historical documentation, capturing existing timber, stone, and layout to support applications and future maintenance. Track decisions with clear milestones, owner approvals, and documented changes to stay compliant and financially sane.
Common Pitfalls and Realistic Transformation Timelines
Common pitfalls can derail a Welsh longhouse renovation if you don’t anticipate them early: scope creep, unrealistic timelines, and underestimating structural needs. You’ll stay on track by forecasting trade-offs, budgets, and compliance without sacrificing character. Use realistic milestones and measurable goals, then adjust as you learn.
- Identify non-negotiables early (load paths, damp control, and ventilation) to avoid costly retrofits.
- Balance modern furniture with historic fabric, prioritizing space, flow, and accessibility.
- Build energy efficiency into insulation, glazing, and renewables to future-proof costs.
- Schedule staged, reviewable phases to manage risk and maintain momentum.
Implement transparent progress checks, document decisions, and communicate changes promptly. This keeps transformation visible, practical, and aligned with your vision.
Quick Start: First 30 Days and a Simple Project Checklist
Kicking off the first 30 days is about clarity, momentum, and tangible wins: define the non-negotiables, map quick wins, and set up a simple, real-time tracking system so you can see progress every week. You’ll prioritize Historical preservation basics, budget caps, and safety standards, documenting what must stay intact. Create a compact checklist: structural assessment, damp treatment, insulation options, and fireplace/ventilation plans. Assign owners, dates, and measurable outcomes to each task. Use a single dashboard to log completed steps and encountered hurdles, updating weekly. Embrace low-friction milestones that reveal fast wins, like securing materials or confirming permits. Throughout, emphasize Cultural significance, so decisions respect layout, traditions, and community input, maintaining authenticity while improving comfort and energy efficiency. Revisit priorities weekly and adjust as needed.
Frequently Asked Questions
How to Prioritize Traditional Features Without Delaying Modern Upgrades?
Prioritize heritage preservation by outlining non-negotiables for traditional features, then plan modern integration around them. You’ll document priorities, set phased milestones, and select adaptable materials. You’ll balance authenticity with performance, ensuring renovations advance without delaying essential upgrades.
What Grant or Grant-In-Aid Options Apply to Listed Buildings?
You can apply for Historic England grants for listed buildings, plus regional schemes; for example, a coastal watched-listed cottage used as a studio. You’ll need historic documentation and Conservation techniques to justify funding and guide repairs.
How to Assess Long-Term Climate Resilience Without Altering Essence?
You assess long-term climate resilience by prioritizing climate adaptation, integrating passive cooling, insulation, and breathable materials, while maintaining character. You map risks, implement modular upgrades, monitor performance, and document lessons to strengthen resilience planning without altering essence.
What Safety Standards Govern Renovations to Ancient Welsh Timber?
Safety standards for renovating ancient Welsh timber require you to follow heritage authenticity guidelines and preservation techniques, including using approved materials, load-bearing checks, and fire resilience measures; you’ll document work, consult professionals, and maintain structural integrity throughout.
How to Plan Phased Works Without Compromising Heritage Values?
Can you plan phased works without compromising heritage values, focusing on Heritage conservation and Structural integrity? You map milestones, sequence tasks, protect fabric, document changes, and use non‑invasive methods, while maintaining continuity, safety, and resilient timber detailing throughout the project.
Conclusion
You’ve got a plan that respects history while modernizing comfort. Start by listening to the walls, then map a clear sequence: assess, prioritise, repair, insulate, and breathe. Budget tight, but think long-term—quality beats cheap fixes. Expect permissions, timelines, and trade-offs; stay flexible and document every decision. Envision this as a living fabric, not a museum relic. Your longhouse becomes a sustainable hug of timber and stone, warming with light, not jargon. A steady, practical transformation, like weaving resilience.
About the Author



