

Plan your garden path by defining its function, mood, and budget, then pick durable paving stones that suit your climate and maintenance preferences. Lay out the route, measure total length and width, and mark boundaries. Prepare a solid base with graded gravel and a sand bedding, then set stones in a stable pattern—panel, running bond, or herringbone. Install proper edging and guarantee drainage with slight slopes. For easy fixes and long-lasting edges, keep your path organized; more tips await.
Key Takeaways
- Plan the path’s function, style, width, and drainage to guide material choice and layout before starting.
- Prepare the site with proper subgrade, compacted base, and edge restraints to support paving stones.
- Dry-fit patterns (running bond, herringbone, basket weave) on the ground to optimize layout and minimize cuts.
- Set stones in a level sand bed, maintaining uniform depth and alignment, then secure with joint material.
- Finish with proper drainage, fill joints, and seal or maintain surface to prevent weed growth and weather damage.
Define Your Path Goals, Style, and Budget

Start by clarifying what you want the path to accomplish. You identify your path’s primary function, the mood it sets, and how it integrates with existing features. Define your style: formal, cottage, modern, or rustic, aligning with your garden aesthetics. Assess throughput, safety, and accessibility to determine width, grade, and surface consistency. Establish a realistic budget, including base materials, edging, and labor if needed, plus an emergency reserve. Prioritize durability, ease of maintenance, and future updates. Consider maintenance tips upfront: select low-maintenance materials, plan for weed control, and schedule seasonal checks. Decide materials and aesthetics that match neighboring features, so upkeep remains straightforward. Finally, document your decisions, measurements, and cost estimates to guide purchases and avoid scope creep.
Choose Your Garden Path Stone Style and Type
To choose your garden path stones, start by matching the material to your climate, foot traffic, and maintenance preferences. You’ll pick styles that align with garden aesthetics and withstand daily use. Evaluate stone types by texture, color, and surface finish; smooth options feel modern, while tumbled or textured finishes read rustic. Consider hardscape durability under freeze-thaw cycles and exposure to moisture. Concrete pavers offer affordability and uniformity; natural flagstone delivers character but can require more maintenance. Slate provides quiet, dense performance with subtle color variation, yet may need sealing. Gravel or decomposed granite offers permeability and a softer look but varies in compaction needs. Prioritize stone durability, installation practicality, and how the tone complements surrounding plantings for cohesive design.
Plan the Path Layout and Measure Space
Before you place stones, map out the path to fit your space and how you’ll move through it. Start with a rough route that aligns with doors, seating, and focal features. Measure total length and the width you want; add extra for potential widening at bends or at entrances. Mark boundaries with string or chalk, then confirm clearance for a wheelbarrow or cart. Consider grade changes, drainage, and adjacent planting areas. Note how Garden lighting will illuminate the surface after dusk, and plan fixture placement along the path edges for safety and ambiance. Think about Plant integration—choose low, mophead, or groundcover varieties that won’t obscure stones or require frequent stepping. Record final dimensions and adjust before laying foundations.
Decide Path Shape and Pattern (Linear, Circular, or Meandering)

Choosing the path shape sets the tone for your garden and influences maintenance. When you decide, assess how you walk the space: straight lines for formal sections, curves for natural flow, or a gentle bend for meandering routes. Path shape guides how you place stones and how often you trim edges. Consider sightlines from entry points and focal plants to determine whether a linear, circular, or meandering pattern works best. Pattern selection matters too; use simple, repeatable arrangements for even load underfoot and easier spacing. For meandering paths, offset stones to create subtle rhythm; for circular layouts, maintain a central hub with radiating rings. Remember, consistent joints and clear edges prevent shifting soil. Choose a layout that complements your landscape, enhancing flow and accessibility.
Assess Subgrade Soil and Prepare It Right
But first, you must assess the subgrade soil and prepare it right. Start with a quick on-site evaluation: note drainage, compaction, and the soil’s color and texture. Perform soil testing to determine moisture-holding capacity and pH, so you know how to adjust for stability. Remove organic debris and roots, then verify a uniform base depth that matches your paving stones’ thickness. If the soil is poorly draining, excavate and replace with a well-graded sub-base aggregate, compacting in layers to achieve uniform density. Use Organic amendments only if tests show nutrient or structure deficiencies, mixing them evenly into the subgrade before laying base material. Maintain a level, well-drained surface, ensuring the subgrade resists shifting under load and weather.
Pick Foundation Depth and Materials
Foundation depth should match the paving stones’ thickness and anticipated load, with a stable, well-drained base as the constant. You select foundation depth based on stone size, soil condition, and expected traffic, then verify material suitability. Use crushed stone or compactable aggregate as the base, compacting in lifts for uniform density and drainage. Add a 2–3 inch layer of permeable sand or special polymeric sand under each stone joint to reduce settlement and wobble. For materials, choose local, durable options like concrete, natural flagstone, or brick pavers that resist freeze–thaw cycles. Confirm edge contact is solid so you don’t shift. Consider garden aesthetics and plant integration by leaving deliberate gaps for shallow roots and seasonal mulch. Keep maintenance simple to preserve both function and appearance.
Set Edge Restraints for Stability

Edge restraints keep your pathway from spreading or lifting under load and moisture. To set them, drive a continuous strip along the sides of your trench, using a rigid edging material that won’t flex under weight. Choose edging materials such as concrete, stone, or steel, and install them level with or just below the top plane of your stones. Secure every section with appropriate fasteners or spikes, spacing them per manufacturer guidance. Confirm the edging is straight and uninterrupted to prevent stone migration. Backfill tightly against the edge with compacted soil or gravel, then tuck your paver units tight to the restraint. This approach protects the garden aesthetic and maintains clean lines, while providing a stable, durable border that supports long-term performance.
Create a Stable Base: Gravel and Sand Layering
You’ll start with a gravel base to support weight and promote drainage, then create a level sand bed for precise stone placement. Focus on proper gravel layering, compacting, and achieving a uniform thickness to accommodate the paving stones. This sets up the key techniques for stable base creation and the overall success of the pathway.
Gravel Layering Basics
A solid base starts with a clear plan: you’ll create a stable, well-drained foundation by layering gravel and sand correctly. Begin with a coarse aggregate as your base, ensuring it’s clean and free of fines. This gravel composition provides drainage and structural support under the paving stones. Next, place a 4–6 inch layer of angular stone, compacting thoroughly to prevent settling gaps. Use a plate compactor to achieve uniform density, avoiding voids that can shift stones later. Top with a sand layer for bedding, then confirm the surface is level and has a consistent slope for runoff. Focus on layering techniques that maintain compaction integrity while preventing wheel rutting. Regularly test drainage, adjust thickness as needed, and verify edge restraint to keep the pathway true.
Sand Bed Preparation
After laying a solid base, focus on the sand bed to finish the bedding for your pavers. You’ll spread a clean, level screed of sharp sand, then use a screed board to true the surface. Aim for a consistent 1 to 2 cm thickness, depending on paver size, and avoid compacting too aggressively. Lightly dampen the sand and rake to blend edges with the gravel below, ensuring a smooth, even plane. Check for low spots by laying a string line or straightedge across the surface, filling any depressions before edging. While you prepare, consider Plant selection for surrounding borders and note Wildlife attraction potential, but keep the sand layer focused on stability and alignment rather than features beyond the bedding. Precision here prevents movement and costly repairs later.
Stable Base Techniques
To create a stable base, start with a crushed-gravel layer compacted to a firm, level plane, then topping it with a thin, well-compacted sand bed that’s kept clean of fines. You’ll create a solid foundation that resists rutting and shifts, essential for durable garden aesthetics and proper stone selection.
- Prepare a graded gravel mix (3/4″ down to fines) and compact in layers to prevent voids.
- Spread a 1/2″ to 1″ sand bed, screed smooth, and keep fines out to preserve drainage and leveling.
- Install stones with a tight, even contact, checking alternating tiles for stability and alignment before final compaction.
Tip: maintain clean edges, avoid over-sanding, and choose stones that suit your garden aesthetics and functional stone selection goals.
Determine Stone Pattern and Alignment
When planning the layout, choose a clear stone pattern and align it for both aesthetics and ease of installation. Start by selecting a practical pattern—running bond, herringbone, or basket weave—based on space, foot traffic, and edge constraints. Check pattern symmetry to ensure balance across the path; uneven gaps undermine safety and appearance. Consider stone color to create contrast or cohesion with surrounding landscaping, and arrange stones to emphasize a natural flow rather than rigid grids. Maintain consistent joint widths and avoid abrupt transitions between sections. Dry-fit a sequence on the ground, adjusting placement to minimize cuts and waste. Mark reference lines on edging to lock alignment, then verify straightness with a string line. Prepare for final setting with level, compacted base, and proper joint material.
Dry-Fit Stones Before Laying
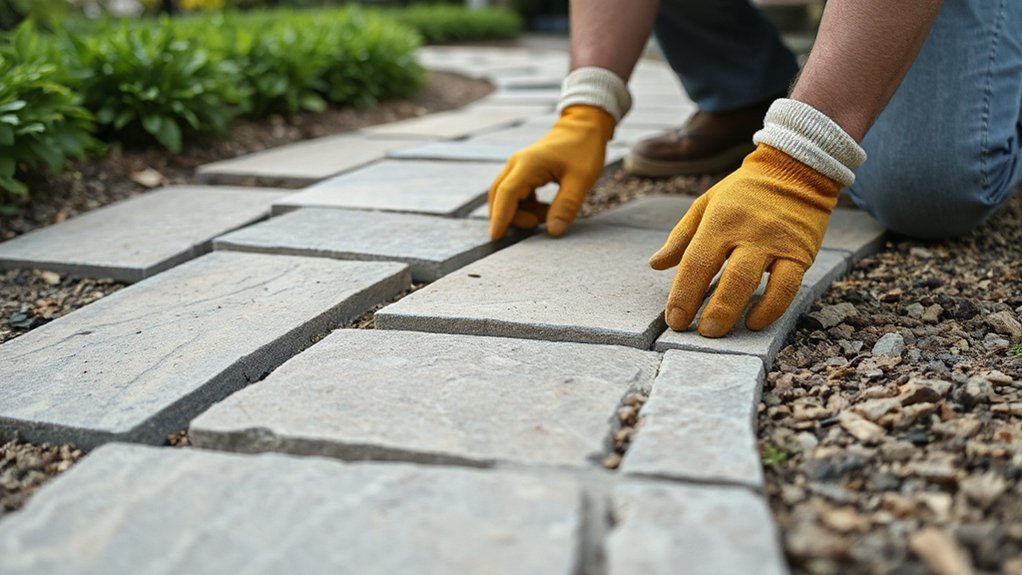
Dry-fit the stones on the ground before you lay them. This quick check guarantees your layout matches your plan and helps you visualize stone patterns and outdoor aesthetics before committing. Move stones as needed, note gaps, and confirm level progressions across curves and straight runs. Keep the shape and weight distribution balanced to prevent future shifting.
- Arrange stones in the intended pattern on a clean surface, then transfer the arrangement to the ground.
- Test alternate placements to refine edge alignments and guarantee consistent joints.
- Mark any stones that require minor trimming or rotation for a precise fit.
Set Stones in Bedding Properly
Start by setting a bedding depth that matches your stone size and soil conditions, so the stones sit firmly without rocking. Build a compact, level base that supports even weight distribution, using a straight edge to gauge true level. Make sure you consistently check for levelness as you place each stone to maintain stability across the pathway.
Bedding Depth Guidelines
Bedding depth sets the stage for a stable, long-lasting path. You’ll guarantee stones seat evenly and don’t shift under load by choosing the right depth and base materials. Begin with a compacted subgrade, then add a granular bed that supports shear and pressure. Aim for a final depth that allows stone faces to align with the surrounding grade.
1) Check base thickness and compact between layers to prevent soil movement.
2) Use a 2–3 inch (5–7.5 cm) bedding layer that tolerates traffic without washing away.
3) Include weed prevention measures under the stone and along the edges to minimize future intrusion.
Focus on soil compaction and weed prevention to preserve alignment and longevity of your path.
Leveling For Stability
With the base prepared and weed barriers in place, you’ll level the stones in their bedding to lock in stability. Start by placing each stone in its intended position, then test for level with a short straightedge. If a stone rocks, add or remove bedding material beneath it until it sits evenly, touching the full face of the stone. Use a rubber mallet to nudge edges flush without shifting alignment. Check slope and alignment frequently as you proceed, correcting any high or low spots. Compact the bedding gently after final placement to prevent movement. Maintain uniform joint width for even load distribution. This careful leveling supports garden aesthetics and plant integration, ensuring durable pathways that remain visually appealing and functional under foot traffic.
Create Joints and Weepage Gaps
Creating joints and weepage gaps is essential for a durable stone path. You’ll control drainage, prevent cracking, and extend life through proper joint formation and weepage management. Plan gaps to align with stone sizes and slope, then choose suitable materials that resist displacement.
1) Establish joint formation by spacing stones evenly and using a consistent, tight mortar or sharp sand mix to fill gaps.
2) Size weepage gaps to allow water escape without undermining stability, typically at the edge and between stones where runoff concentrates.
3) Inspect after placement, brush in dry material, and compact gently to avoid clumping while keeping gaps open for drainage.
Compact and Level Each Stone
To guarantee a stable pathway, compact and level each stone after placement. Use a rubber mallet to settle the stone without shifting its position, then test for level with a spirit level. If a stone rocks, flip it slightly and re-tap until it sits flush. Check both horizontal and vertical alignment, adjusting adjacent stones as needed to maintain uniform gaps. Backfill beneath the stone with compacted sharp sand or screed mix, then re-tap to settle. When you’re true to level, sweep in fine material to fill minor voids and secure edge stability. Maintain garden aesthetics by keeping stones evenly pitched toward drainage, and respect Plant integration by leaving shallow, root-friendly clearances where roots approach the path. Confirm rows stay straight and profiles remain consistent.
Fill Joints and Choose Sealing Options

Once the joints between stones are stable, you’ll fill them to prevent weed growth and curb dirt intrusion while maintaining a clean, even surface. Then you choose sealing options that suit foot traffic and shade. Use tight-grain sand or polymeric joint filler for lasting cohesion, sweeping it into joints as you compact. After setting, sealants help resist weather and stains, but avoid overcoating delicate surfaces.
- Choose a joint filling approach based on traffic, then sweep and compact thoroughly.
- Pick sealing options that resist moisture and staining without trapping water.
- Reassess annual wear; reapply filler or sealer as needed to maintain performance.
Install Proper Drainage Around the Path
Proper drainage starts with a slight slope away from any adjacent structures and across the path so water doesn’t pool on the stones. You’ll plan a grade that directs runoff to a safe destination, avoiding low spots between stones. Install a crushed stone base that dries quickly and supports diffusion of water beneath the pavers. Confirm joints allow minor seepage, yet resist weed intrusion, using sand or small gravel as a capillary break. Create shallow swales along edges to catch surface flow and guide it to permeable areas, not into foundations. Use rainwater management strategies such as French drains or perforated pipes where runoff is concentrated. Prioritize erosion control by stabilizing slopes with mulch, groundcovers, or geotextiles underlay. Test after rains and adjust, maintaining consistent drainage performance.
Trim and Finish Edges for a Clean Look
You’ll start by aligning the edging so the stones sit true to the line, keeping edges precise along the entire path. Use metal edging to lock the line firmly and create a clean, defined boundary that resists shifting. Seal and protect the edges to guard against weather and erosion, ensuring long-lasting, maintenance-friendly trim.
Align Edges Precisely
To finish the edge cleanly, trim any jagged ends and align the paving stones so the outer edge forms a straight, continuous line.
- Achieve consistent width by checking each stone’s edge against a tight string line or straight edge.
- Nudge stones until gaps are even, then tap with a rubber mallet to set level and align the top surfaces.
- Seal connections with a narrow, unobtrusive border that preserves garden design and supports plant selection around the path.
This precise alignment prevents trip hazards and maintains a clean profile. Use Garden design concepts to plan spacing and run, and consider Plant selection to keep the edges visually integrated with surrounding beds. Maintain control points at each corner to sustain long-term straightness.
Use Metal Edges
Metal edges give your path a clean, durable boundary that stays straight even under foot traffic and garden shifts. You install metal edges along the sides to lock stones in place and prevent drifting. Choose aluminum or steel for longevity; aluminum resists corrosion, steel offers strength. Sink the base flange slightly below soil level, then secure with spikes or concrete anchors at regular intervals. Align the edging to your desired line, checking with a mason’s line or straightedge. Cut to fit where curves appear, bending gradually to avoid sharp corners. For a polished look, cover the top with decorative borders that cap the edge and hide fasteners. Guarantee joints remain tight, and keep metal edges clean to preserve the neat, professional finish.
Seal and Protect Edges
Seal and protect the exposed edges to keep your pathway looking sharp and lasting longer. Edges frame the entire installation, so finishing them properly prevents chipping and shifting. Use a clean edge cut, then secure with edge restraints or concrete, ensuring the stones stay aligned. Color variations in pavers should guide your sealing choice; some colors may accentuate or mute after application, so test a small area first. Material durability informs your method—harder stones tolerate less aggressive sealers, while softer varieties benefit from a breathable sealant to prevent moisture damage.
- Apply a compatible edge sealant to the exposed faces and joints.
- Install edge restraints flush with the surface to minimize movement.
- Inspect annually and re-seal as needed to maintain uniform color and durability.
Quick Fixes for Common Laying Issues
If a stone shifts or joints crack after laying, start with quick checks before more involved fixes: verify the base is solid, confirm proper drainage, and reseat any loose pavers with a tap and level. Next, address uneven surfaces by adjusting adjacent stones rather than full replacement; work from the center outward to preserve alignment. Fill gaps with matching joint material, compact firmly, and wipe excess for a clean edge. When drainage shows puddling, revise slope in small increments toward the sculpture side or install a shallow trench to guide water away. For minor lippage, add a shim beneath the high stone and re-tap. In Garden design and Plant selection contexts, keep paths level for accessibility and visual harmony. Prioritize precise, practical corrective steps.
Maintenance Habits to Prolong Path Life
To extend the life of your paving-stone path, establish a simple, ongoing maintenance routine and stick to it. Regular checks prevent deterioration and keep joints solid against shifting soil. Focus on timely clearing, sealing, and correct watering techniques to avoid cracks and weed growth. Address garden pests promptly to prevent damage to edges and grout. Consistency beats intensity; short, frequent sessions outperform sporadic, heavy work.
- Inspect monthly for loose stones, cracks, or sand loss; replace or reseat as needed.
- Rinse and re-sweep joints seasonally, resealing every 2–3 years to preserve stability.
- Monitor drainage and irrigation, adjust watering techniques to prevent pooling and erosion around edges.
Keep paths clean, drains clear, and pests managed, so life spans extend naturally.
Frequently Asked Questions
What Are Common Mistakes to Avoid on Initial Layout?
Avoid misplacing stones; plan spacing carefully. Common mistakes to avoid on initial layout include ignoring design symmetry and rushed material selection, which leads to uneven edges. You’ll guarantee balance by evaluating joints, edges, and appropriate material selection early.
How Do You Budget for Unforeseen Base Issues?
Yes—set a cost estimation baseline, then add a 10-20% contingency planning margin for unforeseen base issues. You’ll budget confidently, adjust as you go, and avoid delays by prioritizing repairs and documenting every expense.
Can You Reuse Existing Stones Safely?
Yes, you can reuse stones, provided you inspect for cracks and chips, test for stability, and reset them on a solid base. Stone selection and safety precautions guide your assessment, handling, and installation for lasting, safe results.
What Tools Are Essential for Beginners?
Tools for beginners are basic: tape measure, level, rubber mallet, chisel, safety glasses, gloves, broom, garden hose. You’ll select plants, prevent weeds, and align stones precisely—this task won’t take long, so your confidence grows dramatically, honestly.
How Often Should You Reseal or Maintain Joints?
You should reseal and perform joint maintenance every 1–3 years, depending on sun, weather, and traffic. Monitor for cracks, weed growth, and erosion, then adjust sealing frequency accordingly. Stay proactive to preserve durability and safe footing.
Conclusion
Now that you’ve planned, chosen stones, laid out the path, and set drainage, you’re ready to enjoy a durable, timeless walkway. Stay precise with compacted subgrade, level stones, and clean edges, and your path will perform for years. Think of the garden as a canvas, and your stones as stepping-stones guiding the eye and feet. With regular maintenance, your pathway remains striking and solid—season after season, a steady rhythm underfoot.
About the Author


