
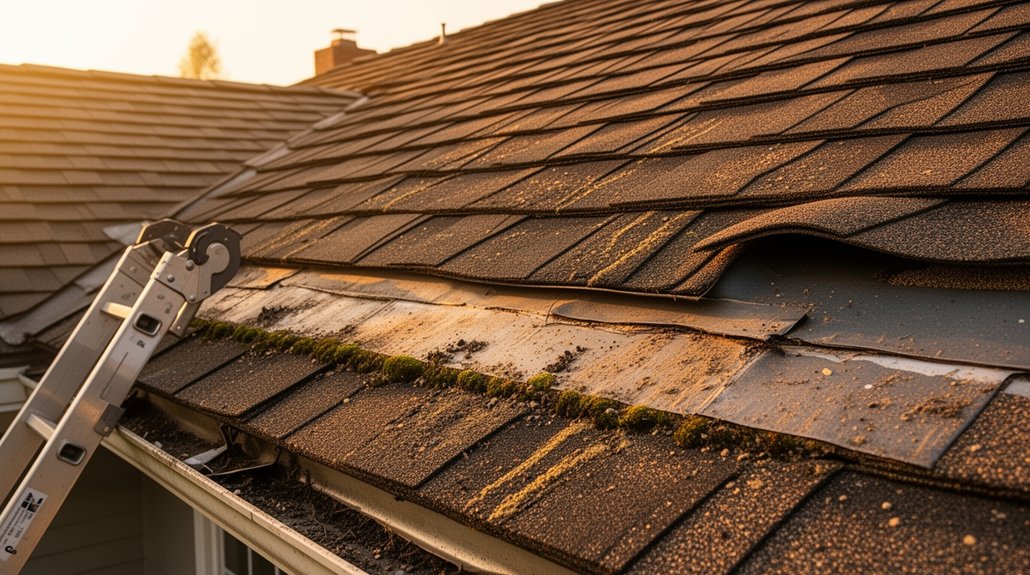
Common roofing mistakes start with improper material choices and skipped or botched installation. You’ll boost longevity by matching materials to climate, avoiding dark colors in hot zones, and ensuring adequate slope, proper underlayment, and correct flashing. Regular maintenance matters: inspect joints, vents, and flashings after rain, document issues, and track repairs. Don’t rely on tape or sealant alone—use compatible products and professional assessments for hidden decking or moisture. If you keep going, you’ll uncover more concrete steps to protect your roof.
Key Takeaways
- Choose appropriate roofing materials and ensure proper installation, avoiding improper underlayment, nail patterns, and material compatibility that cause failures.
- Maintain regular inspections (spring/fall) to catch hidden issues behind flashing, underlayment, and decking before leaks develop.
- Control roof temperature and ventilation by balancing soffit and ridge vents, preventing condensation, moisture damage, and energy waste.
- Keep the roof clean and dry: remove debris and moss, monitor edge deterioration, and address flashing sealants after rain.
- Plan maintenance and budget with documented records, life-cycle data, and a contingency to cover unexpected repairs or replacements.
Why Roofs Fail (and How to Prevent Failures)
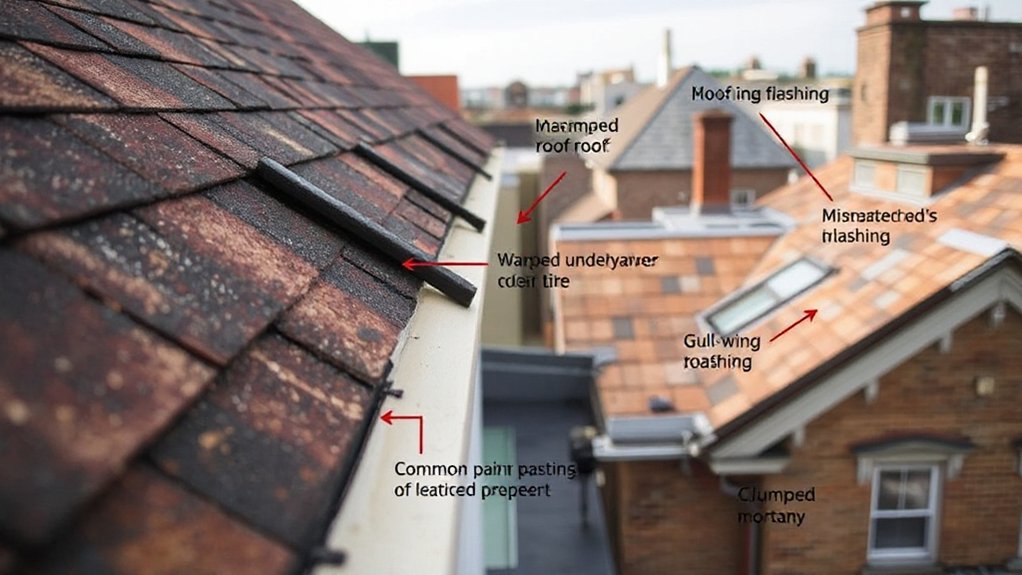
Roof failures don’t happen by accident; they result from a chain of preventable issues. You’ll prevent most problems by understanding how roof color and roof slope influence performance. If you choose a dark roof color in hot climates, you’ll absorb more heat, accelerating aging of shingles and stressing flashing; opt for lighter tones to reduce thermal load. For roof slope, insufficient pitch invites water infiltration and ice damming, while excessive slope increases wind exposure and structural strain. Guarantee proper underlayment, correct nail patterns, and compatible materials for your climate and slope. Regular maintenance, prompt flashing repair, and timely ventilation checks halt minor leaks before they cascade. Plan with accurate load calculations, and address material compatibility from the start to extend life and minimize costly repairs.
Do You Need a Roof Inspection This Year?
An annual roof checkup is essential to catch both visible damage and hidden issues before they escalate. You’ll benefit from a professional inspection that confirms the condition beyond what you can see from the ground. Prioritizing this now helps you avoid bigger repairs and demonstrates clear value in maintenance.
Annual Roof Checkup Needed
Annual checkups matter: a yearly roof inspection helps catch small problems before they become costly repairs. You should schedule a professional or conduct a careful DIY review twice a year, ideally in spring and fall. Look for loose shingles, damaged flashing, and signs of wear along eaves and valleys. Document issues with photos and notes to track progress over time. When you inspect, don’t neglect attic ventilation and insulation, which influence roof longevity. Integrate routine roof cleaning with your approach to debris removal, ensuring drains and scuppers stay clear. Pair inspections with gutter maintenance to prevent overflow that erodes fascia and soffits. Adhere to a clear upkeep calendar, address minor fixes promptly, and avoid delaying needed repairs that can escalate costs.
Visible Damage vs Hidden Issues
Visible damage isn’t always obvious at first glance, and that’s why you shouldn’t rely on appearance alone to decide if you need a roof inspection this year. You must distinguish surface deterioration from hidden defects to assess true risk. External cues, like warped shingles or granule loss, indicate wear, but they don’t reveal underlying issues such as compromised decking, moisture intrusion, or insulation gaps. Schedule a check even if the roof looks fine, because some problems develop behind eaves, underlayment, or in concealed valleys. A minimal annual inspection can catch early signs before leaks appear. Prioritize documentation of findings, note aging components, and map high‑risk areas. By treating hidden defects seriously, you prevent costly repairs and extend roof life.
Professional Inspection Benefits
A professional roof inspection provides a clear, authoritative assessment beyond what a casual glance offers, especially after recognizing that surface wear can mask hidden defects. You’ll gain an objective evaluation of Roof material condition, flashing integrity, and decking stability, not just cosmetic notes. Early detection helps you prioritize fixes before leaks or structural failures emerge, saving time and money. A licensed inspector documents findings with photos and a written report, creating a verifiable record for maintenance planning and insurance claims. This proactive step reduces guesswork and dispute risk when you file Insurance claims, since evidence supports repair decisions and scope. If you’re debating whether to inspect this year, clarity, certainty, and a focused plan argue for yes—consistently protect your home’s value and longevity.
Choosing Climate-Appropriate Roofing Materials
Choose climate-suitable materials that maximize longevity and minimize maintenance for your region. Consider local weather patterns—heat, cold, rain, wind—and how they affect performance and durability. Prioritize options with proven longevity and lower upkeep to reduce future costs.
Climate-Suitable Materials
Are climate conditions dictating your roof’s performance? You’ll choose materials that match your environment, not just the look. Start with climate adaptation: pick products rated for local temperature swings, sun exposure, and humidity, so they perform under stress rather than degrade prematurely. Prioritize material durability, selecting assemblies that resist cracking, warping, and corrosion in your climate. Consider reflective or cooling options in hot areas to reduce heat load, and select moisture-tolerant substrates where humidity is high. In cold regions, guarantee they’re wind-resistant and able to shed snow without excess weight. Confirm fasteners, underlayment, and flashing are compatible and rated for your climate. Avoid trendy, untested choices; base decisions on proven performance data, warranty terms, and professional installation to maintain long-term reliability.
Local Weather Considerations
Local weather drives roof performance more than curb appeal, so pick materials that handle your area’s temperature swings, precipitation, and sun exposure. You select climate-appropriate roofing to minimize hail damage and reduce snow load risks. For cold, high-hail zones, favor impact-resistant shingles or metal with sturdy underlayment and proper fastening. In hot, sunny regions, prioritize reflective coatings, cool colors, and installers who seal flashings to prevent heat-driven gaps. In wet climates, choose water-shedding profiles and durable battens to resist ice dam formation. Wind-prone areas demand fastened edges and wind-rated products. Maintain compatibility between deck, underlayment, and the finished surface to avoid moisture migration. Align your choice with local codes and future weather patterns, ensuring long-term performance, energy efficiency, and predictable repairs. Your material selection directly influences resilience against hail damage and snow load.
Longevity And Maintenance
To maximize longevity and minimize maintenance, pick climate-appropriate roofing materials that resist your area’s temperature swings, moisture, and sun exposure, then install them with proper fastening and underlayment. Choosing materials aligned with climate reduces thermal stress and moisture-related failures, extending roof durability. In dry environments, consider reflective coatings and lighter colors to limit heat absorption; in wet, windy regions, favor durable, water-shedding profiles and sturdy underlayment. Lightly ventilate attic spaces to prevent condensation that harms fasteners and sheathing, and ensure proper flashing at joints. Schedule regular inspections to catch loose shingles and minor damage before leaks arise. Establish maintenance scheduling that pairs seasonal checks with after-storm assessments. Use quality fasteners and periodic resealing as needed to preserve roof durability and predictable maintenance costs.
Ventilation Matters: Attic Design and Roof Life

Ventilation isn’t optional when you’re planning a sturdy roof; it directly affects attic conditions and roof longevity. You control this by pairing proper intake and exhaust airflow, ensuring moisture and heat don’t accumulate. Poor attic design traps warm, humidity-laden air, accelerating wood rot and shingle deterioration. Start with roof soffits as the intake path, ensuring they’re unobstructed and vented. Pair them with adequately placed exhaust vents near the ridge to create a continuous cross-ventilation channel. Use attic insulation properly—not too thick to block airflow, and not so thin that it underperforms. Maintain continuous insulation along edges and around HVAC penthouses to prevent condensation. Regularly inspect seals around ductwork and penetrations; leaks undermine ventilation gains. Correctly designed vents extend roof life and reduce energy costs.
Flashing and Sealant: Stop Leaks at the Source
Flashing and sealant form the first line of defense against leaks, so inspect and address them before addressing shingles or roof decking. You’ll prevent water intrusion by checking joints, vents, chimneys, and skylines for gaps, corrosion, or lifted metal. Focus on flashing installation: guarantee continuous, properly bent metal, clean seams, and correct counterflashing where needed. Tape or sealant alone won’t last; use appropriate metal, fabric, or soldered solutions where flashing meets substrates. For sealant application, choose compatible products and apply in dry, sunlit conditions, filling all gaps without excessive squeeze-out. Recheck after a rain to confirm no pooling or seepage. Keep records of replacements and maintenance, and adopt a proactive schedule to maintain a tight roof envelope. This approach minimizes dramatic leaks and costly repairs.
DIY Roof Fixes That Backfire (And What to Do Instead)
You’re tempted to fix a roof yourself, but DIY roof fixes can backfire quickly and cost you more than a pro. We’ll highlight common DIY disasters and show safer alternatives you can use right away. By sticking to proven methods and professional guidance, you minimize risk and protect your home.
DIY Roof Disasters
Ever tried a DIY roof fix only to watch it backfire? You’re not alone, and the results can be costly. DIY disasters usually stem from DIY pitfalls like improper ladder setup, unsecured fall protection, or assuming a quick patch will hold in a storm. You must recognize that a small leak often signals broader damage, and temporary fixes can trap moisture, rot, or mold behind panels. Prioritize roof safety: use a sturdy ladder, harness, and a buddy, and avoid working in wind or rain. If you’re unsure, stop and call a pro. Document damage, plan a repair scope, and insist on materials and flashing that meet local code. Quick, decisive action beats risky improvisation and longer-term losses.
Safer Alternatives Now
There are safer alternatives to DIY roof fixes that often backfire, and recognizing them can save you time, money, and exposure to hazards. You’ll avoid risky patchwork by prioritizing proven methods and professional guidance. Instead of quick fixes, assess underlying damage with a clear plan that matches your roof’s design and age. Seek safe, documented solutions—modern roofing innovations that address leaks, missing shingles, and vent issues without compromising structure. Consider temporary covers only as a last resort and only while arranging qualified help. When you do, insist on clear warranties and written estimates. Safer alternatives emphasize proper material selection, correct installation, and routine maintenance. This approach minimizes costly callbacks and protects occupants, while keeping your project aligned with long-term durability and compliance.
Catch Leaks Early With Proactive Monitoring
Proactive monitoring catches leaks before they become costly repairs. You should implement a simple, repeatable routine that flags trouble early, not after water stains appear. Use a combination of leak detection methods—sensor probes in vulnerable seams, surface moisture checks after rain, and smart water meters that alert you to unexpected flow. Pair these with weather monitoring to anticipate vulnerabilities, like heavy storms or rapid temperature swings that stress roofing materials. Schedule monthly inspections focused on flashings, vents, and edges; document findings and timelines. When a signal triggers, verify with a visual check, then address the issue promptly to minimize damage and costs. Proactive monitoring keeps your roof more resilient and your budget intact.
Attic Insulation and Moisture Risks Explained
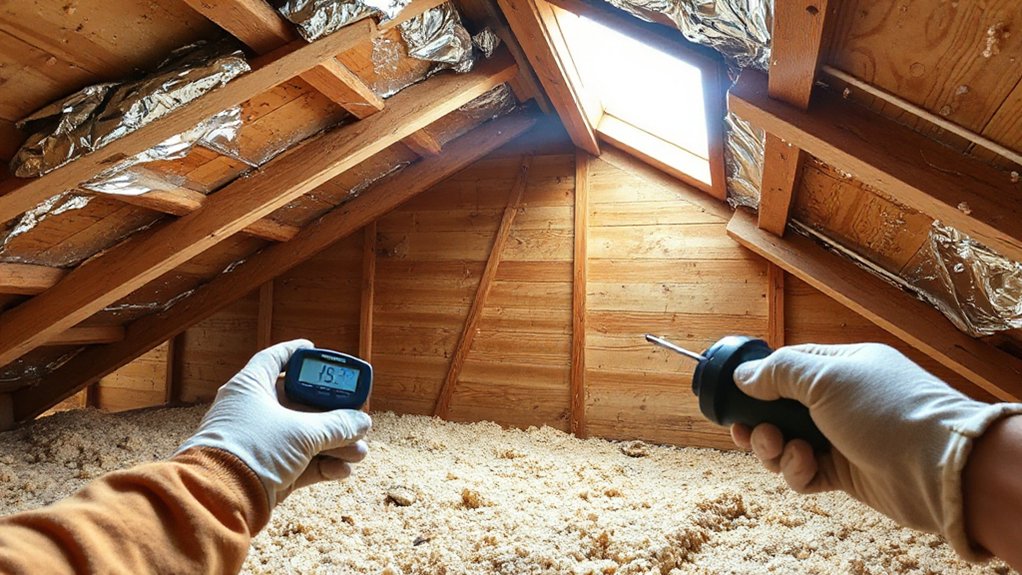
Attic insulation isn’t just about keeping the house warm or cool—it also guards against moisture problems that can compromise the roof deck and structural timber. You’ll reduce condensation by keeping insulation dry and properly staged, preventing mold and rot that force costly repairs. Start with an airtight, well-sealed attic, then make certain insulation depth matches climate to minimize cold spots that invite moisture. Maintain consistent attic ventilation so warm air doesn’t pool at the peak, which drives drips into insulation and rafters. Address any leaks promptly, and use vapor barriers where appropriate to separate living space from the attic. Track moisture control with hygrometers and regular inspections, especially after heavy rain or rapid temperature swings. Informed, proactive upkeep prevents hidden damage and extends roof life.
Roof Ventilation and Energy Efficiency in Practice
Effective roof ventilation directly shapes energy use: well-vented attics keep hot, humid air from building up, reducing cooling loads in summer and stabilizing insulation performance in winter.
You’ll optimize through precise airflow, balanced soffit and ridge vents, and avoiding blockages that trap heat. When ventilation matches your attic’s area, you slash cooling costs and protect Roof insulation from moisture damage. Integrate solar panel installation considerations early, ensuring vents aren’t overshadowed and airflow remains unobstructed.
1) Picture intake and exhaust working in harmony, doors and dampers clear, delivering consistent airflow.
2) Visualize insulation staying dry, fibers lofted, and thermal barriers intact.
3) Imagine solar panel integration that doesn’t impede attic venting or create hot spots.
4) See a maintenance plan that catches blockages before heat leaks escalate.
Create a Seasonal Roof Maintenance Checklist
Seasonal roof maintenance keeps leaks at bay and extends terrain-friendly performance. You’ll follow a concise, repeatable checklist each season to catch issues early and avoid costly repairs. Begin with a visual assessment: inspect shingles for curling, cracking, or missing sections, and note any signs of wear around vents and chimneys. Check roof color for fading or dark streaks that indicate algae or moisture issues. Move to gutters and drainage: remove debris, ensure downspouts are clear, and verify pitch-to-collection flow. In fall, secure loose flashing and reseal edges; in spring, clean moss or algae from shingles without pressure washing. Document findings, plan timely fixes, and schedule professional help when needed. This disciplined approach keeps roof integrity intact and extends overall performance.
Budgeting for Roof Replacement: Real Costs

You’ll get a clear upfront cost breakdown to compare materials, labor, and permit fees, so you know exactly what you’re paying for. Plan for long-term budgets by considering roofing lifespan, maintenance needs, and potential repairs over time. This discussion starts with lining up real costs now and how they shape your future budgeting decisions.
Upfront Cost Breakdown
When budgeting for a roof replacement, start with a clear upfront cost breakdown that includes materials, labor, permitting, and disposal. You’ll translate estimates into real numbers you can track, avoiding surprises later. Consider how each component affects value, aesthetics, and performance, especially roof color and material durability, so you don’t overpay for trend or underpay for longevity.
- Materials: choose a durable option and note color impact on energy and curb appeal.
- Labor: skilled crew time, site safety, and proper installation techniques.
- Permitting: jurisdiction fees, inspections, and code compliance.
- Disposal: dumpster, hauling, and recycling options to minimize waste.
Long-Term Budget Planning
How can you guarantee your roof stays financially manageable for years to come? Start with clear expectations about replacement timing and costs. Track life-cycle data for your roofing materials, labor, permits, and disposal fees to build a realistic budget plan. Use a conservative contingency—roughly 10% of projected costs—for unforeseen issues like weather delays or deck repairs. Create a fixed-savings schedule aligned to your preferred replacement window, and update it annually as prices shift. Prioritize maintenance that extends roof life, because small fixes now yield long-term savings. Compare out-of-pocket versus financing options, weighing interest against early replacement risk. Document every expense to support future budget planning, and review your plan after major weather events. This approach anchors long term savings and stabilizes overall costs.
Remove Debris, Moss, and Edge Deterioration

Regularly clearing debris, moss, and edge deterioration keeps your roof functioning properly and extends its life. You’ll prevent leaks, preserve shingles, and reduce moisture that invites rot.
- Visualize a clean ridge—edge deterioration halted, sealants intact, flashing unbent.
- Picture moss control as a routine task, not a reaction, with safe tools and gentle motion.
- Imagine debris removal revealing true shingle depth, aiding accurate inspections.
- Envision a dry, unobstructed surface that resists wind-driven damage and ice dams.
Maintain this habit with a methodical approach: assess gutters, remove invaders, treat moss where present, and monitor edges for wear. Early action minimizes repair costs and extends roof life. Use proper safety gear and follow manufacturer guidelines to avoid damage.
Fasteners That Hold Up and What to Avoid
Choosing fasteners that hold up starts with understanding material, climate, and roof design; wrong choices lead to leaks and costly repairs. You’ll prioritize fastener quality to resist corrosion, pullout, and torque fatigue over time. Match fastener type to sheathing (wood, metal, or composite) and to local weather patterns, especially freeze-thaw cycles. Use correct length and gauge so fasteners penetrate framing without over-trestle. Follow proper installation techniques: drive flush or slightly below surface, seal penetrations, and avoid overtightening that can shear threads or strip decking. Consider washered options for additional sealing in damp climates. Regularly inspect for rust, loosening, or backing out after seasonal changes. Replace any compromised fasteners promptly to maintain edge protection, wind resistance, and overall roof integrity.
Condensation and Mold in the Attic: Guard Against It
Condensation and mold in the attic aren’t inevitable; they’re symptoms of poor ventilation, temperature differences, and moisture sources that you can control.
- Make certain proper attic ventilation to move air in and out smoothly.
- Insulate and seal ducts to stop warm, moist air from leaking into the attic.
- Use a dehumidifier or exhaust fans during humid seasons to manage moisture levels.
- Inspect for leaks and fix roof penetrations promptly to prevent recurring damp spots.
Track Repairs and Warranties for Peace of Mind
When you’re protecting your investment, track repairs and warranties should be your first line of defense. You’ll want a clear record of every repair, who performed it, dates, and the parts used. Create a centralized file—digital or physical—and update it after every service call. Use it to monitor patterns that signal underlying issues, so you won’t miss critical maintenance. For insurance claims, precise documentation speeds approvals and reduces out-of-pocket costs. Keep receipts, contact details, and photos of before-and-after conditions. Maintain warranty tracking by noting coverage terms, expiration dates, and transfer requirements if you sell. Set calendar reminders for annual reviews and needed re-inspections. By organizing this information, you’ll minimize dispute risk and safeguard your roof’s value over time.
Start Today: A Simple Proactive Roof Maintenance Routine
Start today with a simple, proactive roof maintenance routine that fits into your weekly schedule. A consistent, easy cadence prevents surprises and protects roof aesthetics, while guiding material selection decisions for long-term value.
- Inspect for loose shingles and debris after storms, clearing gutters to maintain flow and reduce weight stress.
- Check flashing and seals quarterly, resealing any gaps to prevent leaks and costly repairs.
- Trim overhanging branches, minimizing moss growth and root intrusion that compromise shingles and underlayment.
- Schedule a professional roof inspection biannually, confirming integrity and catching material wear early for smarter material selection.
Frequently Asked Questions
How Often Should I Inspect My Roof Personally?
You should inspect your roof at least twice a year and after major storms. For Roof maintenance, set a quarterly check-in during dry seasons and inspect more often if you notice leaks, damaged shingles, or debris buildup in gutters.
What Signs Indicate Hidden Roof Damage Beyond Visible Leaks?
Hidden damage often hides in plain sight; look for subtle sagging, curling shingles, granule loss, and attic mustiness signaling roof deterioration. You’ll spot clues after storms, heavy rains, or temperature swings—stay vigilant, and inspect ceilings and vents regularly.
Do Seasonal Repairs Affect Roof Warranty Eligibility?
Seasonal repairs can affect roof warranty eligibility, depending on your provider’s terms. You should review coverage for timing, methods, and approved contractors. If respected, your roof warranty remains valid; otherwise, coverage may be limited or void.
Can DIY Gutter Fixes Cause More Roof Problems?
Sure, DIY gutter fixes can backfire, causing leaks and roof rot. You’ll regret shortcut gutter repair pitfalls; avoid them by consulting pros. You’ll save time, money, and hassle when you choose proper DIY gutter fixes—or skip them altogether.
Which Roof Issues Require a Professional Roofer Immediately?
When you notice active leaks, sagging, exposed nails, or significant wind damage, seek Emergency repairs immediately and get an Expert assessment. Do not delay; attic moisture, widespread shingle loss, or structural concerns demand prompt professional intervention.
Conclusion
A proactive roof routine saves you money and stress. Inspect twice a year, clean gutters, and repair damaged flashing promptly to prevent costly leaks. Choosing climate-appropriate materials cuts long-term failures by up to 30%, and proper attic ventilation can double your roof’s life. Fun fact: homes with regular inspections experience 20% fewer emergency repairs. Start today with a simple maintenance plan, keep fasteners tight, and document warranties—your future self will thank you.
About the Author


