

To revamp a 1960s bungalow, start with a structural health check: inspect framing, foundation, roof, and systems, then plan updates that protect long‑term integrity. Define a clear mid‑century vision—warm palettes, restrained finishes, and vintage details paired with modern comforts. Optimize layout for flow and daylight, preserve iconic features, and source authentic materials. Budget with a priority matrix, then schedule trades to minimize downtime. If you keep going, you’ll unseal practical steps that blend character with efficiency.
Key Takeaways
- Assess and reinforce structure first: inspect framing, foundation, roof, and critical systems before finishing touches.
- Define a cohesive mid-century aesthetic: warm, restrained palettes, natural materials, and period-inspired hardware and lighting.
- Plan flow and light: optimize layout for clear circulation, daylight, and seamless indoor–outdoor connections.
- Budget smartly: use a priority matrix, standard-sized durable materials, and phased updates to manage costs.
- Preserve vintage character while upgrading efficiency: improve insulation and windows with period-compatible, high-performance options.
Assess Structural Health, Layout, and Systems

Before you make any changes, assess the house from the ground up. You’ll evaluate the structure methodically: inspect framing, joists, and beams for cracks, bows, or water damage; check masonry or sill plates for movement. Test the foundation stability by looking for gaps, settling, or uneven floors, and note any recurring drafts or cold spots that signal hidden issues. Inspect the roof for sagging rafters, flashing failures, or damaged soffits, then verify roof integrity by spotting missing shingles and evidence of leaks. Review layouts for functional flow, ceiling heights, and door swings that impede accessibility. Assess systems—electrical, plumbing, and HVAC—for safe operation, code compliance, and future upgrades. Document findings with photos, prioritize fixes, and align decisions with your renovation goals.
Define Your Mid-Century Vision: Style, Color, and Finish
Start by defining a cohesive color palette that nods to mid-century hues while staying livable for daily life. Choose finishes that balance warmth and durability—think wood tones, matte metals, and simple, clean surfaces. As you outline your vision, lock in a practical set of color and finish choices that you can carry through flooring, cabinetry, and accent details.
Define Color Palette
To define your mid-century color palette, start by identifying the vibe you want—whether it’s warm, earthy, or graphic—then select core hues that anchor the project. You’ll shape rooms through a restrained set, balancing contrast and cohesion to guide furniture, textiles, and art choices. Color psychology matters: cool neutrals can calm spaces; saturated accents energize focal walls; tinted woods read as timeless. Pair complementary palettes for depth, using opposite hues on the color wheel to create visual interest without shouting. Keep finishes matte or satin to diffuse glare and unify the look. Subtle shifts in shade can maintain continuity as you move from room to room.
- Establish a core triad for harmony
- Use accents to punch without overwhelming
- Test lighting at different times of day
Select Finishes Tone
When shaping your mid-century vision, choose finishes that reinforce the style without competing with the overall palette. In this step, align materials with your declared voice—wood tones, metals, and laminates that echo the era without shouting. Prioritize subtle contrasts: a warm oak floor under a restrained stone or ceramic backsplash, or a mid-tone veneer on cabinetry with clean, simple hardware. Avoid overly busy patterns; that distracts from the clean lines you’re after. Consider durability and maintenance—hardwearing surfaces save you time. Introduce touches of vintage charm through purposeful, limited accents, like a statement clock or a sculptural lamp, rather than overwhelming the room. Aim for timeless elegance that ages gracefully, not trends that fade. These choices harmonize form and function, delivering a cohesive, lasting look.
Evaluate Floor-Plan Options for Flow and Light
Evaluating floor-plan options for flow and light means prioritizing how people move through the space and how natural light permeates every room. You’ll assess circulation paths, door openings, and room adjacencies to avoid dead zones and bottlenecks, while maximizing sightlines and daylight. Consider open layouts that connect living areas with at-a-glance access to the kitchen and outdoor spaces. Proportions matter: guarantee traffic paths stay unobstructed by furniture and that shifts feel deliberate. Thoughtful window placements boost daylight without glare, and orienting spaces toward the sun improves energy efficiency. Remember: furniture placement and Landscaping design influence how light travels through your bungalow, shaping both mood and usability.
1) Prioritize clear routes and logical adjacencies
2) Align window and door placements with daylight hours
3) Integrate outdoor access to expand perceived space
Plan Structural Updates With Minimal Downtime
Plan your structural updates to keep downtime to a minimum by using efficient phase sequencing. Start with simultaneous planning and procurement to avoid delays, then schedule trades in tight, non-overlapping windows. This approach reduces on-site time while preserving safety and quality.
Plan Downtime-Minimized Upgrades
To minimize downtime when upgrading a 1960s bungalow, you start with a focused plan that targets essential structural updates first and sequences tasks to overlap demolition, inspection, and installation where safe. You’ll map critical loads, structural reinforcements, and essential early utilities, then align trades to minimize gaps. By prioritizing scope, you reduce disruptions and keep the project on a tight rhythm, preserving Vintage charm and letting retro furniture reposition smoothly afterward.
1) Schedule parallel tasks where possible, staggering inspections with short install windows to avoid idle days.
2) Lock in major system updates first, then finish carpentry and finishes in a tight, overlapping sequence.
3) Use prefabricated components to cut field time while maintaining quality.
Efficient Phase Sequencing Strategies
Efficient phase sequencing centers on releasing the right order of operations to keep downtime to a minimum. You map tasks by dependency, triage critical lines, and group related work into contiguous blocks. Begin with structural inspections, then address foundational fixes before interior demos, so you’re not redoing work. Schedule utilities upgrades concurrently with accessible areas to reduce overall disruption, but avoid overlapping trades that create conflicts or safety risks. Prioritize tasks that unblock subsequent steps, such as framing or insulation, to maintain steady progress. Use historical accuracy as your compass for finish selections, ensuring that new elements harmonize with the bungalow’s era. When selecting finishes, favor vintage accessories that blend authenticity with modern efficiency. Communicate daily progress, stick to milestones, and minimize last‑minute changes that inflate downtime.
Preserve Iconic Mid-Century Details While Updating
Preserve the best of the mid-century era by prioritizing iconic details while you update. You’ll keep the visual language intact, letting clean lines and purposeful geometry guide renovations. Focus on a respectful balance: modern upgrades, but with a nod to the era’s character. Use Mid century furniture as anchors, selecting pieces that harmonize with updated spaces. Preserve Architectural ornamentation where it defines the room’s mood, avoiding gratuitous embellishment that clashes with the era’s restraint. Perform a measured refresh: replace finishes, not personas, and maintain the sense of light-filled openness. Your goal is continuity, not nostalgia trivia, so every change should reinforce the design story you’re telling.
- Identify signature elements to keep and rehome
- Match new materials to original tones and textures
- Prioritize proportion and scale for updated rooms
Add Modern Comforts Without Losing Character

Add modern comforts without washing out the bungalow’s character by integrating thoughtful upgrades that respect its lines and textures. You’ll upgrade essentials first, like insulation, lighting, and smart climate control, choosing devices that blend with vintage finishes rather than shouting modern. Prioritize durable materials in upholstery and flooring that echo the era, so you don’t chase trends. When you plan furniture placement, keep sightlines clear to emphasize original architectural details while creating practical zones. Use period-inspired silhouettes with updated padding for comfort, and pair them with contemporary fabrics in restrained colors. For kitchens and baths, install efficient fixtures with clean, simple profiles that mimic mid-century hardware. This approach preserves vintage charm while delivering predictably reliable comfort, ensuring daily use feels authentic, cohesive, and inviting.
Budget for a Mid-Century Renovation: Priorities and Savings
Start with a Budget Priority Matrix to quickly flag must-haves, nice-to-haves, and non-negotiables, so you can allocate funds with confidence. Look for savings on materials by choosing durable basics, bulk purchases, and local options without sacrificing mid-century character. Plan phase scheduling tactics that align trades, deliveries, and inspections to minimize downtime and cash flow gaps.
Budget Priority Matrix
A Budget Priority Matrix helps you allocate funds smartly by separating must-daves from nice-to-haves in a mid-century renovation. You’ll identify core needs, set a realistic ceiling, and prevent scope creep that undermines your budget allocation. This matrix acts as a decision tool, guiding trade-offs between function and form while keeping your project focused and affordable. By prioritizing essentials first, you preserve value without sacrificing style or durability. Use it to map costs against timeline and risk, and to communicate confidently with trades and suppliers about constraints and expectations.
- Define must-haves vs. nice-to-haves to anchor decisions.
- Align budget with phased priorities to control cash flow.
- Track changes to protect material sourcing and overall cost discipline.
Save On Materials
Smart budgeting for a mid-century renovation means trimming material costs without sacrificing durability or style. You’ll prioritize multipurpose materials, standard sizes, and locally sourced options to cut waste and transport taps. Choose durable, timeless finishes that age well, like low-maintenance paints and sealed surfaces, rather than trendy veneers. For decor, lean on Vintage furniture and Retro lighting to anchor the look without overbuilding. Refinish existing built-ins when possible, and specify repairable, replaceable components to extend life. Source reclaimed or surplus materials from reputable suppliers, and request samples or use planed stock to avoid returns. Compare bids on bulk purchases and opt for generic equivalents that match performance. Finally, document material allowances, track changes, and keep decisions aligned with your budget and design intent.
Phase Scheduling Tactics
Phase scheduling sets the pace for a mid-century renovation, pairing priorities with realistic timelines and budgets. You’ll allocate work by impact, not impulse, aligning cost-effective choices with lasting value. Historical context informs where to invest and where to trim, while architectural influences guide authentic detailing that won’t outpace your wallet. You’ll build a phased plan that reduces risk and stress, keeping buffers for unforeseen fixes that often arise in vintage homes.
- Prioritize core structural updates first to protect long-term investment.
- Stage cosmetic refreshes after essential systems, maximizing visible gains per dollar.
- Build in review points to reallocate funds as needs evolve while preserving period-correct integrity.
Sourcing Authentic Mid-Century Materials and Fixtures
Sourcing authentic mid-century materials and fixtures isn’t guesswork; it’s a disciplined process of identifying period-appropriate pieces that perform reliably today. You approach this with clear criteria, focusing on materials, finishes, and construction methods that define the era. Start by authenticating provenance and examining hardware, joinery, and surface patinas rather than chasing trends. Prioritize reliable, serviceable components, and verify availability of parts for long-term maintenance. When selecting aesthetics, balance vintage furniture and decorative accessories with modern practicality to guarantee seamless integration. Seek reputable vendors who specialize in mid-century stock, and request detailed photos, measurements, and condition reports. Document every purchase against your project timeline to prevent overage. In practice, curate a cohesive showing of form and function.
Mid-Century Energy Upgrades: Insulation, Windows, and Systems
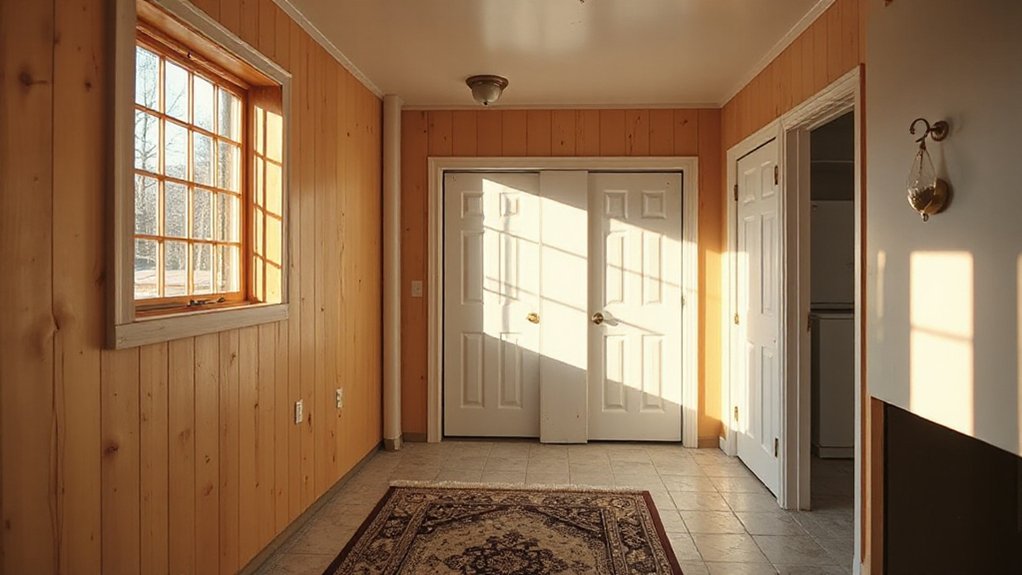
Upgrade your 1960s bungalow with energy-savvy upgrades that respect the era’s character while boosting comfort and efficiency. You’ll target insulation, windows, and systems to reduce heat loss without compromising vintage decor or retro furniture appeal. Choose multi‑panel, low‑U‑factor windows with slim profiles to preserve sightlines. Add attic and wall insulation, plus air-sealing to stop drafts at doors and penetrations. Modern heat pumps or efficient boilers keep reliability without oversized radiators clashing with mid‑century lines.
- Prioritize continuous insulation and airtight seals around attic hatches, outlets, and rim joists.
- Select high‑efficiency, historically respectful window options and proper flashing to avoid leaks.
- Integrate smart controls and zoned systems for comfort that honors retro aesthetics while saving energy.
Step-By-Step Renovation Timeline: Prep to Proud Finish
To map a smooth renovation from prep to finish, start with a clear, realistic timeline that aligns with your bungalow’s curb appeal and structural realities. Break the project into three phases: prep, demo and rebuild, and finish. In prep, lock permits, confirm layout, and budget contingencies. During demolition, protect existing vintage features, identify load-bearing constraints, and schedule trades with zero downtime. In rebuild, prioritize framing, plumbing, and electrical updates first, then insulation and drying, followed by insulation and drywall. Finish with flooring, paint, and fixtures, binding decisions to a consistent mid-century aesthetic. Plan for finishes that showcase vintage furniture and mid century art, ensuring furniture layout aligns with traffic flow. Build in reviews at milestones to stay on track, and document changes for future maintenance.
Frequently Asked Questions
How Long Does a 1960S Bungalow Renovation Typically Take?
Typically, a 1960s bungalow renovation takes 6–12 weeks, depending on scope. You’ll balance Vintage charm with design consistency, schedule trades, and expect buffers for approvals. You’ll stay practical, crafted, and decisive to keep timelines on track.
What Permits Are Usually Required for Mid-Century Updates?
Permits typically include planning, building, electrical, and plumbing approvals. You’ll confront historical preservation considerations and zoning regulations, so you plan carefully, file early, and stay compliant as you progress, avoiding delays and costly revisions. Your project succeeds confidently.
Can I Live in the Home During a Renovation?
Yes, you can live there during renovations, but plan around dust, noise, and safety. Prioritize furniture placement to maintain flow, and schedule landscaping enhancements during slower exterior work for smoother, less disruptive progress.
How Do I Prioritize Structural vs. Cosmetic Changes?
When you’re rebuilding a house, you steer like a captain—stabilize the hull first. Prioritize structural fixes, then tackle cosmetic updates; focus on interior redesign and exterior enhancements to preserve safety and value while you live in it.
What Are Common Hidden Issues in 1960S Bungalows?
Hidden issues in 1960s bungalows often include outdated wiring, asbestos, and inadequate insulation; address them first while preserving charm. You’ll uncover decorative details worth protecting, and prioritize historical preservation to maintain architectural integrity and market value.
Conclusion
You’ll love how this bungalow finally behaves—efficient, bright, and somehow still unapologetically 1960s. Sure, you’ll dodge surprises, save a bundle, and swear the floor plan finally makes sense, all while pretending you didn’t spend months chasing the “perfect vintage vibe.” But hey, you’ll nail it: a durable, thoughtfully updated shell that respects the era, with modern comfort lurking behind every rail and window. Mission accomplished, even if your coffee budget looks suspiciously mid-century, too.
About the Author



