
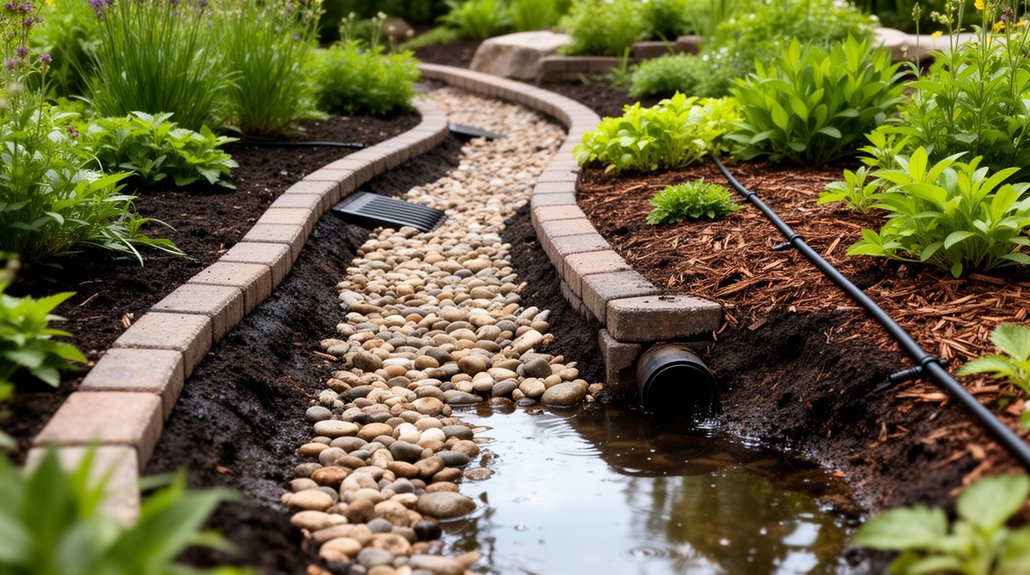
Start by identifying trouble spots after rain or irrigation—look for pooled water, soggy soil, and runoff near foundations. Do quick soil tests: a 6-inch hole filled with water should drain in 30 minutes, and watch for slow percolation. Amend clay with organic matter and, if needed, gypsum. Use raised beds, gentle slopes (2–3%), swales, and permeable paths to direct water away. Regular maintenance keeps drains clear. More practical steps await to guide your next move.
Key Takeaways
- Map trouble spots after rain and note low-lying, water-collecting areas to target drainage fixes.
- Test soil drainage with a simple 6-inch hole and percolation check to guide amendments.
- Improve soil structure by adding organic matter, sand (if appropriate), and gypsum only when needed.
- Install or maintain swales, gentle 2–3% slopes, and raised beds to direct and speed drainage.
- Use permeable paths and regular gutter/downspout maintenance to keep outlets clear and away from foundations.
Identify Drainage Trouble Spots in Your Yard
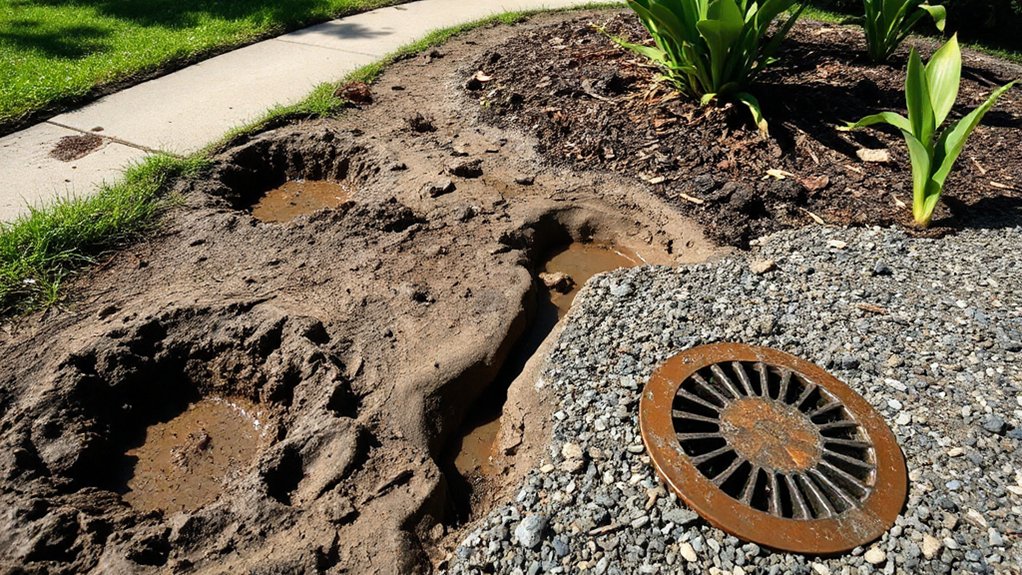
To identify drainage trouble spots, start by surveying your yard after a heavy rain or irrigation and look for pooled water, muddy patches, and soggy soil that persists for more than a day. Note areas where water collects near foundations, slopes converge, or where run-off concentrates. Mark paths where soil remains visibly saturated and footprints leave lasting indentations. Consider whether the soil feels unusually hard or crusted after drying, signaling soil compaction that impedes infiltration. Record both high- and low-lying zones, plus any breaks in turf where thinning occurs. These observations help you map drainage problems and prioritize improvements. Accurate detection relies on methodical checking, not guesswork, so stay systematic and precise in your notes.
Quick, Budget-Friendly Tests for Soil Drainage
Want a quick read on how your soil handles water without breaking the bank? Here’s a concise, practical set of tests you can do today. Start with a simple planter-drain test: dig a 6-inch hole, fill with water, and note how long it takes to drain. If water remains after 30 minutes, drainage is limited. Next, perform a percolation check by filling the hole again, then measure drop-rate over 15 minutes to gauge soil structure. Use a shovel to loosen surface slightly and observe vertical settling to gauge aeration. Employ affordable drainage sensors in shallow tubes at root depth to monitor moisture cycling over 24 hours. Record results; compare to recommended ranges for your plant types. This quick, budget-friendly approach reveals drainage gaps and informs improvements.
Amend Clay Soils for Better Drainage and Root Health
Clay soils struggle with drainage because their fine particles pack densely and water sits among micro-pores. To improve drainage and root health, begin with a planned soil amendments approach. Four practical steps: 1) test texture and pH, 2) incorporate coarse organic matter like compost or well-rotted manure to loosen structure, 3) add grit or shredded bark to increase aeration where texture is heavy, and 4) apply gypsum only if soils are high in sodium or calcium imbalance. Use a shovel to mix amendments at a depth of 6–8 inches, then blend thoroughly with existing soil. Mulch lightly to conserve moisture without creating a crust. Monitor plant performance and adjust annually. This approach supports Clay remediation and long-term drainage improvement.
Raised Beds and Layouts That Improve Water Movement

Raised beds elevate drainage by moving soil above grade so water doesn’t pool. Plan layouts that channel flow—straight lines, gentle slopes, and clear low spots—to guide excess moisture away from roots. Use bed spacing and runoffs that promote continuous drainage paths, not stagnation.
Raised Beds Elevate Drainage
When you build raised beds, you immediately boost drainage because the soil sits above compacted ground and drains more freely. Elevating soil reduces compaction, improves infiltration, and creates consistent moisture levels for roots. You’ll also gain better soil warmth and earlier planting opportunities, plus easier weed management and maintenance.
- Use high-quality topsoil mixed with compost to maximize structure and drainage
- Position beds on a gentle slope or with a light base to encourage runoff
- Install edging that minimizes soil erosion and maintains bed height
- Choose mulch and plant selections that complement improved drainage for garden decor and pest control
- Plan fan-shaped layouts to optimize air circulation and water distribution
Apply these steps for reliable drainage, minimal waterlogging, and cleaner, longer-lasting beds.
Layouts Channel Water Flow
To guide water where it benefits your beds, design layouts that direct flow rather than trap moisture. You’ll optimize drainage by shaping beds and paths to create predictable channels for runoff. Use raised beds with staggered widths that encourage lateral spreading without pooling, and position them along gentle slopes to harness gravity. Integrate permeable paths between beds to reduce surface saturation while guiding excess water toward swales or drainage lines. Favor continuous contours and simple, modular shapes that prevent eddies where water stagnates. Consider water filtration benefits by lining channels with coarse mulch or stone to slow velocity and trap particulates. Be mindful of soil compaction; avoid heavy machinery and frequent stepping on bed edges to preserve pore space and promote infiltration.
Grading and Swales: Directing Runoff Effectively

Grading and swales channel water away from your plants and foundations by shaping the landscape with precise slopes and shallow ditches. You direct runoff to lower risk areas, reduce erosion, and improve infiltration. Implement gentle, continuous slopes away from structures, and carve swales that capture sheet flow. Use stable lining where needed and maintain clear inlets to avoid clogging. Integrate rainwater harvesting by directing captured water into planters or storage, boosting drought resilience. Establish drainage barriers at property lines or around beds to guide movement and deter erosion. Regularly inspect after storms, reseal edges, and adjust for seasonal shifts to sustain performance.
- Create swales with 2–3% slope for effective conveyance
- Align swales to collect water toward a destination
- Place drainage barriers to steer flow
- Channel water toward rainwater harvesting zones
- Schedule seasonal maintenance and weed control
Plan and Place Grates, Pipes, and Catch Basins
After shaping the site with swales and graded slopes, you’ll install the drainage components that move water efficiently from surface to storage or outlets. Plan grate locations first, aligning Drainage grates with anticipated flow paths and nearby structures. Choose grates that resist clogging and match trench dimensions; verify top surfaces sit flush with soil to prevent trip hazards. For pipe placement, lay pipes on a consistent grade toward the outlet, using straight runs and minimal turns to reduce friction losses. Use perforated piping only where infiltration is needed, and cap non-perforated sections to direct flow. Connect catch basins to sumps with secure joints, testing joints for leaks before backfilling. Label components for future maintenance and accessibility.
Plants That Help Drainage and Move Water
Choosing water-wise plants and understanding soil-structure allies sets you up for quicker drainage. Opt for species with deep or widespread roots that move excess moisture away from surface zones, and pair them with soil amendments that improve permeability. Start by matching plant traits to your site’s water pattern and reinforce with structural soil work to sustain flow.
Water-Wise Plant Choices
Water-wise plants can improve drainage by stabilizing soil, absorbing excess water, and directing runoff away from fragile areas.
You’ll choose species that thrive in your climate and handle moisture shifts without constant watering. Focus on xeriscape principles to minimize irrigation and maximize soil structure. Opt for drought resistant plants that root deeply, enhance infiltration, and resist waterlogging. Groundcovers reduce surface runoff, while native perennials anchor soil and promote slow drainage. Group plants by water needs to prevent oversaturation. Use mulch to keep soil structure intact and to prevent crusting that slows infiltration. Incorporate a mix of grasses, sedges, and shrubs to create channels for excess water and pathways for evaporation.
- Sedum and sempervivum
- Carex and rushes
- Low-growing grasses
- Native perennial bog plants
- Shrub-tolerant moisture lovers
Soil-Structure Allies
Soil-Structure Allies are key players in moving water through the landscape and preventing surface pooling. You harness their power by selecting plants that naturally improve drainage and channel flow. Seek species that tolerate wet soils yet loosen the profile, such as deep-rooted grasses and moisture-loving perennials that develop fibrous roots. These allies promote soil aeration, letting air reach the root zone and speeding evaporation. Incorporate organic matter in nearby beds to boost microbial activity and improve structure, then choose varieties with root systems that create vertical channels as they grow. Space plants to avoid crowding, allowing easy water movement between roots. Maintain healthy mulch, monitor for saturation, and prune to prevent thatch buildup that can hinder drainage.
Maintenance Routines to Keep Drainage Clear and Working
To keep drainage working reliably, set up a simple routine: inspect gutters and downspouts after heavy rains, remove debris, and make certain water channels away from foundations. You’ll improve flow, reduce puddling, and support Garden aesthetics while limiting maintenance surprises. Regular checks also curb pest entry and dampness around foundations, aiding Pest prevention. Stay disciplined: document issues, address blockages promptly, and verify slope directs water properly.
- Inspect and clear gutters, downspouts, and trench grates after storms
- Test flow by running water along the lines to spot leaks or clogs
- Remove leaves, decorative debris, and sediment from drainage paths
- Ensure outlets and outlets’ extensions direct water away from foundations
- Schedule seasonal checks and repairs to maintain consistent performance
Frequently Asked Questions
How Often Should I Test Drainage After Rainstorms?
You should test drainage within 24 hours after rainstorms, then weekly for a month to confirm consistency. Watch rainwater absorption rates and note signs of soil compaction, adjusting irrigation and aeration practices accordingly for ideal flow.
Can Drainage Improvements Affect Soil pH or Fertility?
Like a careful surgeon, you’ll see drainage improvements can affect soil pH and fertility. Yes—soil acidity and nutrient levels can shift with altered moisture. Monitor changes, adjust amendments, and test regularly to maintain balanced, productive garden soil.
Do I Need Permits for Installing Drainage Features?
Yes, you may need permits for installing drainage features. Check local and state permit requirements and legal considerations before starting. Contact your planning office, follow guidelines, and guarantee compliance to avoid fines or required removals.
Which Plants Are Best for Preventing Erosion in Damp Zones?
You should prioritize sturdy groundcovers like hardy grasses and creeping perennials for erosion control and plant selection. You’ll dampen runoff, stabilize slopes, and build resilience; think long-rooted species that thrive in damp zones, nimbly guarding against erosion.
How Long Do Drainage Installations Last Before Maintenance?
A drainage installation typically lasts 20–50 years, depending on materials and soil. You should monitor for settling, clogs, and groundwater changes. Drainage system durability hinges on proper installation, and maintenance scheduling should occur every 1–3 years.
Conclusion
To wrap it up, you’ve got clear, actionable steps to fix damp spots and move water where you want it. Identify trouble spots, test soil, and amend clay when needed. Use raised beds and smart grading to guide runoff, then install pipes or catch basins where water pools. Choose drainage-loving plants and stick to regular maintenance. Think of your yard as a sponge—when you improve drainage, you release its true potential. Your garden will thank you.
About the Author


